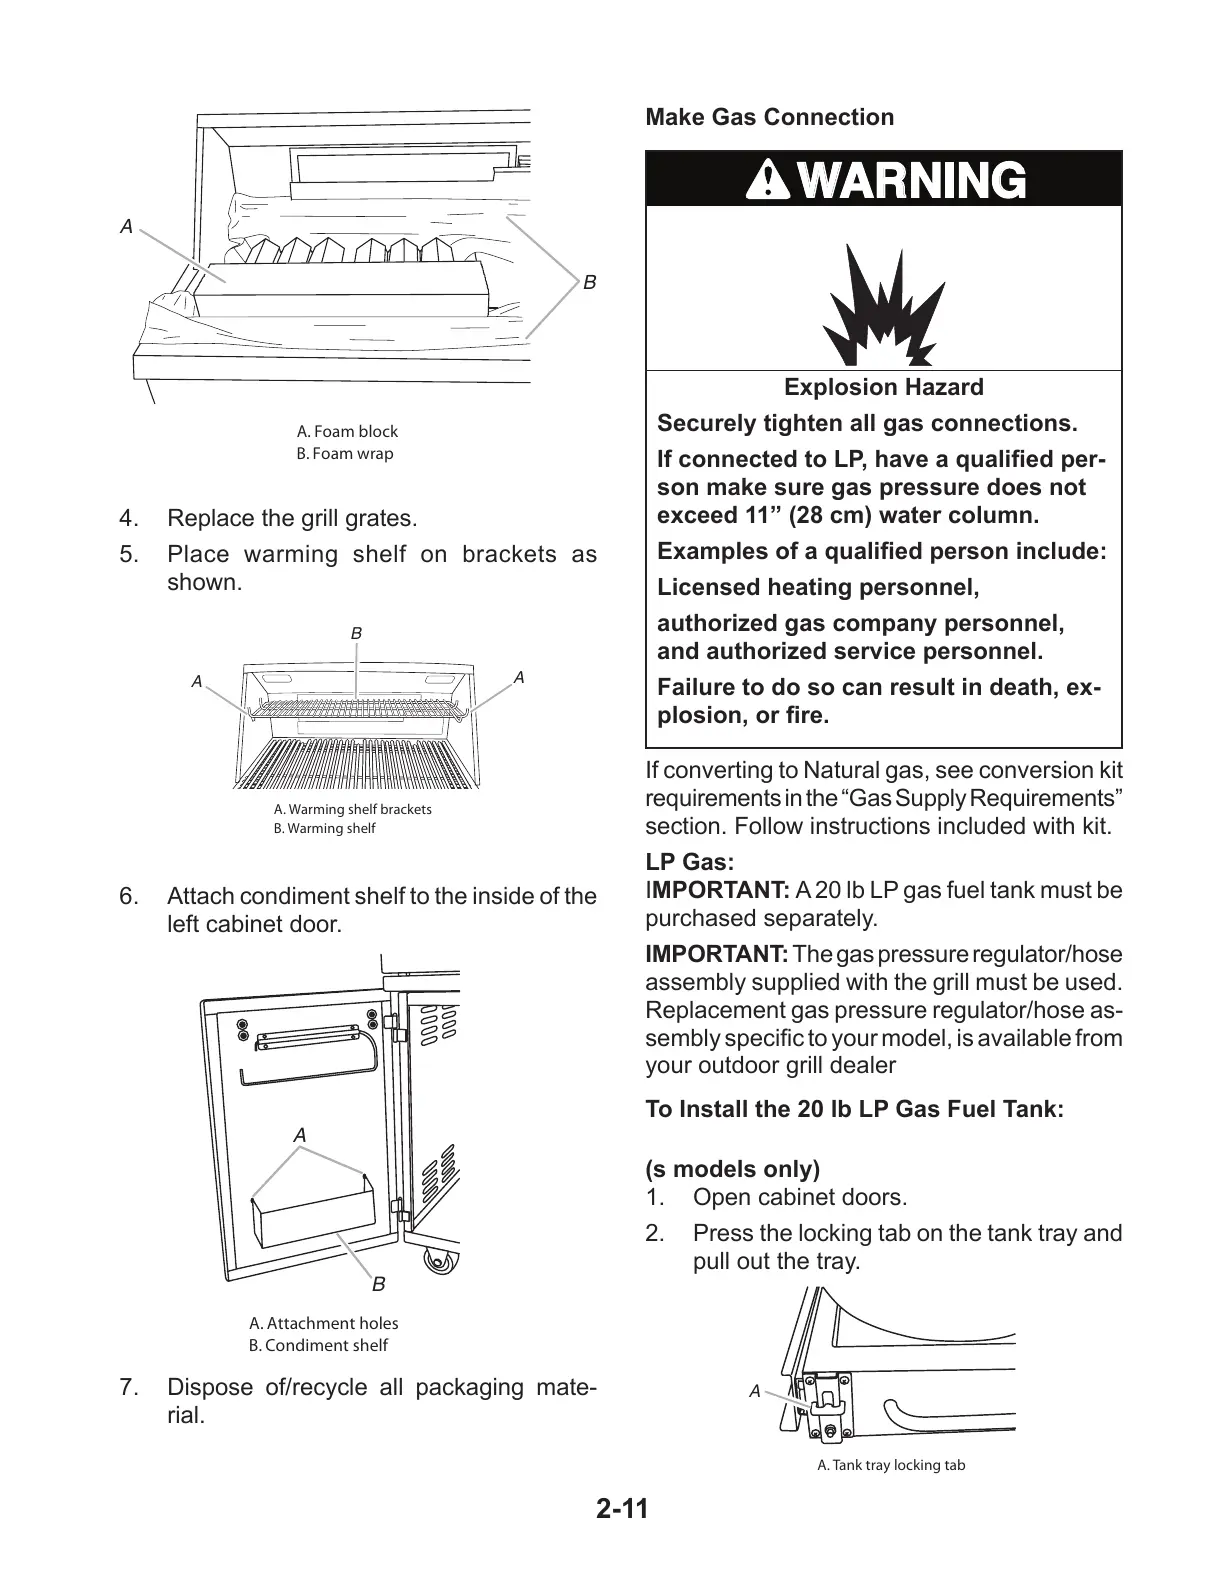
A. Foam block
B. Foam wrap
A
B
4. Replace the grill grates.
5. Place warming shelf on brackets as
shown.
A. Warming shelf brackets
B. Warming shelf
A
B
A
6. Attach condiment shelf to the inside of the
left cabinet door.
A. Attachment holes
B. Condiment shelf
A
B
7. Dispose of/recycle all packaging mate-
rial.
Explosion Hazard
Securely tighten all gas connections.
If connected to LP, have a qualied per-
son make sure gas pressure does not
exceed 11” (28 cm) water column.
Examples of a qualied person include:
Licensed heating personnel,
authorized gas company personnel,
and authorized service personnel.
Failure to do so can result in death, ex-
plosion, or re.
Make Gas Connection
If converting to Natural gas, see conversion kit
requirements in the “Gas Supply Requirements”
section. Follow instructions included with kit.
LP Gas:
IMPORTANT: A 20 lb LP gas fuel tank must be
purchased separately.
IMPORTANT: The gas pressure regulator/hose
assembly supplied with the grill must be used.
Replacement gas pressure regulator/hose as-
sembly specic to your model, is available from
your outdoor grill dealer
To Install the 20 lb LP Gas Fuel Tank:
(s models only)
1. Open cabinet doors.
2. Press the locking tab on the tank tray and
pull out the tray.
A. Ta nk tray locking tab
A
All manuals and user guides at all-guides.com