- 10 -
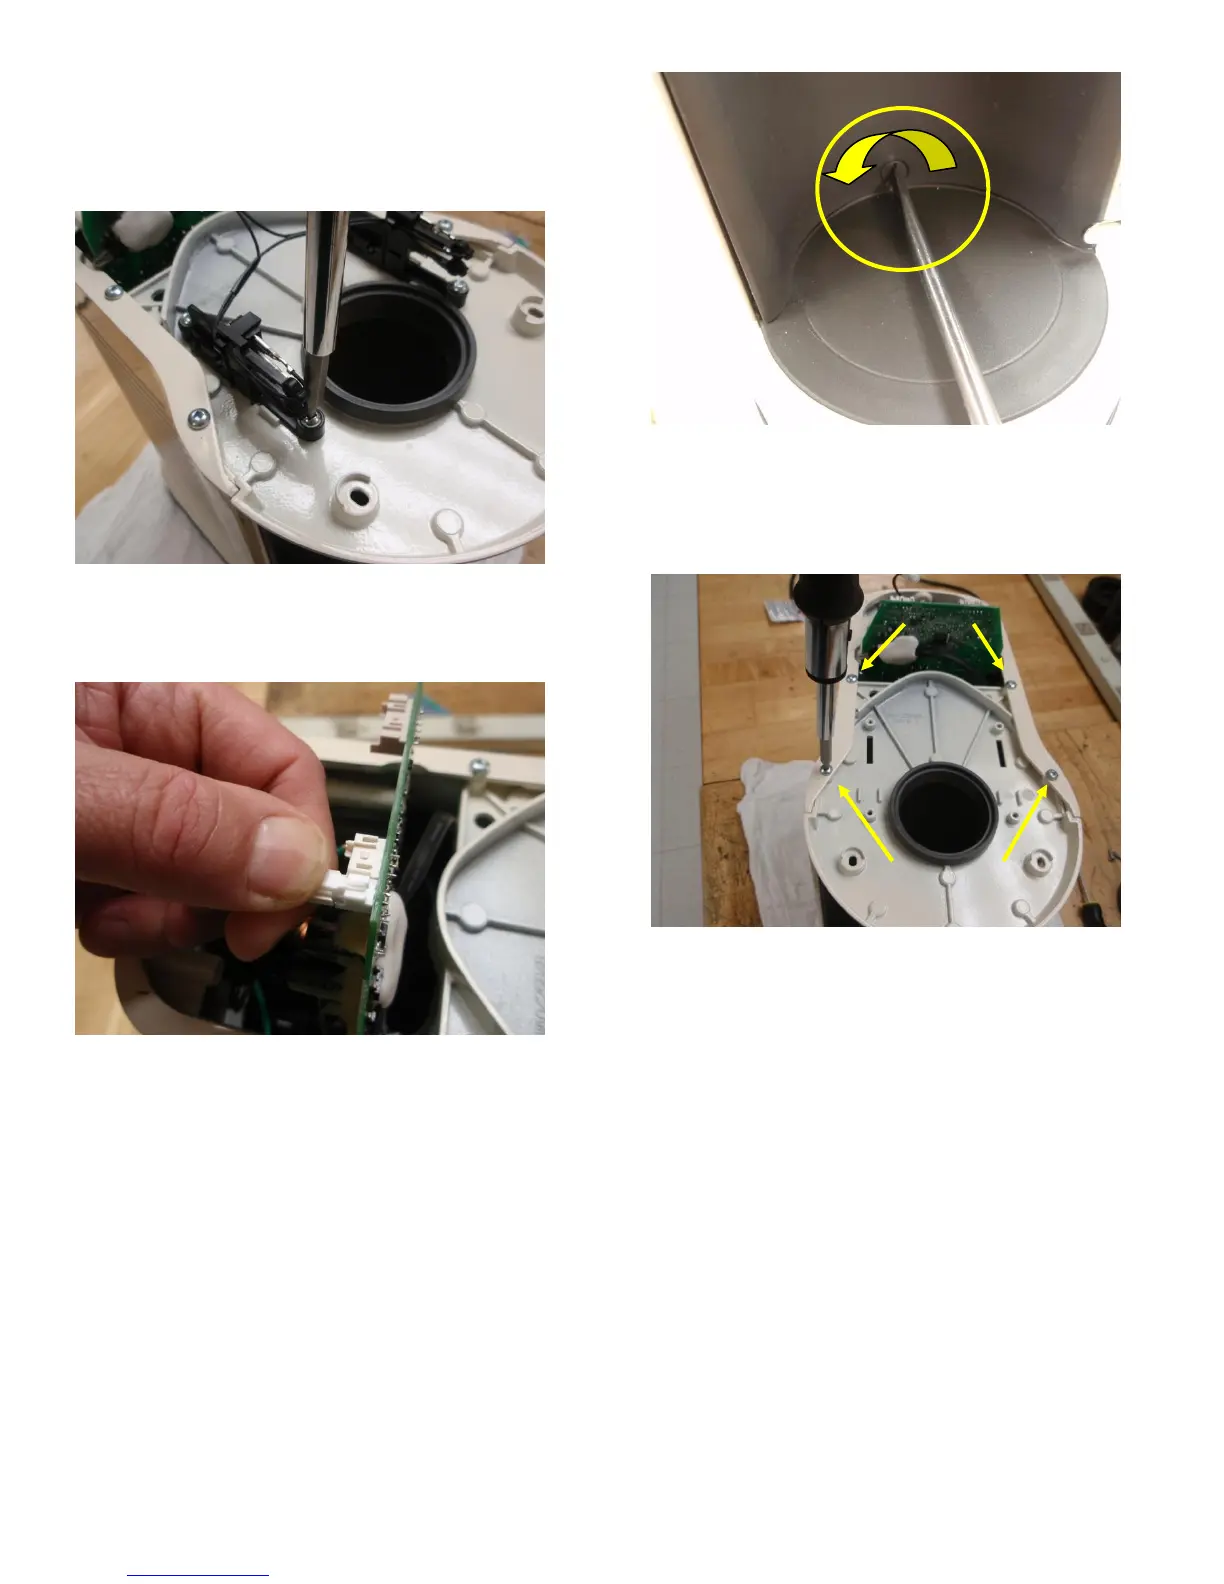
9. Remove the (4) 6-32 x .250 screws that secure the
safety interlock switches to the upper cover.
10. Unplug the safety interlock switch assembly from the
electronic control circuit board and set it aside on the
workbench with the screws (Fig. 8).
Fig. 8) Remove the 4 screws that secure the safety interlock
switches.
11. Unplug the speaker wire harness from the electronic
control circuit board (Fig. 9).
Fig. 9) Unplug the speaker wire harness from the electronic
control circuit board
12. Using a large flat blade screwdriver, remove the jar
bumper located down low on the inside of the unit at
the front plastic housing by unscrewing it counter-
clockwise (Fig. 10).
Fig. 10) Remove the jar bumper from the inside of the front
plastic housing by turning out counter-clockwise
13. Remove the (4) 8-32 x .325 screws that secure the
upper cover to the blender housing surround (Fig.
11).
Fig. 11) Remove the 4 screws that secure the upper cover.
14. Using a small flat blade screwdriver and being
careful not to scratch the surround housing, gently
pry the plastic front housing front from the surround
sliding it and the upper cover free from the rest of
the blender body (Figs. 12 & 13).