- 9 -
5. While holding the upper cover to the upper housing
with one hand, upright the blender on the work
surface (Fig. 3).
Fig. 3) Hold the upper cover to the upper housing when up
righting the unit
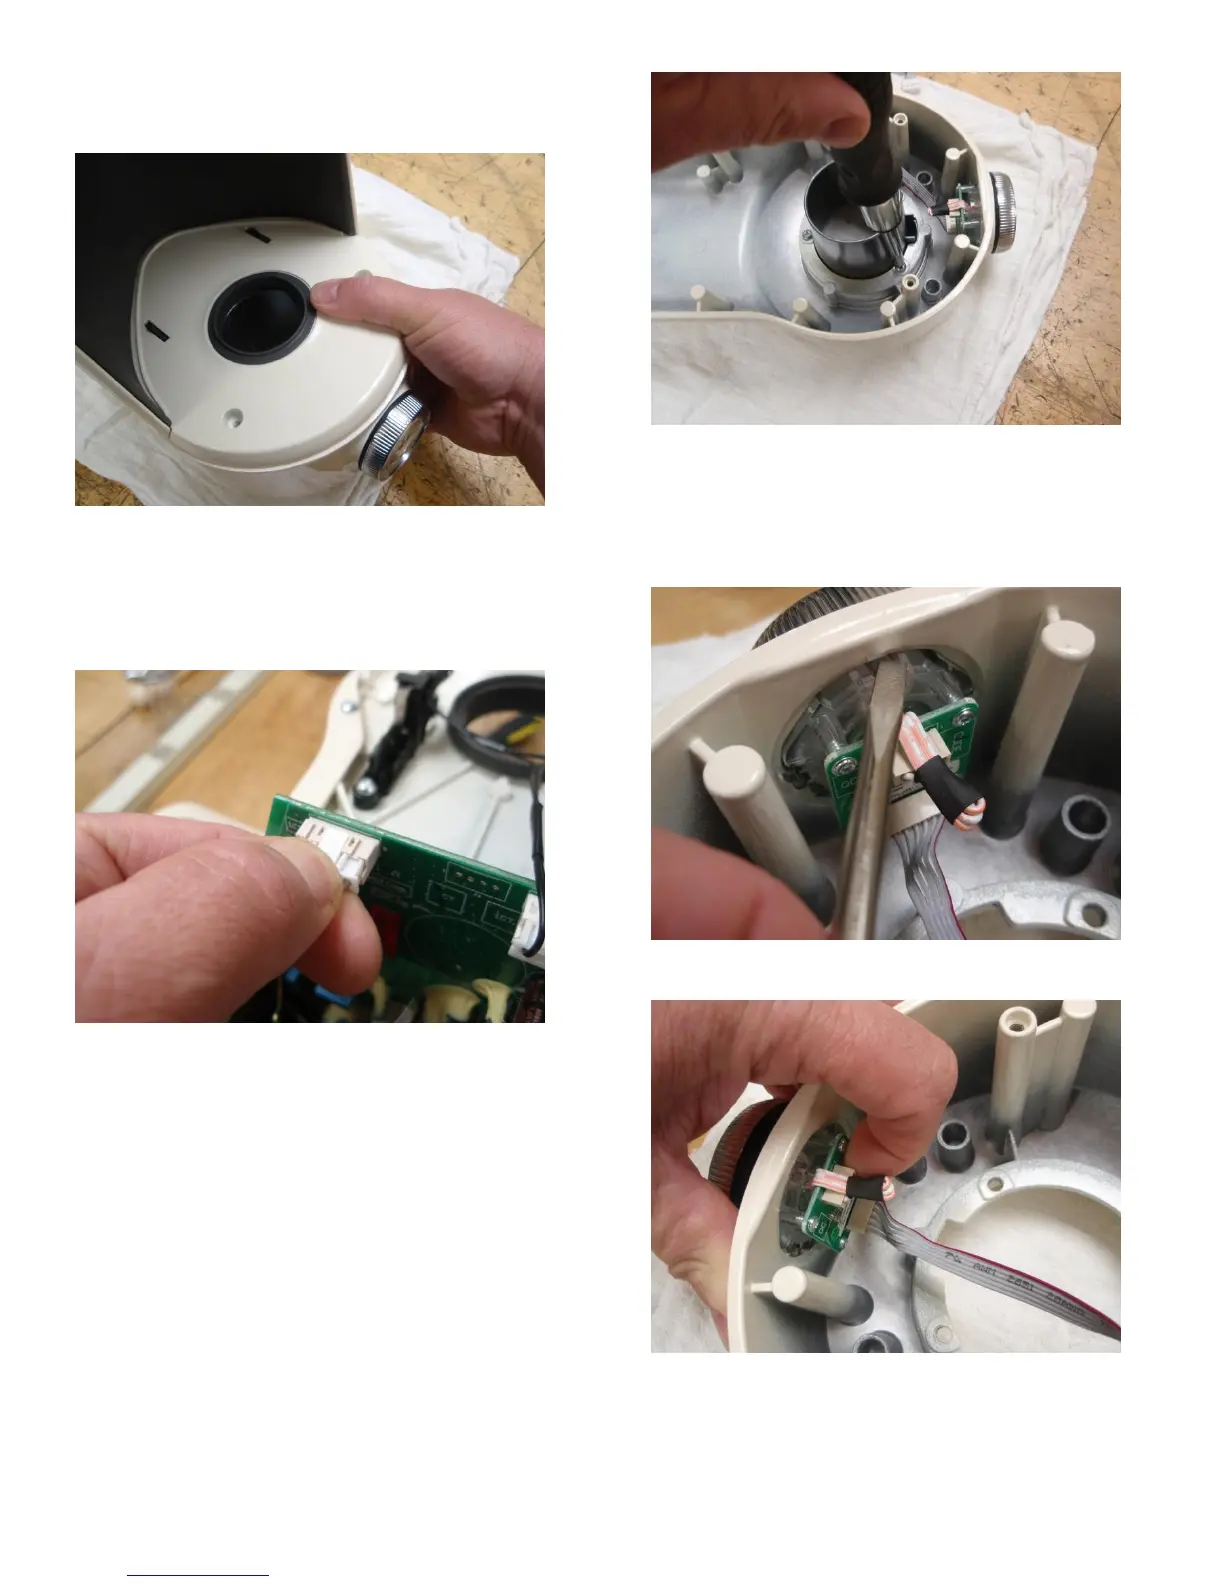
6. Remove the upper housing by lifting it from the unit
and unplugging the UI from the electronic control
circuit board squeezing the tab on the plug while
pulling it from the socket (Fig. 4).
Fig. 4) Squeeze the tab on the UI wire harness plug to remove
it from the electronic control circuit board
7. The collar can be removed from the upper cover by
removing the (3) 8-16 x .562 screws that secure it in
place (Fig. 5).
Fig. 5) Remove the 3 screws holding the collar to the housing
8. Remove the UI from the upper housing by
depressing the (4) plastic tabs that secure it in place
with a small flat blade screwdriver while applying
outward pressure to the back of the UI assembly
(Fig. 6).
Fig. 6) Release the tabs on the UI to remove it from the upper
housing
Fig. 7) Apply pressure to the back of the UI to remove it from
the upper housing