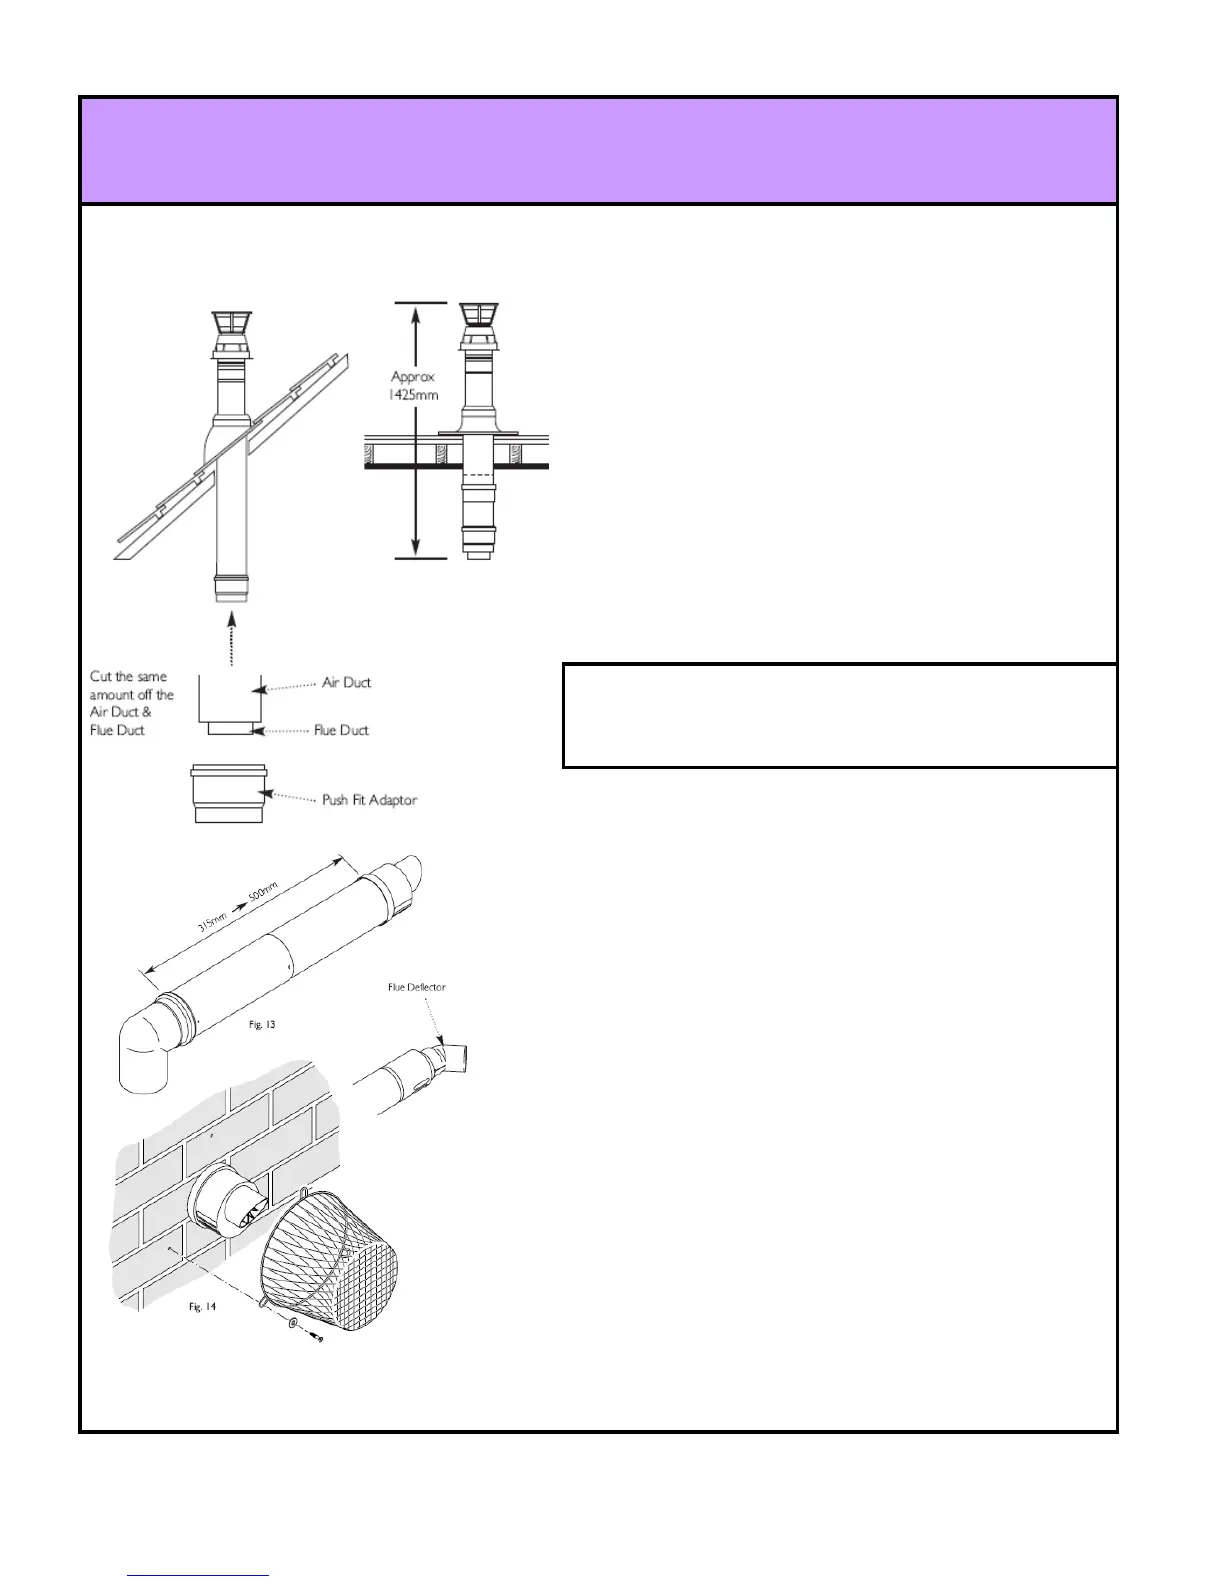
2-3-3 Installing flue (For Roof Terminals)
① For Roof Terminals
1. In the case of a pitched roof 25-50 degrees, position the lest
tile to replace/flash over existing roof tilling. Make an aperture
in the roof suitable for the lower tube of the roof terminal and
ensure the integrity of the roof cover is maintained. The
adjustable plastic collar can either be positioned. on the lead
tile or the lower tube of the roof terminal prior to the final
positioning of the vertical flue through the tile Check the collar
is correctly located to suit required roof pitch (either 25˚ to 38˚ or
37˚ to 50˚) From inside the roof adjust the to vertical position and
secure to the roof structure with the clamp supplied.
2. For flat roof installations the aluminum flashing must be
incorporated into the roof covering and the appropriate aperture
aperture made in the roof decking. The vertical flue is lowered
onto the flashing.(A mastic seal may be necessary). From inside
the roof, structure with the clamp supplied
IMPORTANT : If the boiler is not fitted immediately after the flue
System, temporary precautions must be taken to prevent rain entry
into the room of installation, Any precautionary measures must
be removed prior to commissioning the boiler.
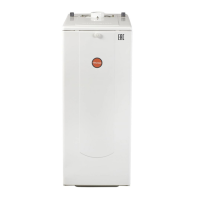
② Flue Dimensions
The standard horizontal telescopic flue kit allows for lengths between
315mm and 500mm from elbow to terminal (Fig 13)
③ Flue Trim
1. The rubber flue trim supplied may be fitted to either the outside
wall or on the inner wall of installation.
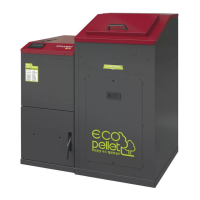
④ Terminal Guard (Fig. 14)
1. When codes of practice dictate the use of terminal guards, they
can be obtained from most Plumber' and Builders' Merchants.
2. There must be a clearance of at least 50mm between and part
of the terminal and the guide.
3. When ordering a terminal guide quote the appliance name and
model number.
4. The flue terminal guide should be positioned centrally over the
terminal and fixed as illustrated.