28 29
•AttachingyourcameratotheBodyPieceviatheQuickReleaseAdaptorandQuickReleaseAdaptorsocket(fordetails
on how to attach the Quick Release Adaptor with socket to your camera, please refer to ‘Attaching the Quick Release
Adaptor with socket to your camera’, page 21)
Note:Thecamerapositioncanbeadjustedhorizontallywhenusingthismethod.
•AttachingthecameradirectlyontotheBodyPiece
Note:Thehorizontalandverticalpositionofthecamerawillbexedwhenusingthismethod.
4. Rotate the wheel on the Body Piece anticlockwise to tighten the Tilting Head Adaptor, the Quick Release Adaptor
socket or the camera itself onto the Body Piece.
Note: When mounting the camera with the Tilting Head Adaptor or the Quick Release Adaptor socket, please make sure
you push the orientation column on the Body Piece down. When mounting your camera directly onto the Body
Piece, please pull the orientation column up.
Note:Ifyouwanttomakechangestothehorizontalpositionofthecamera,youcanrotatethewheelontheBodyPiece
clockwise, adjust the camera position, and rotate anticlockwise to re-tighten the mount.
Note: You may want to use the secure strap to link up the camera with the hole in the Grip Wings to fasten the mount.
Please refer to ‘Securing the strap’, page 20.
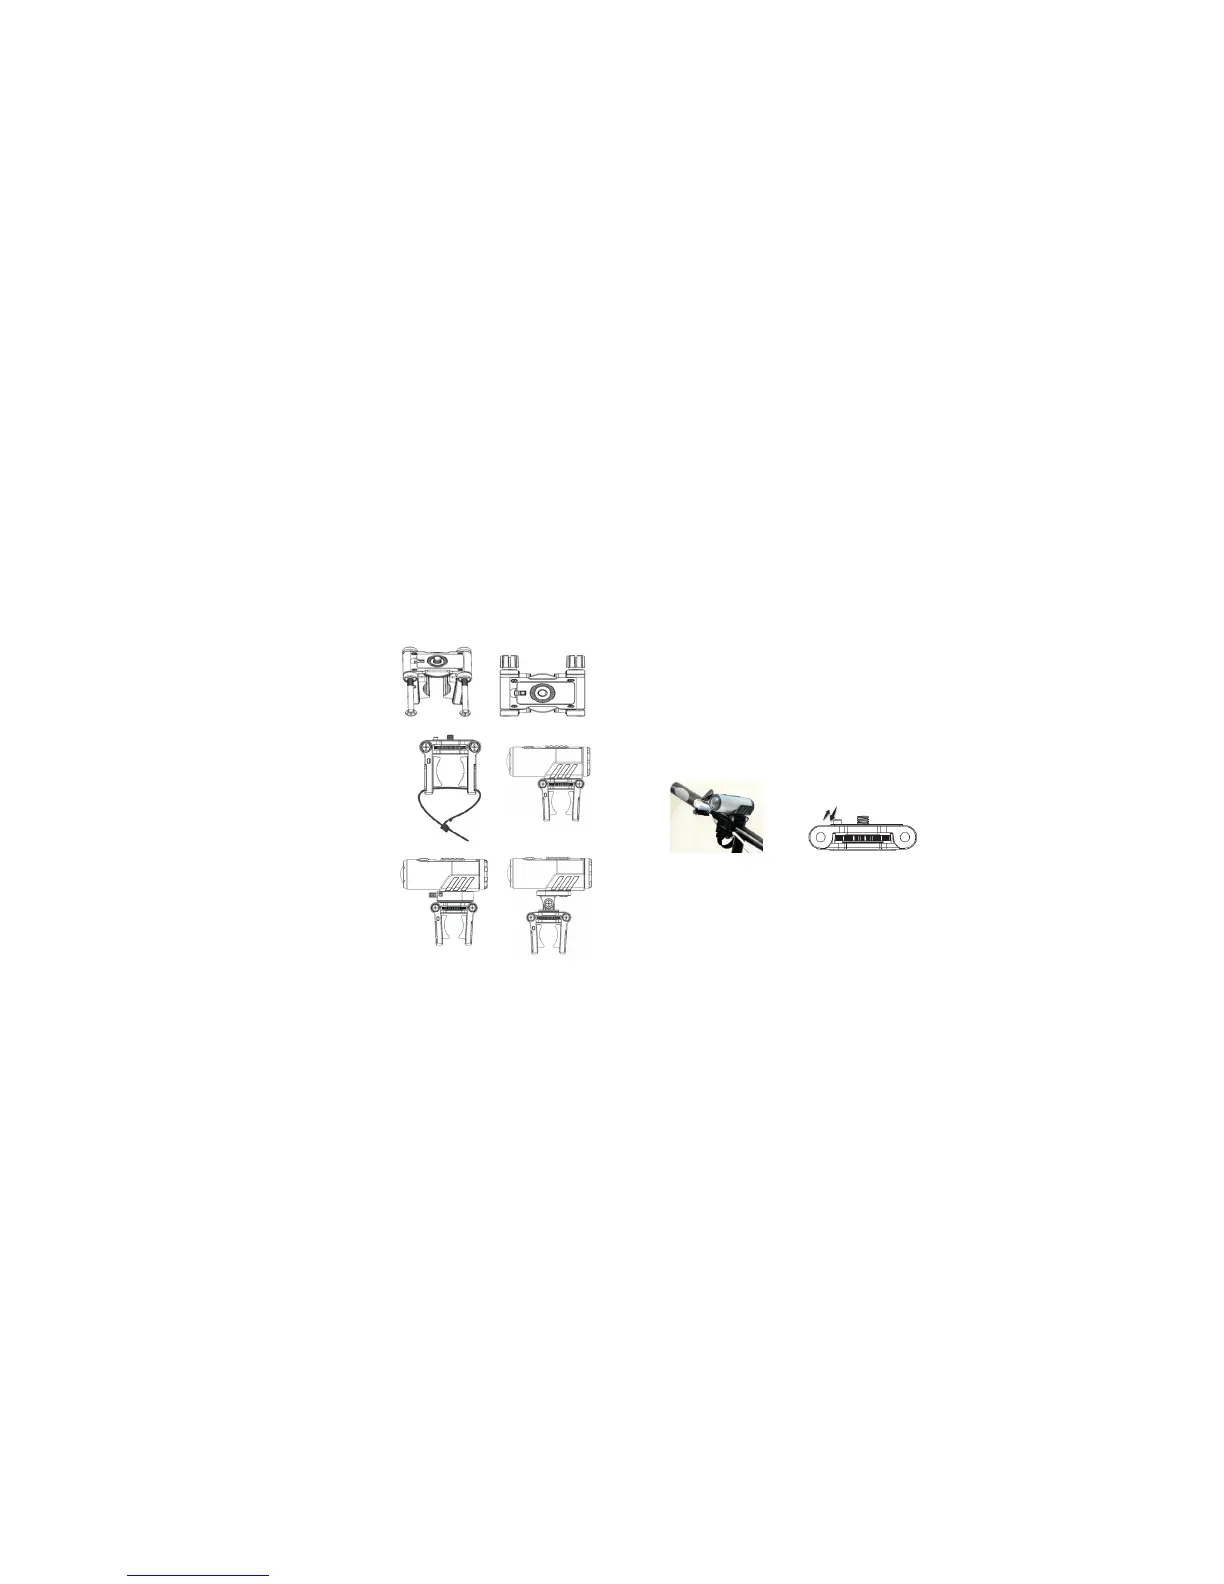
Mounting onto your handlebars
Assembling the Grip Mount
1. Attach the Grip Wings to the left and right side of the Body Piece accordingly.
Note: Please make sure you install the Grip Wings with the curved rubber
pad facing downwards and fit the gears of the Grip Wings and the
Body Piece correctly on both sides.
2. Inserttheboltsthroughtheholesandtightenthenut.
Mounting onto your handlebars
1. Attach and clip the Grip Mount onto the handlebars by adjusting the nuts.
Note: The angle of the Grip Wings can be adjusted: simply loosen the nut,
adjust the Grip Wings and re-tighten the nut.
2. LooptheGripTiethroughtheventsoftheGripWings,loopbackthroughthe
vent of the tie clip, and tighten the Grip Tie.
Note: By pressing the latch on the Grip Tie, you can loosen it.
3. There are three ways to mount the camera onto the Body Piece: Either use the
Tilting Head Adaptor or Quick Release Adaptor socket to mount your camera
onto the Body Piece, or attach your camera directly onto the Body Piece.
•AttachingyourcameratotheBodyPieceviatheTiltingHeadAdaptor
(for details on how to attach the Tilting Head Adaptor to the camera,
please refer to ‘Attaching the Tilting Head Adaptor to your camera’, page 21)
Note:Thecamerapositioncanbeadjustedhorizontally,plusthecameraangle
can be rotated upwards or downwards by loosening or tightening the
nut on the Tilting Head Adaptor.