OPE-MVUSER-0473-C The Knox Company ▪ MedVault
®
▪ 11
Installing Circuit Board
Step #12 Connect board
• Make sure that ESD wrist strap clip is attached to the solenoid
bracket
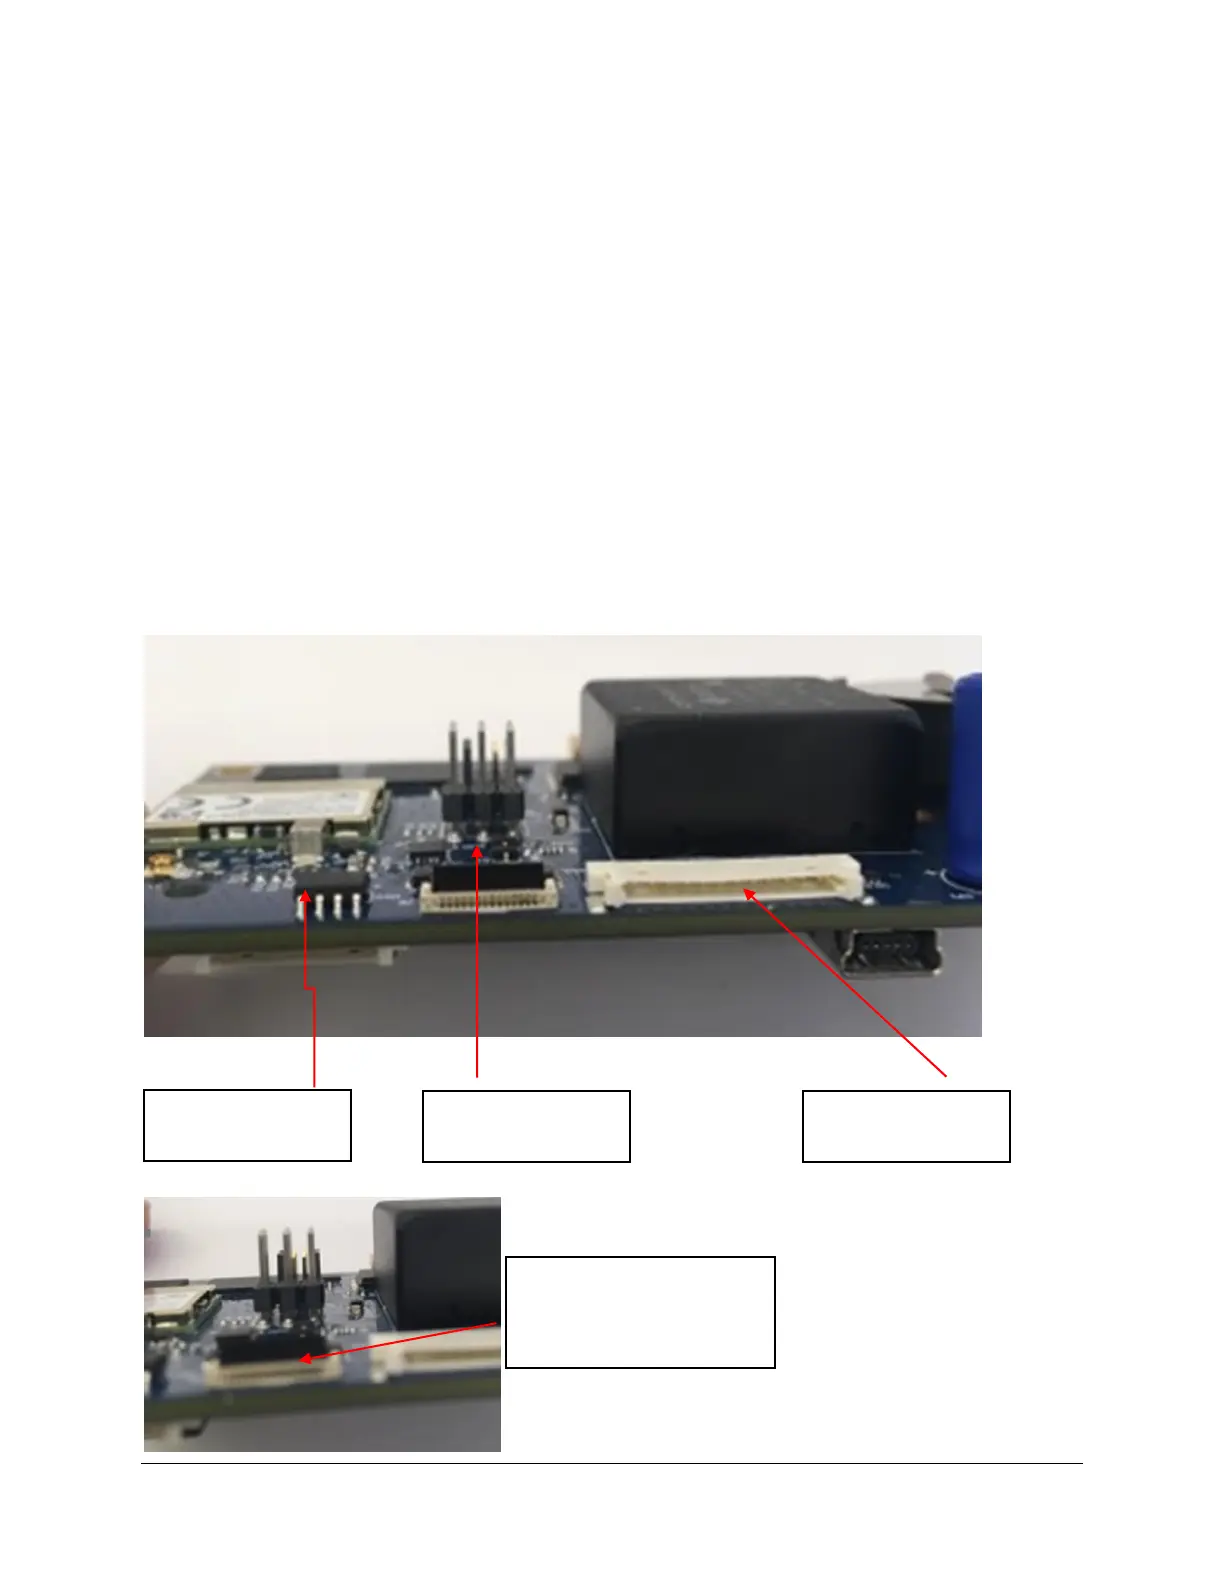
• You’re now ready to install the new MedVault 2.5 circuit board. The
connectors from left to right on the board: ethernet, Keypad display, and
the IO connector.
• Carefully install the keypad display connection. If installed
incorrectly, the keypad will not function properly.
• Carefully lift the black tab up, perpendicular to the board
• Insert the blue cable firmly
• Next, gently push down on the black tab to secure the keypad display
connector

 Loading...