OPE-MVUSER-0473-C The Knox Company ▪ MedVault
®
▪ 3
MedVault 2.5 Board Installation Instructions
The following instructions are for the following kits.
The difference between the two kits is the length of the coax cable on the
circuit board and the serial numbers on the label. Make sure that the retrofit
kit matches the MedVault in which the board will be installed.
The following document shows the steps to remove the MedVault 2.0 board
and replace with the new 2.5 MedVault Board. Removing the MedVault 2.0
board and installing the new Knox MedVault 2.5 circuit board is a simple
process that should take approximately ten minutes to complete. The
MedVault 2.5 Circuit board will be required for using KnoxConnect cloud-
based software.
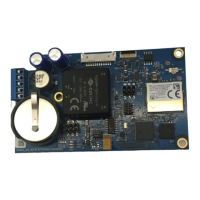
The Knox MedVault 2.5 circuit board includes the following
updates:
• Automatic PIN updates and audit history upload
• Management and reporting through KnoxConnect cloud-based
software
• Improved reliability
• New circuit board design and resilient firmware
• Optional use of Knox eLock and Knox eKey as an additional access
method or override
The tools and materials needed for the installation
includes the following items:
• #2 Phillips Screwdriver for 10/32 and 6/32 screws
• Flat head 3/32 screwdriver
• Fine point wire cutters
• Knox MedVault Tech key
• Knox MedVault 2.5 Retrofit kit which contains the new circuit board
and all additional materials needed to remove and replace the board.

 Loading...