EasyManuals Logo

Knox MedVault 2.5 Mini User Manual

Knox MedVault 2.5 Mini
18 pages
To Next Page IconTo Next Page
To Previous Page IconTo Previous Page
Page #14 background imageLoading...
Page #14 background image
OPE-MVUSER-0473-C The Knox Company ▪ MedVault
®
12
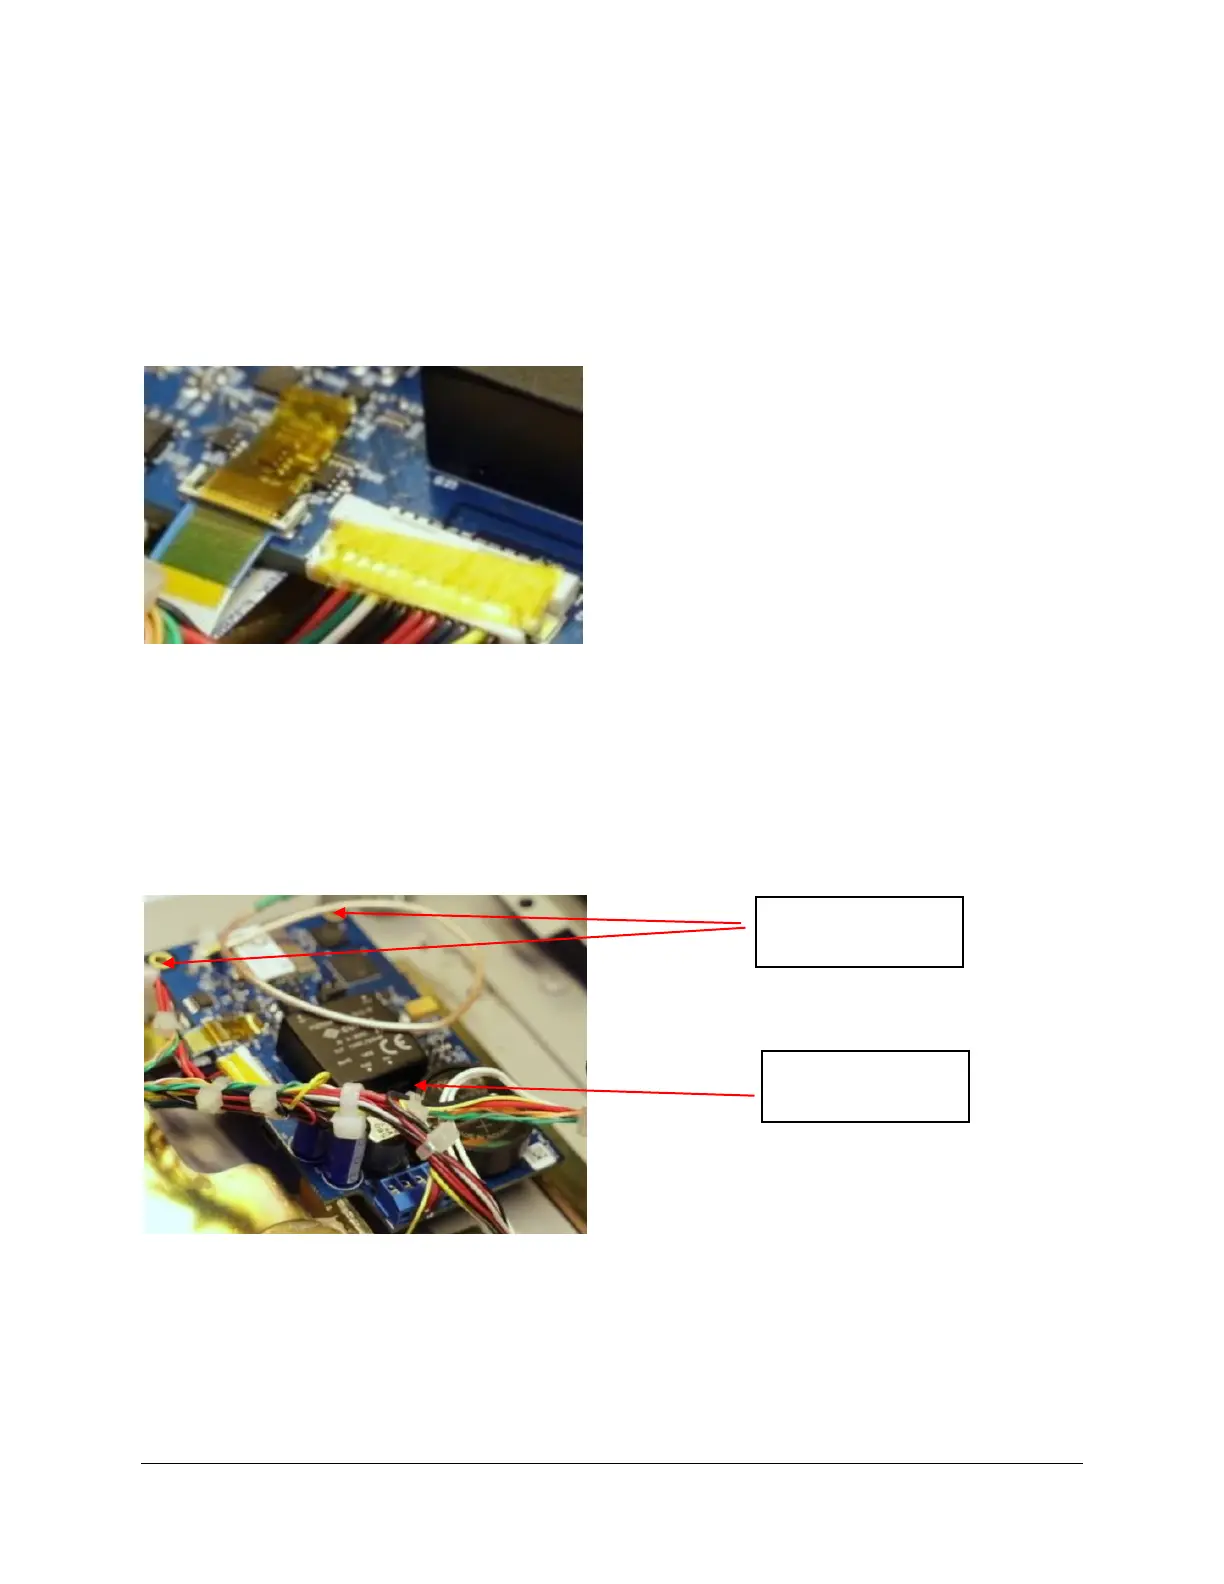
Step #13 Add Kapton tape to Connectors
Apply Kapton tape to the keypad display connection and the IO connection.
Kapton tape is included in the retrofit kit
Kapton tape length will extend onto circuit board
Step #14 Fasten New board
Fasten the circuit board in place. Use the original MedVault screws for 2 of
the locations.
For the third location near the terminal block, use the screw that is included
in the retrofit kit. This screw is a different length
Screw from old
circuit board
Screw from
Retrofit Kit

Questions and Answers:

Question and Answer IconNeed help?

Do you have a question about the Knox MedVault 2.5 Mini and is the answer not in the manual?

Knox MedVault 2.5 Mini Specifications

General IconGeneral
BrandKnox
ModelMedVault 2.5 Mini
CategoryMotherboard
LanguageEnglish

Related product manuals