EasyManua.ls Logo

Koldfront PAC802W - User Manual

Koldfront PAC802W
26 pages
Print Icon
To Next Page IconTo Next Page
Loading...
V2.3-06142017
Portable Air Conditioner
Owner’s Manual
For more information on other great EdgeStar and Koldfront products on the web, go to http://www.edgestar.com
To use the EdgeStar self-diagnostic tool, go to https://support.edgestar.com
PAC802W / PAC1202W

Questions and Answers

Summary

Important Safety Information

Electrical Safety Precautions

Safety guidelines for electrical connections and usage.

General Operational Safety

General safety rules for unit operation, child safety, and placement.

Safety Plug Operation

Testing the LCDI Safety Plug

Instructions for testing the Leakage-Current Detection and Interruption (LCDI) plug.

Introduction and Product Information

For Your Records: Model and Serial Number

Section to record model, serial number, and date of purchase for warranty.

Parts Identification

Front View Component Labels

Diagram and labels identifying front-facing unit components.

Back View Component Labels

Diagram and labels identifying rear-facing unit components.

Window Kit Installation Instructions

Window Kit Preparation Steps

Steps to prepare for window kit installation, including parts and location check.

Window Kit Parts List Overview

List and images of all parts included in the window kit.

Installation Site Preparation

Optimal Location Selection

Guidelines for choosing a suitable location, considering clearance and surface.

Window Slider Kit Assembly

Instructions on how to prepare and assemble the window slider kit.

Double Hung Sash Window Installation

Step 1: Foam Seal Application

Attaching foam seal to window sill and frame.

Step 2: Slider Kit Adjustment

Attaching and adjusting the window slider kit to the window.

Double Hung Sash Window Installation (Continued)

Step 3: Sealing Sash Gap

Sealing the gap between window sashes with foam seal.

Step 4: Security Bracket Installation

Securing the window sash with a security bracket.

Sliding Sash Window Installation

Step 1: Foam Seal Application

Attaching foam seal to window sill and frame for sliding windows.

Sliding Sash Window Installation (Continued)

Step 2: Slider Kit Adjustment

Attaching and adjusting the window slider kit for sliding windows.

Step 3: Sealing Sash Gap

Sealing the gap between window sashes with foam seal.

Step 4: Security Bracket Installation

Securing the window sash with a security bracket.

Exhaust Hose Connection Guide

Step 1: Adapter Assembly

Connecting adapters to the exhaust hose.

Step 2: Unit Placement

Placing the unit in the installation location with proper clearance.

Step 3: Hose to Unit Attachment

Connecting the exhaust hose to the unit's air outlet.

Exhaust Hose Connection Guide (Continued)

Step 4: Hose to Window Kit Attachment

Connecting the exhaust hose adapter to the window kit.

Exhaust Hose Usage Guidelines

Optimal Hose Length and Kink Prevention

Recommendations for exhaust hose length, avoiding kinks, and not extending the hose.

Hose Requirement by Operating Mode

Guidance on when the exhaust hose is required for Cooling, Dehumidify, and Fan modes.

Unit Drainage Procedures

Continuous Drain Setup

Instructions for setting up continuous drainage for dehumidifying mode.

Manual Drain Procedure

Procedure for manually draining the unit when the water reservoir is full.

Control Panel Overview

Control Panel Button Functions

Explanation of each button on the control panel and its function.

Mode Indicator Light Guide

Description of the indicator lights for different operating modes.

Using the Control Panel Features

LED Display Information

Explanation of what the LED display shows in different modes and for errors.

Selecting Operating Modes

Details on selecting and using Auto, Cool, Dry, and Fan modes.

Cooling Mode Operation

How to operate the unit in cooling mode, including temperature and fan speed.

Dry (Dehumidify) Mode Operation

How to use the unit in dehumidify mode, noting limitations.

Auto Mode Functionality

How the unit operates automatically in AUTO mode based on ambient temperature.

Fan Mode Operation

How to use the unit in fan-only mode and select fan speed.

Power Button and Auto-Restart

How to turn the unit on/off and information about auto-restart.

Louver Swing Feature Control

How to use the swing feature for air direction.

Using the Control Panel Features (Continued)

Timer Setting Instructions

Instructions for setting auto-on and auto-off timer programs.

Sleep;ECO Mode Activation

How to activate and use the Sleep/ECO operation for energy saving.

Temperature and Timer Adjustment

How to adjust temperature and timer settings using the increase/decrease buttons.

Fan Speed Indicator Lights

Explanation of fan speed indicator lights.

Remote Control Operation

Remote Control Layout

Visual representation of the remote control and its buttons.

Using the Remote Control

How to use the remote control to operate the air conditioner's functions.

Remote Control Operation (Continued)

Remote Control Button Functions

Detailed explanation of each button on the remote control.

Remote Control Battery Installation

Instructions for installing or replacing batteries in the remote control.

Error and Protection Codes

LED Display Error Codes

List of error codes displayed on the unit and their meanings.

LED Display Protection Codes

Explanation of protection codes, specifically 'P1' for a full water reservoir.

Routine Maintenance

Cleaning the Unit Exterior

Instructions on how to clean the exterior of the air conditioner.

Routine Maintenance (Continued)

Cleaning the Pre-filter

Step-by-step guide on how to clean the unit's pre-filter.

Unit Preparation for Storage

Steps to follow when preparing the unit for long-term storage.

Energy Saving Guide

Tips for Energy Efficiency

Tips and recommendations for efficient operation and energy savings.

Troubleshooting Common Issues

Issue Resolution Table

A guide to common problems, their possible causes, and solutions.

Troubleshooting Cooling Performance

Airflow and Cooling Issues

Troubleshooting specific problems related to cooling performance and air flow.

Product Specifications

Technical Specifications Table

Technical specifications for the PAC802W and PAC1202W models.

EdgeStar Limited Warranty

Warranty Coverage Details

Details on what parts and labor are covered by the warranty.

Warranty Exclusions and Limitations

Limitations and exclusions from the product warranty coverage.

Obtaining Warranty Service Assistance

Instructions on how to contact EdgeStar for warranty service and support.

Overview

This document describes the Koldfront Portable Air Conditioner models PAC802W and PAC1202W, providing an owner's manual with important safety information, operation instructions, technical specifications, and maintenance guidelines.

Function Description:

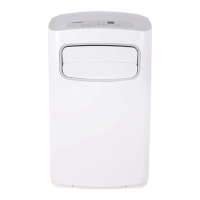
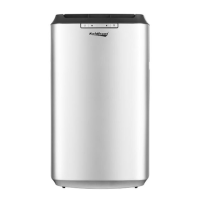
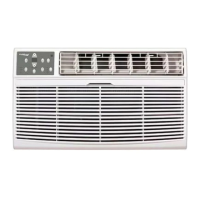
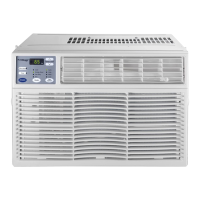
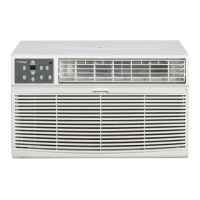
The Koldfront Portable Air Conditioner is designed for indoor use to provide cooling, dehumidification, and fan-only operation. It is equipped with a Leakage-Current Detection and Interruption (LCDI) safety plug to reduce the risk of fire due to arcing faults in the power supply cord. The unit is portable, featuring casters for easy movement, and requires venting to the outside when operating in cooling mode. It exhausts condensed water, in either gaseous or droplet form, out of the exhaust port. In very humid conditions, an internal reservoir may fill, causing the unit to turn off and require manual draining.

Important Technical Specifications:

  • Models: PAC802W, PAC1202W
  • Voltage / Frequency: AC 115 V ~ 60 Hz for both models.
  • Input Power: 900 W for PAC802W, 1350 W for PAC1202W.
  • Current: 8.0 A for PAC802W, 12.0 A for PAC1202W.
  • Color: White for both models.
  • Coolant: R410A for both models.
  • Timer: 24 Hour for both models.
  • Dimensions (W x H x D): 18.75" x 34.5" x 15.75" for both models.
  • Weight: 57.2 lbs. for PAC802W, 62.7 lbs. for PAC1202W.
  • Exhaust Hose Length: Can be extended up to approximately 48 inches for maximum efficiency, but the shortest possible length is recommended.

Usage Features:

  • Control Panel and Remote Control: The unit can be operated via a control panel on the unit or a universal remote control (requires two AAA batteries).
  • Operating Modes:
    • Cooling Mode: Sets a desired room temperature (17°C/62°F to 30°C/88°F) and fan speed (LOW, MID, HIGH, AUTO).
    • Dry Operation (Dehumidify): Removes moisture from the air. Fan speed and temperature cannot be adjusted in this mode. The exhaust hose can be used to remove hot air and moisture for more efficient dehumidification.
    • Auto Operation: Automatically selects cooling or fan mode based on the set temperature and ambient temperature. Fan speed cannot be selected.
    • Fan Operation: Circulates air. Fan speed can be selected (LOW, MID, HIGH, AUTO). Temperature cannot be adjusted. The exhaust hose can be used to remove hot air for more efficient operation.
  • LED Display: Shows set temperature (°C or °F), room temperature (in DRY and FAN modes), error codes, and alerts.
  • Auto Swing Feature: Initiated by the SWING button, allows louvers to swing up and down automatically. Louvers can be stopped and held at a desired angle. Manual adjustment of louvers is not recommended.
  • Timer Function: Allows setting an AUTO ON start time and AUTO OFF stop time program, adjustable in 0.5-hour increments up to 10 hours, then 1-hour increments up to 24 hours.
  • Sleep/ECO Operation: Increases the set temperature by 1°C/1°F after 30 minutes, and by another 1°C/1°F after an additional 30 minutes. This new temperature is maintained for 7 hours before reverting to the original setting. This feature is unavailable in FAN or DRY mode and can only be activated via remote control.
  • Auto-Restart: If power is interrupted, the unit will restart in its last used mode and settings once power is restored. The compressor restarts after 3 minutes.
  • Temperature Unit Conversion: Press and hold the UP and DOWN buttons simultaneously for 3 seconds to switch between Fahrenheit and Celsius.
  • Short Cut Button (Remote Control): Restores current settings or resumes previous settings, including operating mode, setting temperature, fan speed, and sleep feature. Holding for more than two seconds reverts to current settings.

Maintenance Features:

  • Cleaning the Unit: Use a soft dry cloth or a lukewarm damp cloth. A soft bristle brush can clean between vents, and a vacuum cleaner can clean condenser coils. Abrasive chemicals, volatile substances, gasoline, detergents, chemically treated cloths, or other cleaning solvents should not be used. Water should never be sprayed directly on the unit.
  • Cleaning the Pre-filter: The pre-filter should be cleaned periodically (weekly in dusty environments). Power off the unit, remove the pre-filter, vacuum or tap off loose dust, then rinse under lukewarm water (below 104°F). A mild soap and water solution can be used if needed. Allow the filter to air dry completely before reinstalling. The unit should never be operated without the pre-filter.
  • Draining the Unit:
    • Continuous Drain: In dehumidifying mode, remove the upper drain plug and attach the drain hose to the continuous drain outlet, routing it to a suitable drainage port.
    • Manual Drain: In cooling mode, if the internal water reservoir fills (indicated by a "P1" error code and beeping), the unit will turn off. Move the unit to a drain location, remove the bottom drain plug, and connect the drain hose to the bottom tray manual drain outlet. The unit drains by gravity. Reinstall the drain plug and restart the unit after draining.
  • Preparation for Storage: Before extended storage, drain all water from the reservoir, operate in fan mode for a few hours to dry internal coils, power off, unplug and wind the power cord, and remove and store the exhaust hose and duct connectors.
  • Filter Reminder: After 250 hours of operation, the Filter indicator light illuminates as a reminder to clean the air filter. Press the Sleep button for 3 seconds to reset this reminder.

Safety Information:

  • Designed for indoor use only.
  • Avoid extremely humid or wet environments.
  • Do not wet the housing or control panel.
  • Always turn off and unplug before cleaning or when not in use for a long period.
  • Do not operate with a damaged plug or loose socket.
  • Use only the correct power supply and amperage.
  • A damaged power cord must be replaced by the manufacturer, service agent, or qualified technician.
  • Do not remove any part of the casing unless instructed by an authorized technician.
  • Not intended for use by children; children should be supervised.
  • Do not allow children to play with controls or drop objects into air outlets/vents.
  • Do not place objects or sit on the unit.
  • Use in an upright position on a flat, level surface with at least 20 inches of clearance from walls/objects.
  • Route the power cord carefully to avoid tripping hazards.
  • Intended for domestic use only; commercial use may invalidate the warranty.
  • Electrical products should be recycled at a local recycling center.
  • The LCDI plug must be tested before use: plug in, press TEST (should trip), then press RESET to operate. Do not use TEST/RESET as an ON/OFF switch.
  • Longer exhaust hoses are not recommended.
  • The exhaust hose must be installed in Cooling Mode. In Dehumidify and Fan Modes, it can operate with or without the hose, but the hose provides more efficient operation.
  • Never spray water directly on the unit.
  • Never operate the unit without the pre-filter.

Koldfront PAC802W Specifications

General IconGeneral
BrandKoldfront
ModelPAC802W
CategoryAir Conditioner
LanguageEnglish

Related product manuals