Home
Konica Minolta
All in One Printer
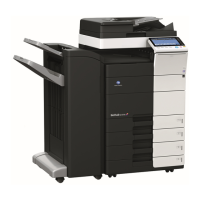
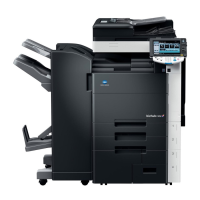
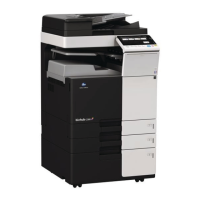
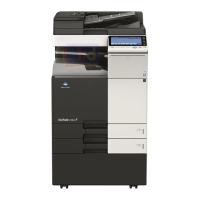
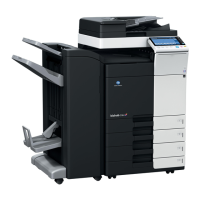
bizhub C451
Konica Minolta bizhub C451 Copy Operations
5
of 1
of 1 rating
610 pages
Give review
Manual
Specs
To Next Page
To Next Page
To Previous Page
To Previous Page
Loading...
bizhub C45
1/C550/C
650
2-9
Installat
ion and operati
on precautions
2
Before successive holidays
When the optional
Fax Kit FK-502 is not i
nstalled:
7
CAUTION
Ignoring thi
s cautions co
uld cause inju
ry or damage to prop
erty.
%
Do not
ignore this s
afety advi
ces.
Caution
Symbol
•
Unplug the product when you w
ill not use the
product for long periods
of time.
36
38
Table of Contents
Default Chapter
3
Table of Contents
3
1 Introduction
13
Openssl Statement
15
Available Features
17
Selecting the Print Color
17
Automatically Selecting the Paper
17
Adjusting Copies to the Size of the Paper
17
Specifying Separate Horizontal and Vertical Zoom Ratios
17
Scanning the Original in Separate Batches
17
Center Binding and Folding in Half and in Three
17
Sorting Copies
18
Stapling Copies
18
Punching Holes in Copies
18
Copying Multiple Original Pages Onto a Single Page
18
Copying an Original Containing Various Page Sizes
19
Adjusting Copies According to the Image Quality of the Original
19
Inserting Paper between Copies of OHP
19
Adding a Cover Page
19
Inserting Different Paper into Copies
19
Inserting Pages from a Different Original at Specified Locations in a Copy
20
Printing Double-Sided Copies with the Specified Page on the Front Side
20
Copying with Reversed Colors
20
Printing a Mirror Image
20
Copying with a Background Color
21
Improving the Copy Color Quality
21
Separately Copying a Page Spread
21
Repeating Copy Images
21
Printing the Enlarged Image on Multiple Pages
21
Creating Booklets from Copies of Pamphlets
22
Making Copies for Filing
22
Adjusting the Image to Fit the Paper Size
22
Copying with the Page Layout of a Magazine
22
Erasing Sections of Copies
23
Printing a Sample Copy
23
Printing Date/Time or Page Number on Copies
23
Managing Jobs
23
Programming Copy Settings
23
Checking the Copy Settings
23
Enlarging the Size of Text in Touch Panel Screens
23
Displaying Explanations of Functions and Settings
23
Interrupting a Copy Job
23
Explanation of Manual Conventions
24
Safety Advices
24
Sequence of Action
24
Tips
24
Special Text Markings
24
Descriptions and Symbols for Originals and Paper
26
Width" and "Length
26
Paper Orientation
26
User Manuals
27
User Manual
27
Copy Operations (this Manual)
27
Print Operations
27
Box Operations
27
Network Scanner Operations
27
Pagescope Web Connection Operations
27
Fax Operations (Option)
27
Network Fax Operations (Option)
27
Legal Restrictions on Copying
28
2 Installation and Operation Precautions
29
Safety Information
31
Warning and Precaution Symbols
31
Meaning of Symbols
31
Disassemble and Modification
32
Power Cord
32
Power Source
33
Power Plug
33
Grounding
34
Installation
34
Ventilation
35
Actions in Response to Troubles
35
Consumables
36
When Moving the Machine
36
Before Successive Holidays
37
Regulation Notices
38
CE Marking (Declaration of Conformity) for Users of the European Union (EU)
38
User Instructions FCC Part 15 - Radio Frequency Devices (for U.S.A. Users)
38
Interference-Causing Equipment Standard (ICES-003 ISSUE 4) (for Canada Users)
38
For Users in Countries Not Subject to Class B Regulations
38
Laser Safety
39
Internal Laser Radiation
39
CDRH Regulations
40
For European Users
40
For Denmark Users
40
For Finland, Sweden Users
40
For Norway Users
41
Laser Safety Label
41
Ozone Release
42
Acoustic Noise (for European Users Only)
42
For EU Member States Only
42
Caution Notations and Labels
43
Space Requirements
44
Operation Precautions
45
Power Source
45
Operating Environment
45
Storage of Copies
45
3 Before Making Copies
47
Part Names and Their Functions
49
Options
49
Outside of Machine
54
Inside of Machine
59
Finisher FS-517/Punch Kit PK-512/Punch Kit PK-513
61
Punch Kit PK-512/Punch Kit PK-513
62
Finisher FS-608
63
Punch Kit PK-512/Punch Kit PK-513
64
Saddle Stitcher SD-505/Mailbin Kit MT-502
66
Post Inserter PI-503
68
Large Capacity Unit LU-301
69
Control Panel
71
Basic Settings Screens
73
Icons that Appear in the Screen
75
Adjusting the Angle of the Control Panel
76
To Adjust the Angle of the Control Panel
76
Turning on the Main Power and the Auxiliary Power
78
Turning on the Machine
78
Scanning During Warm-Up
79
Turning off the Machine
80
Automatically Clearing Settings (Automatic Panel Reset)
81
Automatically Canceling the Mode Screen (System Auto Reset)
81
Automatically Conserving Energy (Low Power Mode)
81
Automatically Conserving Energy (Sleep Mode)
82
Manually Conserving Energy
83
Automatically Turning the Machine On/Off (Weekly Timer)
83
Controlling each User's Use of this Machine (User Authentication)
85
Controlling each Account's Use of this Machine (Account Track)
88
Controlling Use of this Machine with Authentication Unit (Biometric Type)
91
When "1-To-Many Authentication" Has Been Specified
91
When "1-To-1 Authentication" Has Been Specified
92
Controlling Use of this Machine with the Authentication Unit (IC Card Type)
93
When "Card Authentication" Has Been Specified
93
When "Card Authentication + Password" Has Been Specified
94
Loading Paper into Tray 1 and Tray 2
95
Loading Paper into Tray 3
97
Loading Paper into Tray 4
97
Loading Paper into the LCT
99
Loading Paper into the Bypass Tray
100
4 Basic Copy Operations
105
General Copy Operation
107
Operations that Cannot be Combined
110
Operations Where the Setting Specified Last Is Given Priority
110
Operations Where the Setting Specified First Is Given Priority
111
Feeding the Document
112
Loading the Document into the ADF
112
Placing the Document on the Original Glass
113
Scanning the Document in Separate Batches ("Separate Scan" Setting)
115
Scanning a Multi-Page Document from the Original Glass
118
Specifying Document Settings
122
Specifying the Document Size ("Original Size" Settings)
122
Copying Documents of Mixed Sizes ("Mixed Original" Setting)
124
Loading Folded (Z-Folded) Documents
126
Selecting the Document Orientation ("Original Direction" Settings)
127
To Select an Original Direction Setting
128
Selecting the Position of the Binding Margin ("Binding Position" Settings)
129
To Select a Binding Position Setting
130
Reducing the Effects of Dust on the Left Partition Glass
131
Changing Scan Settings for each Document
132
Selecting a Color Setting
135
To Select a Color Setting
135
Selecting a Paper Setting
137
Automatically Selecting the Paper Size ("Auto" Paper Setting)
137
Manually Selecting the Desired Paper Size
138
Specifying a Zoom Setting
139
Automatically Selecting the Zoom Ratio ("Auto" Zoom Setting)
139
Specifying the Zoom Ratio of the Document ("Full Size" Setting)
140
Typing in the Zoom Ratio ("XY Zoom" Setting)
141
Slightly Reducing the Copy ("Minimal" Setting)
142
Selecting a Preset Zoom Ratio ("Enlarge and Reduce" Settings)
143
Typing in Separate X and y Zoom Ratios ("Individual Zoom" Settings)
144
Selecting a Stored Zoom Ratio
146
Storing the Desired Zoom Ratio
146
Selecting an Original > Copy Setting
149
Selecting Single-Sided Copies
150
Selecting Double-Sided Copies
151
Selecting a Combined Copy Setting
153
Copying Multiple Document Pages Onto a Single Page ("Combined Copy" Settings)
154
Selecting the Quality of the Document
156
Loading Documents with Small Print or Photos ("Original Type" Settings)
156
To Select an Original Type Setting
157
Selecting the Density Settings
159
Adjusting the Print Density ("Density" Settings)
159
Adjusting the Background Density ("Background Removal" Settings)
161
Adjusting the Reproduction Quality of Text
162
Printing with a Glossy Finish ("Glossy" Setting)
163
Selecting Finishing Settings
164
Separating Copies by Sets ("Sort" Setting)
167
Separating Copies by Pages ("Group" Setting)
168
Selecting the Output Tray
169
Stapling Copies ("Staple" Settings)
170
Punching Holes in Copies ("Punch" Settings)
173
Selecting a Folding Setting
176
Folding Copies in Half ("Half-Fold" Setting)
177
Binding Copies at the Center ("Center Staple & Fold" Setting)
180
To Fold Copies in Three ("Tri-Fold" Setting)
183
Manually Using the Finisher
185
Names of Control Panel Parts
186
Finishing
186
Selecting Not to Rotate the Image
188
Scanning the Next Document to be Copied While a Copy Job Is Being Printed (Next Job Reservation)
189
Temporarily Stopping Scanning/Printing
190
Deleting a Paused Job
191
5 Additional Copy Operations
193
Checking the Copy Settings (Check Job)
195
To Check the Settings
195
To Change the Settings
197
Printing a Proof to Check the Settings (Proof Copy)
198
Interrupting a Copy Job (Interrupt Mode)
200
Registering Copy Programs (Mode Memory)
201
Deleting a Copy Program
203
Copying with Programmed Copy Settings (Mode Memory)
204
Displaying Function Descriptions (Help)
206
Overview of Help Screens
206
Displaying Main Help Screens
208
Specifying Control Panel Settings (Accessibility Mode)
211
Displaying the Accessibility Setting Screen
211
Setting the "Touch Panel Adjustment" Function
211
Setting the "Key Repeat Start/Interval Time" Functions
213
Setting the "System Auto Reset Confirmation" Function
214
Setting the "Auto Reset Confirmation" Function
216
Setting the "Enlarge Display Mode Confirmation" Function
218
Setting the "Message Display Time" Function
220
Setting the "Sound Setting" Functions
221
6 Troubleshooting
223
When the Message "An Internal Error Occurred." Appears (Call Service Representative)
225
When the Message "Misfeed Detected." Appears
227
Location of Paper Misfeed
227
Paper Misfeed Indications
228
Clearing a Paper Misfeed in the ADF (Feed Section)
231
Clearing a Paper Misfeed in the ADF (Transport Section)
233
Clearing a Paper Misfeed in the ADF (Scanning Section)
237
Clearing a Paper Misfeed in the ADF (Output Section)
240
Clearing a Paper Misfeed in the ADF (Turnover Section)
242
Clearing a Paper Misfeed in the Fusing Unit
244
Clearing a Paper Misfeed in the Main Unit
247
Clearing a Paper Misfeed in the Automatic Duplex Unit
249
Clearing a Paper Misfeed in the Bypass Tray
251
Clearing a Paper Misfeed in the Paper Transport Section
252
Clearing a Paper Misfeed in Tray 1
254
Clearing a Paper Misfeed in Tray 2
255
Clearing a Paper Misfeed in Tray 3
256
Clearing a Paper Misfeed in Tray 4
257
Clearing a Paper Misfeed in the Tray 3/4 Horizontal Transport Unit
258
Clearing a Paper Misfeed in the LCT
260
Clearing a Banner Paper Misfeed
262
Clearing a Paper Misfeed in Finisher FS-517
266
Clearing a Paper Misfeed in Finisher FS-608
270
To Clear a Paper Misfeed in Finisher FS-519
274
To Clear a Paper Misfeed in the Mailbin
277
To Clear a Paper Misfeed in the Saddle Stitcher
278
Clearing a Paper Misfeed in the Post Inserter
280
When the Message "Unable to Staple." Appears
281
Clearing Jammed Staples in Finisher FS-517
282
Clearing Jammed Staples in Finisher FS-608
285
Clearing Jammed Staples in Finisher FS-519
288
Clearing Jammed Staples in the Saddle Stitcher
289
When the Message "Replenish Paper." Appears
291
Message "Due to Insufficient Memory" Appears
292
When the Message
292
When the Message "Please Replace Following Unit(S)." Appears
293
When the Message "XXXX Needs to be Replaced." Appears
294
When the Message "Now Remote Operating. Please Do Not Turn off the Power." Appears
295
Simple Troubleshooting
296
Main Messages and Their Remedies
299
7 Specifications
301
Specifications
301
Main Unit
303
Automatic Duplex Unit
305
Automatic Document Feeder
305
Large Capacity Unit LU-301
306
Finisher FS-608
307
Punch Kit PK-512
308
Punch Kit PK-510
309
Maintenance Service
310
Mailbin Kit MT-502
310
8 Copy Paper/Original Documents
311
Copy Paper
313
Possible Paper Sizes
313
Paper Types and Paper Capacities
314
Special Paper
316
Precautions for Paper
317
Paper Storage
317
Auto Tray Switch Feature
318
Order for Selecting Paper Trays
318
Selecting the Paper Settings
319
Automatically Detecting the Paper Size ("Auto Detect" Setting)
319
Selecting a Paper Size Setting ("Size" Setting)
320
Specifying a Non-Standard Paper Size ("Custom Size" Settings)
322
Storing a Non-Standard Paper Size ("Custom Size" Settings)
324
Selecting a Setting for Oversized Paper ("Wide Paper" Settings)
326
Specifying a Setting for Special Paper
329
Printing Double-Sided Copies Manually
331
Original Documents
333
Documents that Can be Loaded into the ADF
333
Precautions for Loading Documents into the ADF
334
Documents that Can be Placed on the Original Glass
334
Precautions for Positioning Documents on the Original Glass
334
9 Application Functions
335
Color Adjust Parameters and Samples
337
General Information about Color
338
Red" Parameter
340
Green" Parameter
341
Blue" Parameter
342
Color Balance" Parameter (CMYK Color Adjustment)
343
Brightness" Parameter
345
Contrast" Parameter
346
Saturation" Parameter
347
Sharpness" Parameter
348
Hue" Parameter
349
Copy Density" Parameter
350
Single Color" Function
351
Color" Function
352
Background Color" Function
353
Neg-/Pos. Reverse" Function
354
Mirror Image" Function
355
Inserting Paper between OHP Transparencies ("OHP Interleave" Function)
356
Adding Cover Pages ("Cover Sheet" Function)
358
Inserting Different Paper into Copies ("Insert Sheet" Function)
361
Inserting Copies of a Different Document for a Specified Page ("Insert Image" Function)
365
Specifying Pages to be Printed on the Front Side ("Chapters" Function)
368
Scanning Documents with Different Settings and Printing Copies All Together ("Program Jobs" Function)
371
Copying with Image Colors Inversed ("Neg./Pos. Reverse" Function)
375
Copying in a Mirror Image ("Mirror Image" Function)
377
Adding a Background Color to Copies ("Background Color" Function)
380
Adjusting the Copy Color Quality ("Color Adjust" Parameters)
382
To Adjust the Color Adjust Parameters
383
Checking the Print Result of the Color Adjust Settings (Sample Copy)
384
Producing Separate Copies of each Page in a Page Spread ("Book Copy" Function)
386
Tiling Copy Images ("Image Repeat" Function)
390
Copying an Enlarged Image on Multiple Pages ("Poster Mode" Function)
394
Copying Booklets ("Booklet Original" Function)
398
Adding a Binding Margin to Copies ("Page Margin" Function)
400
Adjusting the Image to Fit the Paper ("Image Adjust" Settings)
403
Copying with the Page Layout of a Booklet ("Booklet" Function)
406
Erasing Specified Areas of Copies ("Frame Erase" Function)
408
Printing the Date/Time or Page Number on Copies ("Stamp/Composition" Functions)
410
Printing the Date/Time ("Date/Time" Function)
411
Printing the Page Number ("Page Number" Function)
414
Printing Previously Registered Stamps ("Stamp" Function)
417
Printing Copy Protection Text ("Copy Protect" Function)
420
Printing Repeating Stamps ("Stamp Repeat" Function)
426
Printing the Image Scanned First Overlapped by the Remaining Document Pages ("Overlay" Function)
431
Saving a Scanned Image as a Registered Overlay ("Overlay" Function)
433
Using a Registered Overlay ("Overlay" Function)
435
Printing a Header/Footer ("Header/Footer" Function)
436
Saving the Scanned Document in a User Box ("Save in User Box" Function)
438
10 Replacing Toner Cartridges and Staples and Emptying Punch Scrap Box
441
Replacing the Toner Cartridge
443
To Replace the Toner Cartridge
446
Replacing the Waste Toner Box
448
To Replace the Waste Toner Box
450
Replacing an Imaging Unit
452
To Replace the Imaging Unit (Black)
454
To Replace the Imaging Unit (Yellow, Magenta and Cyan)
458
Replacing the Staple Cartridge
463
To Replace the Staple Cartridge in Finisher FS-517
464
To Replace the Staple Cartridge in Finisher FS-608
467
To Replace the Staple Cartridge in Finisher FS-519
470
To Replace the Staple Cartridge in Saddle Stitcher
472
Emptying the Punch Scrap Box
474
To Empty the Punch Scrap Box in Finisher FS-517/FS-608
477
To Empty the Punch Scrap Box in Finisher FS-519
478
11 Care of the Machine
479
Cleaning
481
Housing
481
Original Glass
481
Left Partition Glass
481
Control Panel
482
Document Pad
482
Paper Take-Up Rollers
482
Electrostatic Charger Wire
483
Print Head
483
Viewing Counters (Meter Count)
485
Viewing Counters
485
Viewing the Coverage Rate
486
When the Message "It Is Time for the Scheduled Inspection of the Device." Appears
487
12 Managing Jobs
489
Overview of Job List Screen
491
Jobs
491
Multi-Job Feature
491
Job List Screens
492
Left Panel Job List
494
Performing Operations on Jobs
496
Deleting a Job
496
Checking Job Settings
498
Checking Job Details
498
Displaying the Current Jobs List (Stored Jobs and Active Jobs)
499
Displaying the Job History List
500
Printing a Proof Copy of a Stored Job
500
Printing a Stored Job
501
Increasing Printing Priority
504
13 Utility Mode
505
Overview of Utility Mode Parameters
507
List of Registration Information and Parameters
507
Create One-Touch Destination
509
Create User Box
509
Limiting Access to Destinations
509
Access Level
511
Level Settings
512
Group
512
Specifying a Group Setting
513
Specifying a Destination Level
514
Specifying a User Level
516
Displaying the Destination Registration Screen
517
Specifying User Settings
519
System Settings
519
Custom Display Settings
521
Copier Settings
521
Scan/Fax Settings
521
Printer Settings
524
Change Password
525
Change E-Mail Address
525
Displaying the User Settings Screen
526
Specifying Administrator Settings
527
System Settings
527
Administrator/Machine Settings
533
One-Touch/User Box Registration
534
User Authentication/Account Track
534
Network Setting
536
Copier Setting
537
Printer Settings
537
Fax Settings
538
System Connection
538
Security Settings
538
Displaying the Administrator Settings Screen
541
Check Consumable Life
543
Displaying the Check Consumable Life Screen
543
Overview of Weekly Timer Settings
545
Printer Adjustment
546
Leading Edge Adjustment
546
Centering
547
Leading Edge Adjustment (Duplex Side 2)
548
Centering (Duplex 2Nd Side)
549
Finisher Adjustment
551
2-Position Staple Pitch Adjustment
551
Center Staple Position Adjustment
552
Half-Fold Position
554
Tri-Fold Position Adjustment
556
Punch Vertical Position Adjustment
558
Punch Horizontal Position Adjustment
559
Punch Resist Loop Size Adjustment
561
Punch Edge Sensor Adjustment
563
Cover Sheet Feeder Size Adjustment
564
Color Registration Adjust
565
Adjusting the Color Registration for Yellow, Magenta and Cyan
565
Gradation Adjustment
567
Header/Footer Settings
569
Specifying Headers/Footers
569
Editing Headers/Footers
571
Authentication Method
572
User Authentication and Account Track
572
When User Authentication and Account Track Are Synchronized
572
When User Authentication and Account Track Are Used Separately
573
Selecting an Authentication Method
574
User Authentication Setting
577
Administrative Settings List
577
Default Function Permission
578
Public User Access
579
User Registration
579
User Counter
584
Viewing User Counters
585
Account Track Setting
586
Account Track Registration
586
Account Track Counter
589
Viewing Account Counters
590
Password Rules
591
Conditions of the Password Rules
591
Enhanced Security Mode
592
Appendix
595
Entering Text
597
Enlarging the Keyboard
598
To Type Text
599
List of Available Characters
599
Glossary
600
Other manuals for Konica Minolta bizhub C451
User Guide
808 pages
Service Manual
1503 pages
Technical Bulletin
21 pages
User Manual
620 pages
Network Scanner Operations
302 pages
Operation Manual
304 pages
Installation Manual
40 pages
Operation Guide
68 pages
Quick Guide
10 pages
Security Guide
28 pages
Faq And Quick Guide
12 pages
5
Based on 1 rating
Ask a question
Give review
Questions and Answers:
Need help?
Do you have a question about the Konica Minolta bizhub C451 and is the answer not in the manual?
Ask a question
Konica Minolta bizhub C451 Specifications
General
Brand
Konica Minolta
Model
bizhub C451
Category
All in One Printer
Language
English
Related product manuals
Konica Minolta bizhub C450
608 pages
Konica Minolta bizhub C454
272 pages
Konica Minolta BIZHUB C452
343 pages
Konica Minolta bizhub C458
286 pages
Konica Minolta bizhub C450i
110 pages
Konica Minolta bizhub C454e
178 pages
Konica Minolta bizhub C4050i
227 pages
Konica Minolta bizhub C25
339 pages
Konica Minolta bizhub C308
286 pages
Konica Minolta bizhub C364
272 pages
Konica Minolta BIZHUB C250
658 pages
Konica Minolta bizhub C224
272 pages
 Loading...