CF5001 Field Service Ver.1.0 Sep 2003 PROCESS UNIT
1-41
I DIS./ASSEMBLY
4.11 Replacing the 1st transfer
roller
A. Periodically replaced parts/cycle
• 1st transfer roller /Y, /M, /C, /K: Every 200,000
copies
B. Procedure
1. Remove the transfer belt. (See "4.10 Replacing
the transfer belt.")
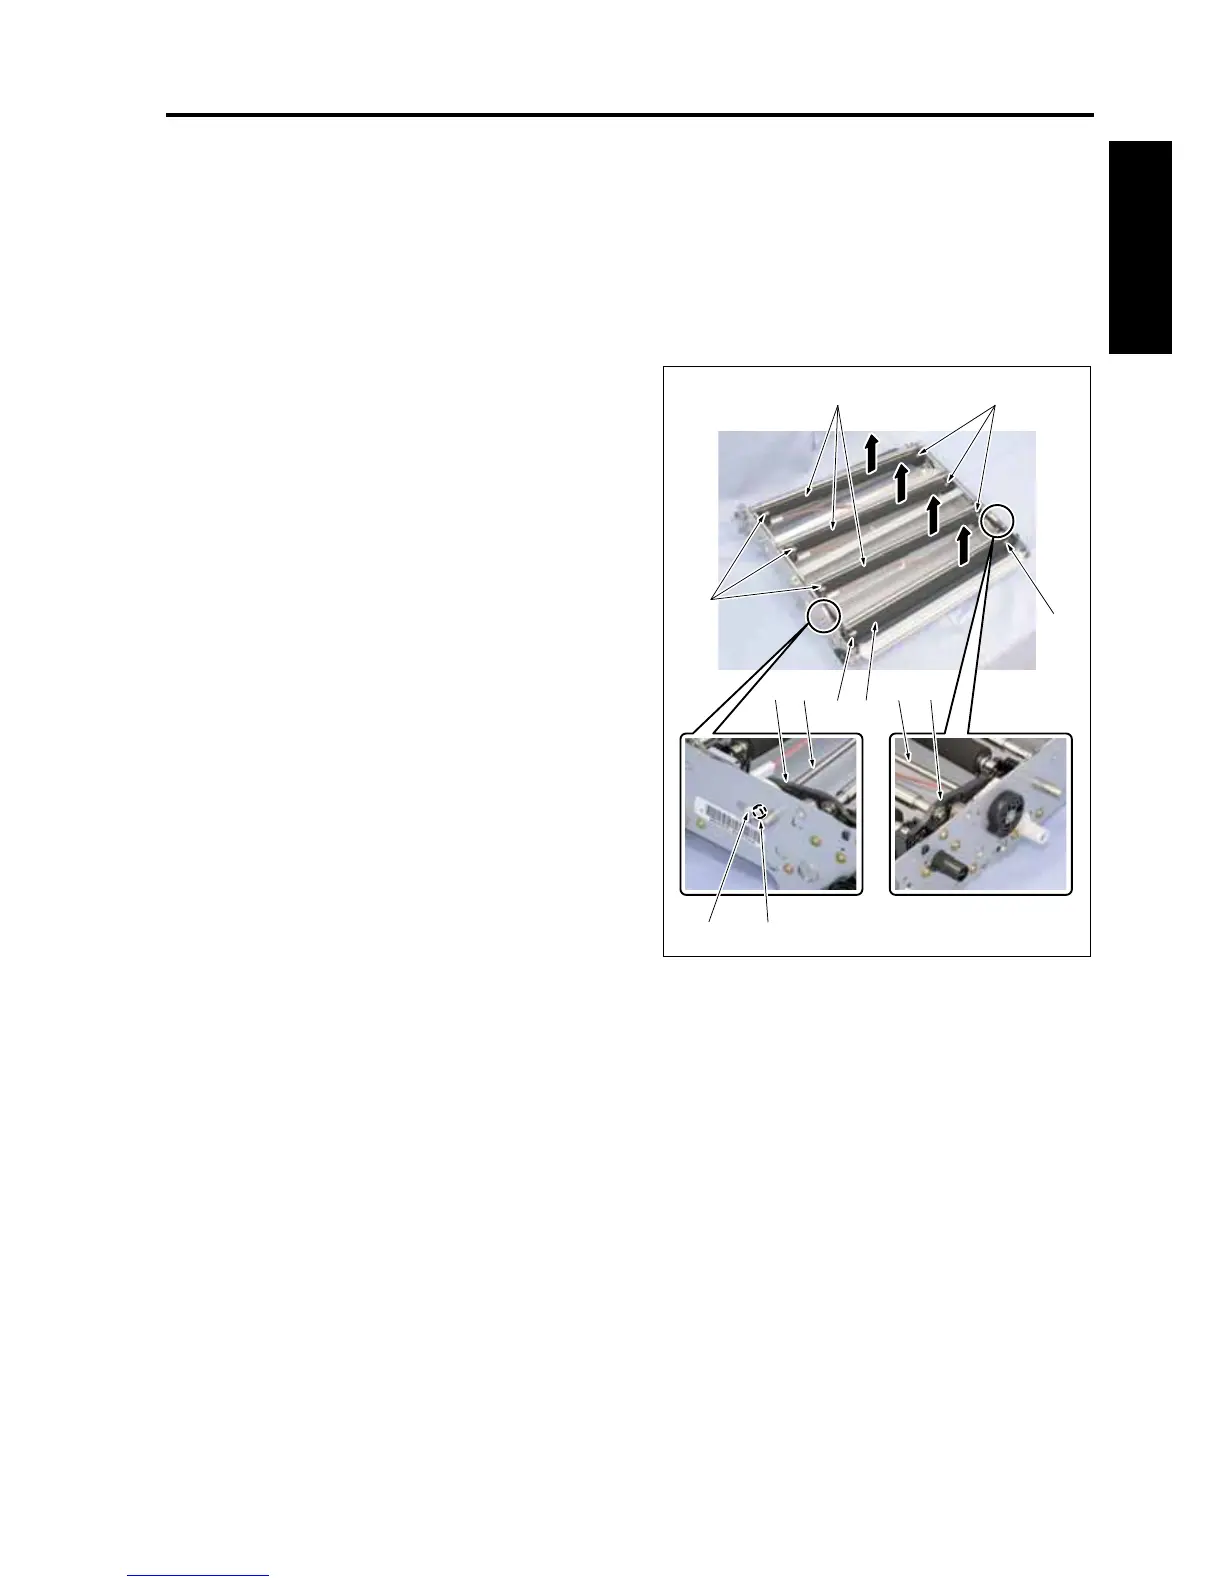
2. Place the transfer belt unit as shown in the illus-
tration.
3. Remove the stop ring [1].
4. After removing 1 bearing [2], slide the stopper /4
[3] to open the tip end of the transfer release
arm [4].
5. Remove the 1st transfer roller /K [6] while sliding
it.
6. Remove 3 1st transfer rollers/Y, /M, /C [5].
Note:
• Be sure to reinstall the 1st transfer roller so
that a shallow groove near the groove of the
E-ring comes this side.
7. Remove the E-rings [7], 2 each, from each of
the 1st transfer rollers.
8. Reinstall the above parts following the removal
steps in reverse.
[3] [4]
[2][1]
[7]
[7][5]
[7]
[7] [6]
[4] [3]
8050ma3055