GETTINGUPAND RUNNING
This section covers the preparation of the camera. This includes the changing of batteries, memory
cards, and lenses as well as the use of external power supplies.
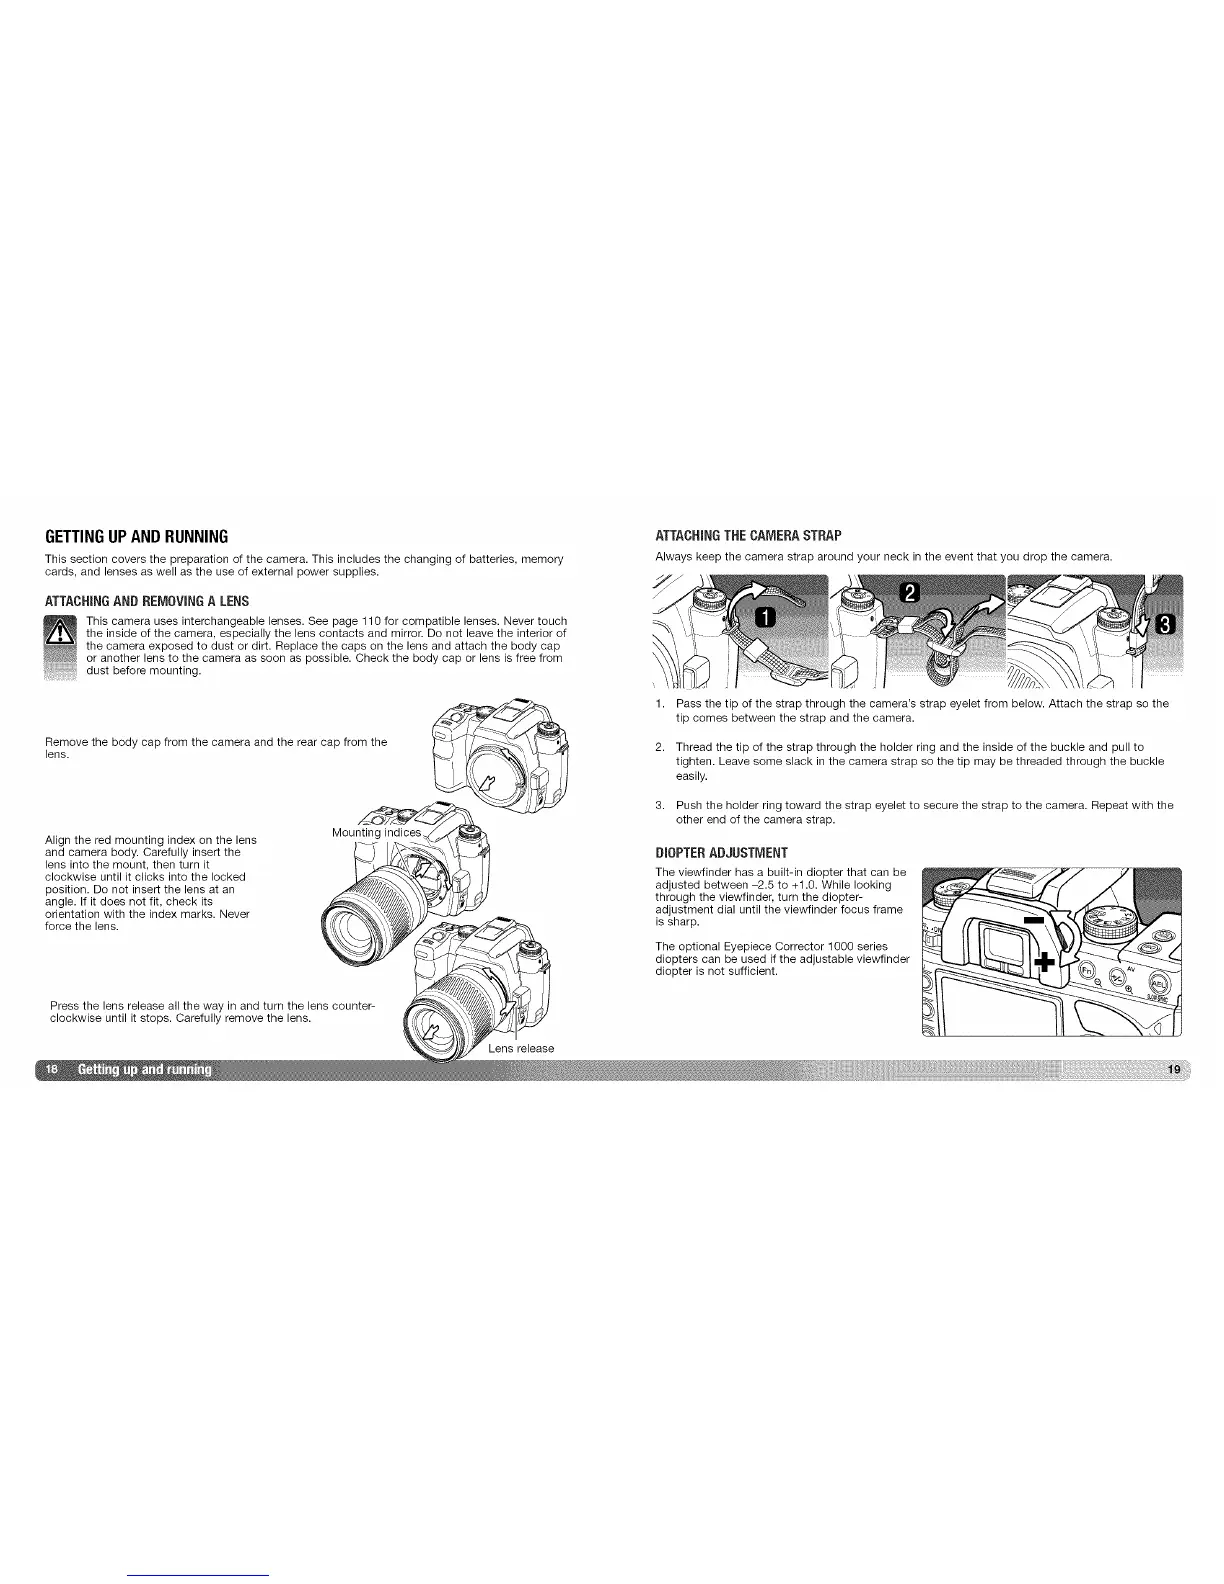
ATTACHINGAND REMOVINGA LENS
This camera uses interchangeable lenses. See page 110 for compatible lenses. Never touch
the inside of the camera, especially the lens contacts and mirror. Do not leave the interior of
the camera exposed to dust or dirt. Replace the caps on the lens and attach the body cap
or another lens to the camera as soon as possible. Check the body cap or lens is free from
dust before mounting.
Remove the body cap from the camera and the rear cap from the
lens.
Align the red mounting index on the lens
and camera body. Carefully inser_ the
lens into the mount, then turn it
clockwise until it clicks into the locked
position. Do not inser_ the lens at an
angle. If it does not fit, check its
orientation with the index marks. Never
force the lens.
Mounting indices
Press the lens release all the way in and turn the lens counter-
clockwise until it stops. Carefully remove the lens.
ATTACHINGTHECAMERASTRAP
Always keep the camera strap around your neck in the event that you drop the camera.
1. Pass the tip of the strap through the camera's strap eyelet from below. Attach the strap so the
tip comes between the strap and the camera.
2. Thread the tip of the strap through the holder ring and the inside of the buckle and pull to
tighten. Leave some slack in the camera strap so the tip may be threaded through the buckle
easily.
3. Push the holder ring toward the strap eyelet to secure the strap to the camera. Repeat with the
other end of the camera strap.
DIOPTERADJUSTMENT
The viewfinder has a built-in diopter that can be
adjusted between -2.5 to +1.0. While looking
through the viewfinder, turn the diopter-
adjustment dial until the viewfinder focus frame
is sharp.
The optional Eyepiece Corrector 1000 series
diopters can be used if the adjustable viewfinder
diopter is not sufficient.
 Loading...