18 G
ETTING STARTED
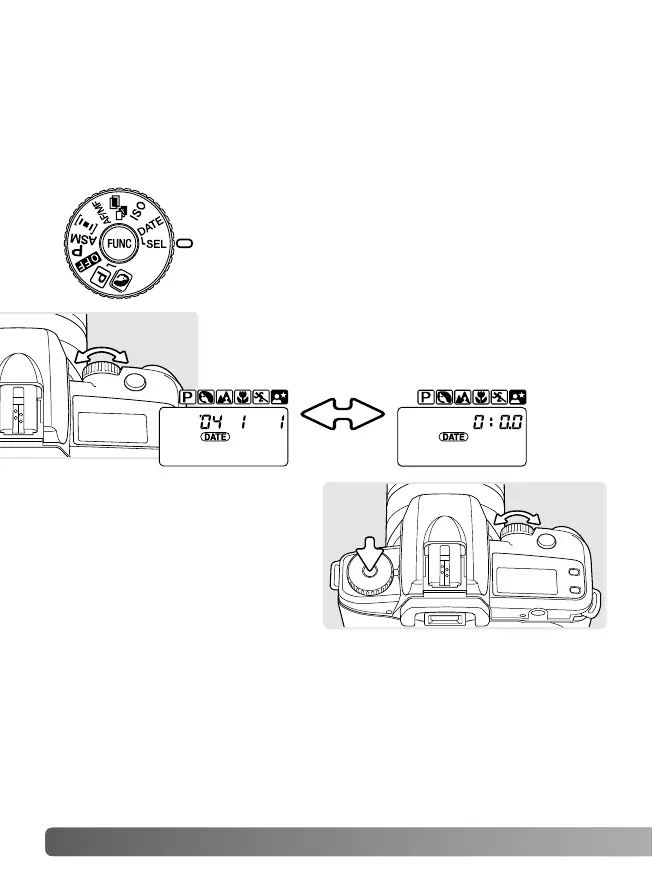
SETTING DATE AND TIME - DATE MODEL
Turn the function dial to the date select position
(SEL); the calendar is displayed on the data
panel. The date format is year, month, day.
The camera’s clock and calendar need to be set for date imprinting.
The date blinks on the data panel when the camera is turned on if
the clock and calendar are not set or have reset because the
batteries are exhausted.
1
Turn the control dial (1) to select the date and
time registers; the selected register blinks.
2
3
To change the selected register,
press and hold the function
button (2) and turn the control
dial (3). The camera uses a 24
hour clock so 14:00 is 2pm. The
calendar is automatic from the
year 2003 to 2039.
Continue until the calendar and clock are set. Turn the function dial
to another position to view the standard data panel display. See
page 52 on how to use the date imprinting function.
Calendar Clock
 Loading...