137
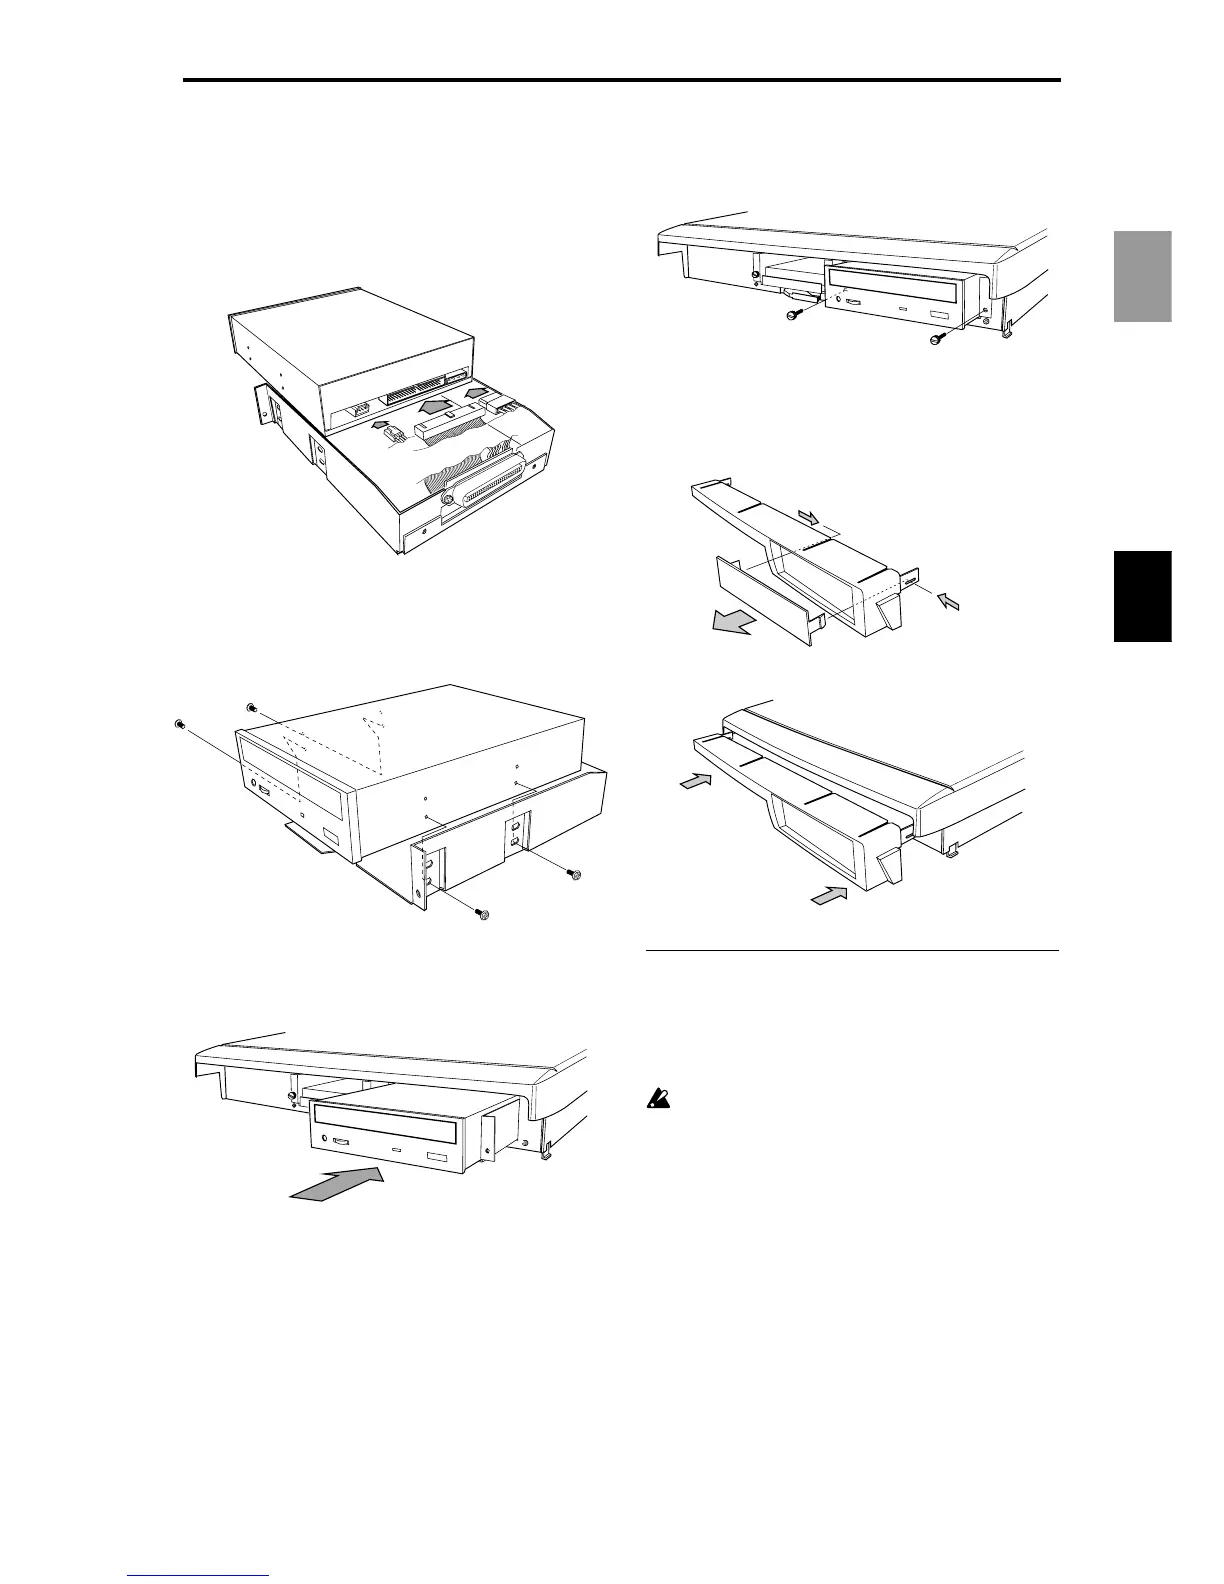
5 Connect the cable to the CD drive.
Connect the 40 pin flat cable, audio cable, and
power supply cable (attached to the CD drive car-
tridge) to the hard disk.
Be careful that the connectors are oriented cor-
rectly, and that they are pushed in all the way.
6 Fasten the CD drive in the CD drive cartridge.
Use the screws included with the CD drive to fas-
ten it in place.
7 Insert the CD drive cartridge into the D1600.
Push it firmly in all the way.
8 Using the screws that you removed in step 3, fas-
ten the CD drive cartridge to the D1600.
9 Close the front cover.
If you have installed the CD drive, remove the
drive bay cover before closing the front cover.
Checking the operation of the internal CD-R/RW drive
1 Turn on the power as described in the power-on
procedure, and verify that the D1600 starts up cor-
rectly. (→p.18)
Turn on the power of the D1600, and make sure
that the start-up LCD screen shows that the inter-
nal CD-R/RW drive has been detected.
If the D1600 does not recognize the internal CD-R/
RW drive, try reinstalling the internal CD-R/RW
drive.
Appendices
About the drive