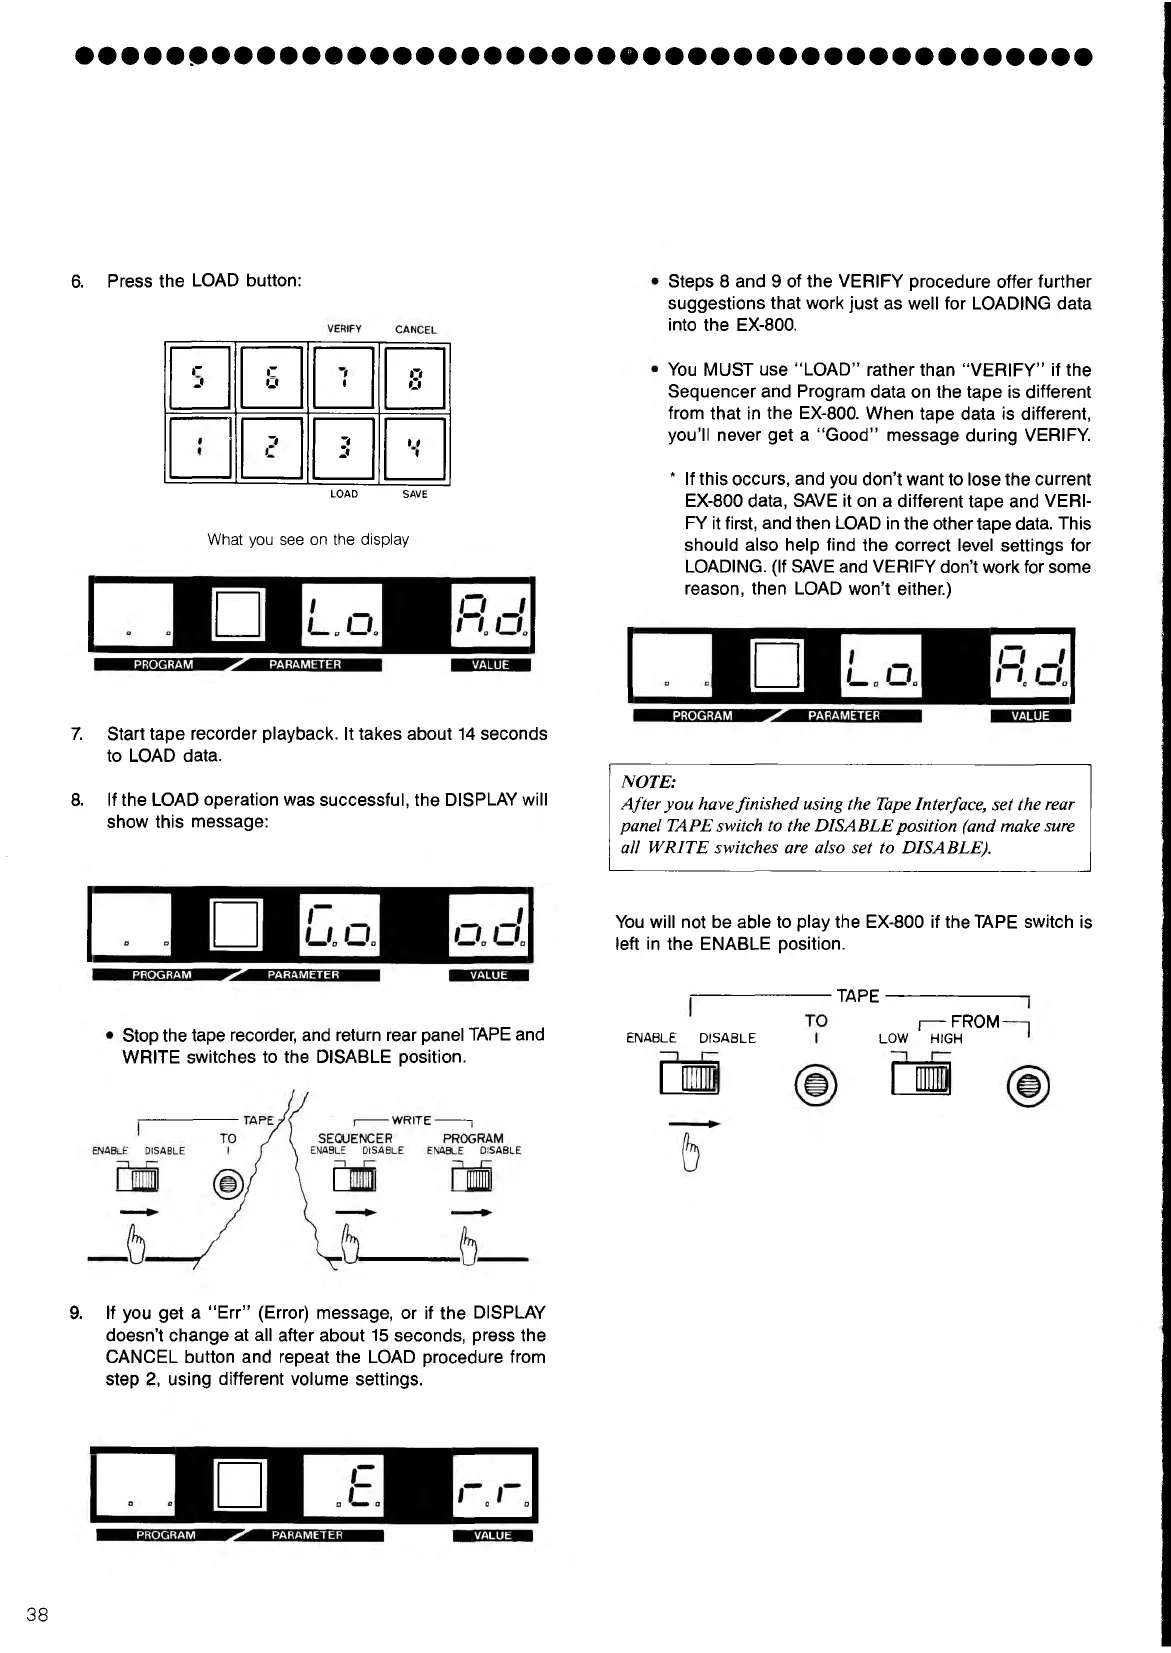
6. Press the LOAD button:
r
j
r
u
i
O
L9
wi
Zt
ji
It
«
LOAD SAVE
What you see on the display
7. Start tape recorder playback. It takes about 14 seconds
to LOAD data.
8. If the LOAD operation was successful, the DISPLAY will
show this message:
Stop the tape recorder, and return rear panel TAPE and
WRITE switches to the DISABLE position.
Steps 8 and 9 of the VERIFY procedure offer further
suggestions that work just as well for LOADING data
into the EX-800.
You MUST use “ LOAD” rather than “VERIFY” if the
Sequencer and Program data on the tape is different
from that in the EX-800. When tape data is different,
you’ll never get a “Good” message during VERIFY.
* If this occurs, and you don’t want to lose the current
EX-800 data, SAVE it on a different tape and VERI
FY it first, and then LOAD in the other tape data. This
should also help find the correct level settings for
LOADING. (If SAVE and VERIFY don’t work for some
reason, then LOAD won’t either.)
NOTE:
After you have finished using the Tape Interface, set the rear
panel TAPE switch to the DISABLE position (and make sure
all WRITE switches are also set to DISABLE).
You will not be able to play the EX-800 if the TAPE switch is
left in the ENABLE position.
■ TAPE ■
ENABLE DISABLE
I— FROM-
LOW HIGH
9. If you get a “Err” (Error) message, or if the DISPLAY
doesn’t change at all after about 15 seconds, press the
CANCEL button and repeat the LOAD procedure from
step 2, using different volume settings.
38
 Loading...