Page 16
C. Where a L or PL type venting is used to vent the insert through a
masonry fireplace (see “Typical installation Configurations”
section, figure 10A), a hole may be cut through the fireplace to
accommodate the vent pipe. This hole must be properly repaired
upon removal of the insert.
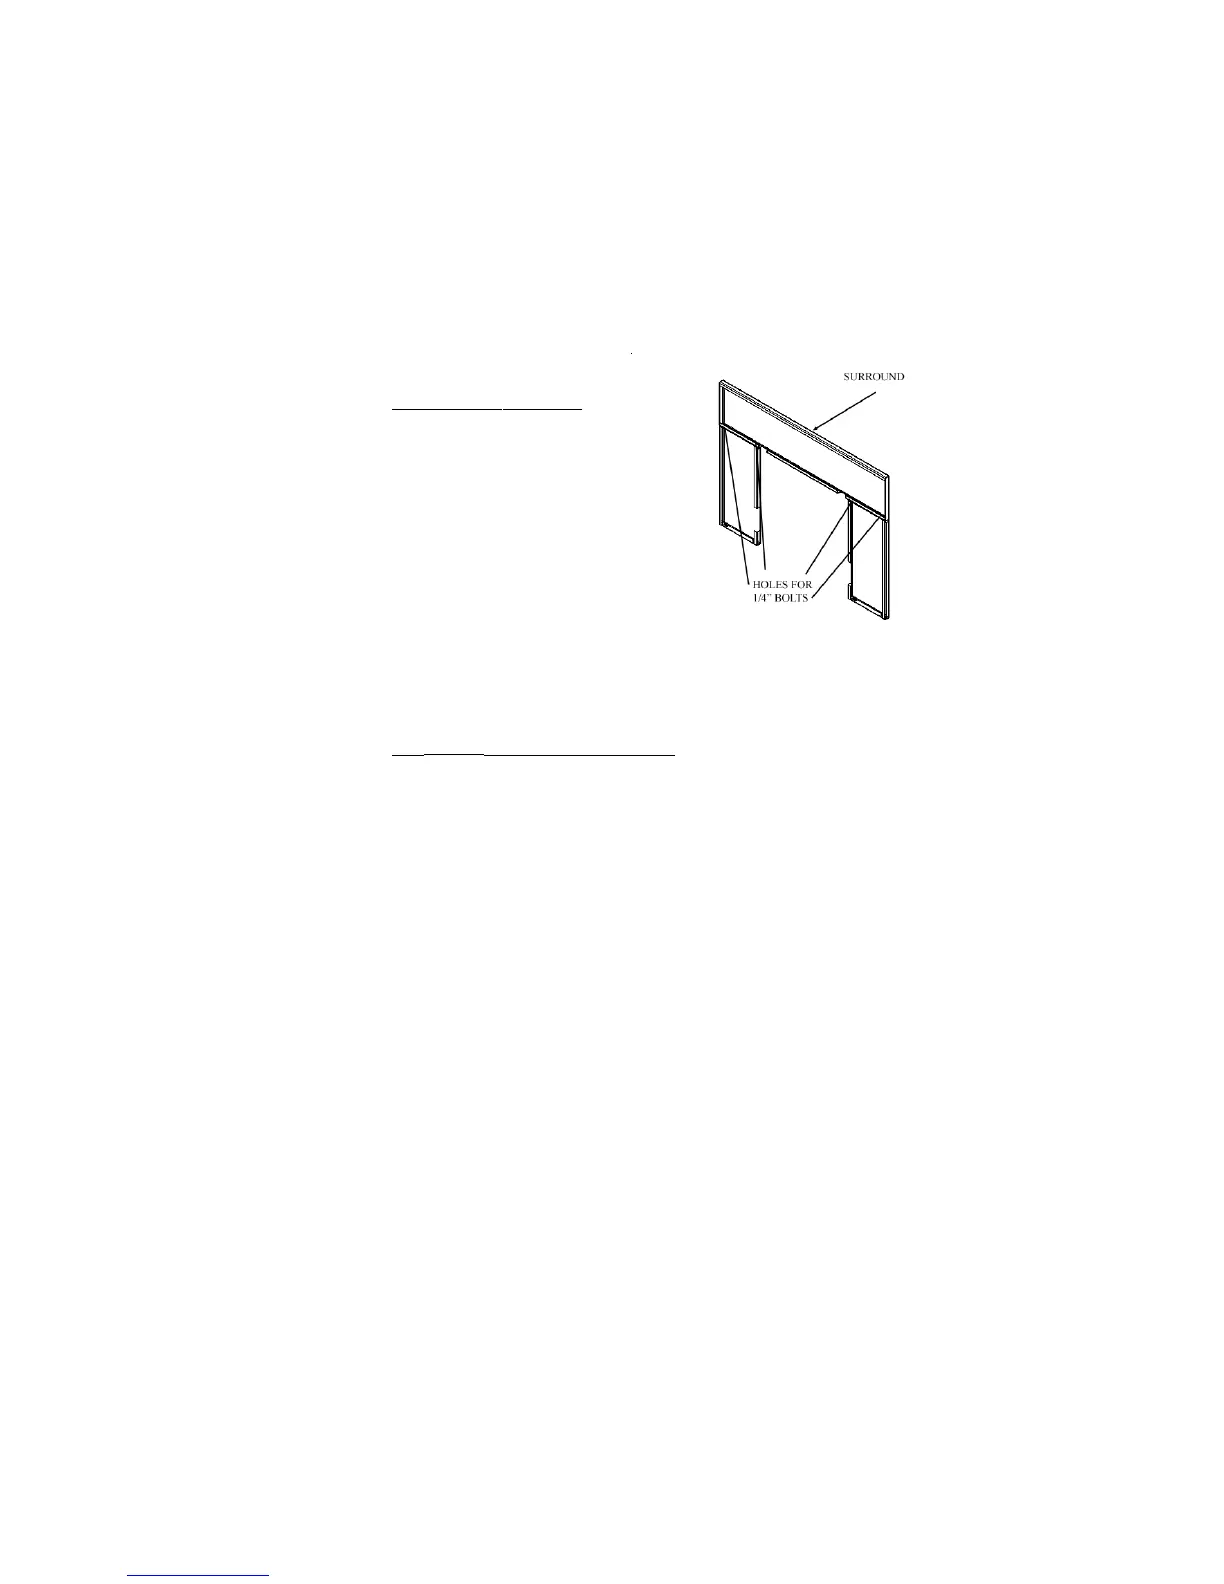
Figure 14. KOZI pellet insert
surround
7.3 KOZI Pellet Insert Installation
Please follow the following steps when installing a KOZI pellet insert:
1. Verify that the fireplace opening meets the insert’s minimum require-
ments.
Working from the exterior of the building:
2. Attach and seal the exhaust venting to the terminal using sheet metal
screws and high temperature (RTV) silicone sealant.
3. Insert the venting into the existing chimney and secure the terminal to the
chimney. Ensure that the venting and chimney are properly sealed.
4. If outside combustion air is being used, install the air intake as necessary.
Working from the interior of the building:
5. Verify that an electrical outlet is available for the pellet insert. If not,
have one installed.
6. Place the insert part way into the opening.
7. Attach and seal the free end of the exhaust venting to the pellet insert
using sheet metal screws and high temperature (RTV) silicone sealant.
8. If the top of the chimney was not sealed to the vent terminal in step 3,
seal the existing chimney damper to the new pellet venting to prevent
drafts to and from the home.
9. Plug the power cord into the electrical outlet.
10. Assemble the surround (if not previously assembled) and slide it on the
insert (see the “Surround Assembly” section).
11. Push the insert into the cavity until the surround touches the existing
fireplace.
7.2 Surround Assembly
The KOZI pellet insert surround can be seen in
Figure 14. The surround comes in 3 separate
pieces and needs to be assembled before being
attached to the heater. Layout the top and sides
of the surround on the floor as shown in figure
14. Verify that each side piece mounting holes
are aligned with the top piece mounting holes.
Using the supplied 1/4” bolts, secure the side
pieces to the top. Your surround is now ready to
mount to the insert.