Page 23
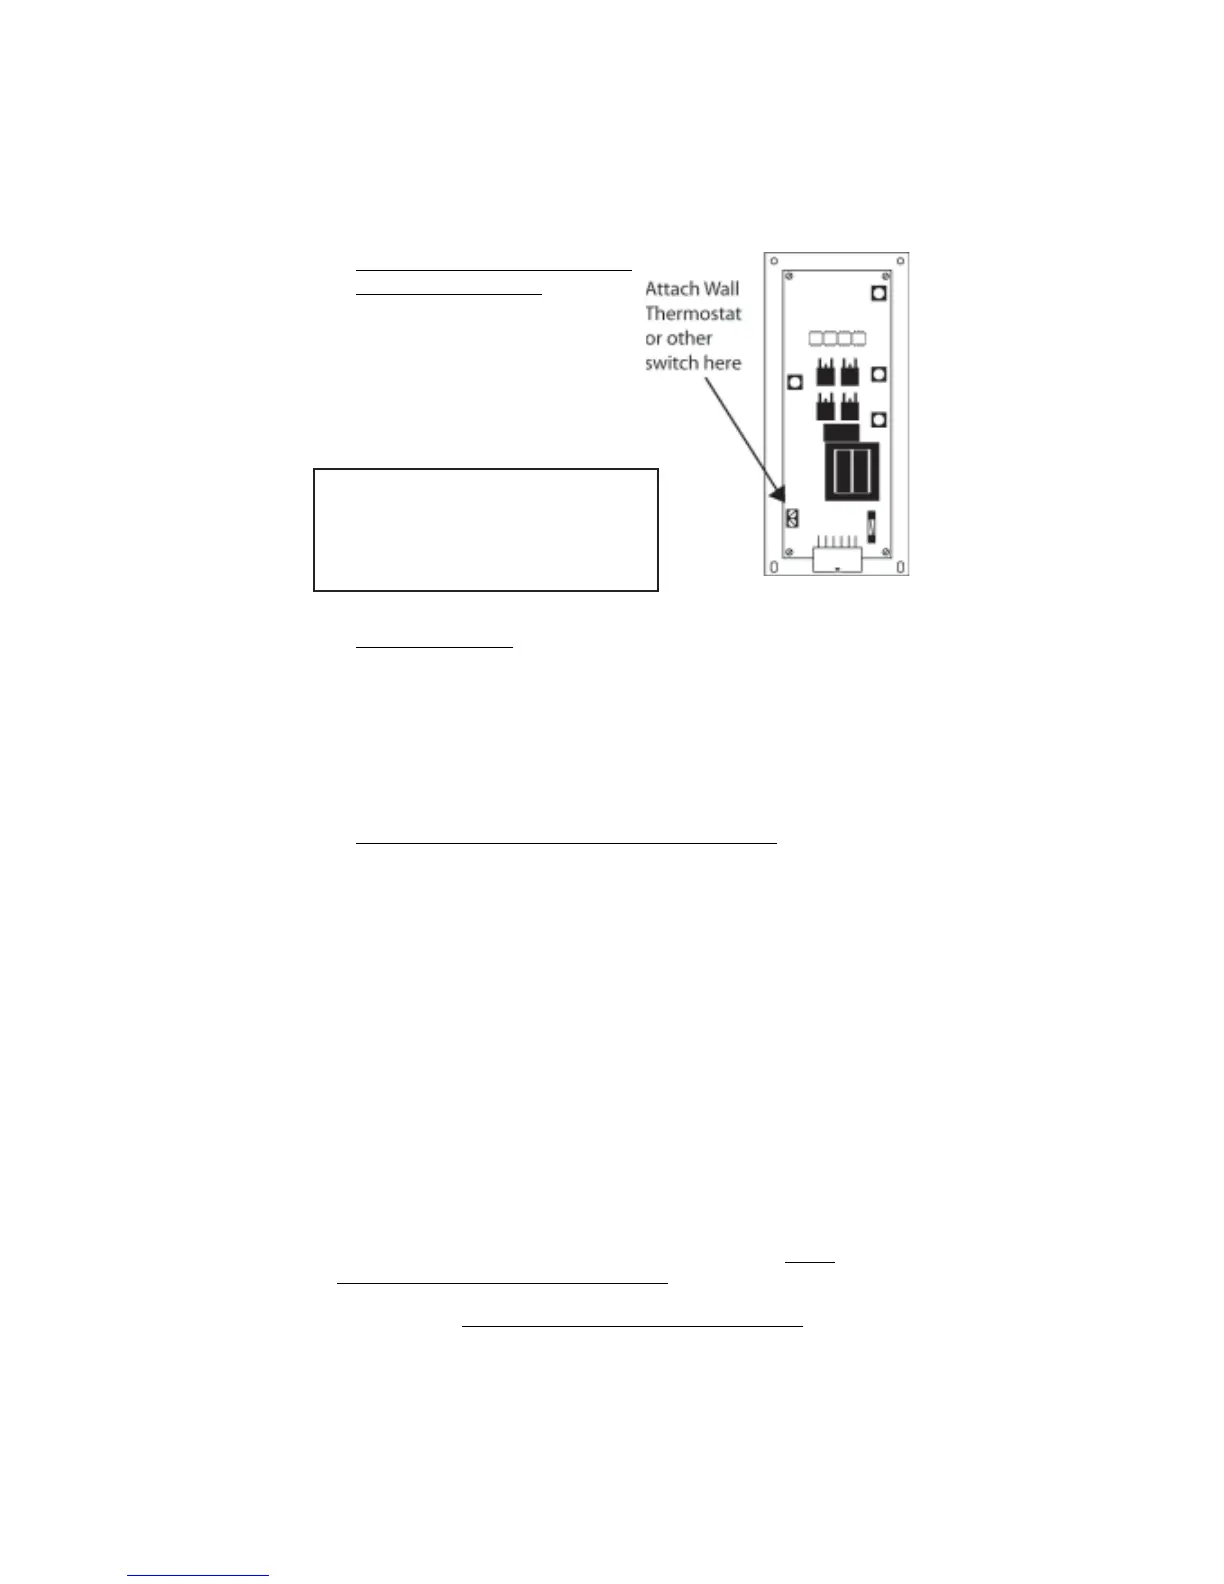
Figure 19. Wall thermostat
terminals
4.8 Wall thermostat, wall switch or
other switching device.
The MX2
TM
control is capable of using an external
switch (such as a millivolt wall thermostat) to turn
the stove on and off. Any millivolt rated switching
device can be used with this control. The switch/
thermostat must be wired to the terminals as shown
in Figure 19.
TO PREVENT INJURY OR DAMAGE TO
THE HEATER, ALWAYS UNPLUG THE
HEATER FROM THE POWER OUTLET
BEFORE SERVICING.
4.9 Damper Control
The damper control rod is located on the left side of the heater. This rod controls the
amount of air passing through the burn pot. By pushing the control rod in, you reduce
the amount of air passing through the burn pot. By pulling the rod out, you will increase
the amount of air passing through the burn pot. Once properly set, you should not need
to adjust the damper. The MX2
TM
control will automatically change the exhaust fan speed
to adjust the amount of combustion air needed for each heat setting. A typical damper
setting is between 5/8” (15 mm) to 3/4” (20 mm) form the fully pushed in position.
4.10 Starting (lighting) your Heater for the First Time
Read the following instruction completely before attempting to light your heater for the
first time. This method applies to all modes of operation (“AUTO, HIGH/LOW,
“MANUAL”). For “AUTO” mode, use thermostat or other switching device in lieu of
“ON/OFF” button..
Once your heater is properly installed, complete the following steps to light it for the
first time or whenever your heater runs out of fuel:
1. Fill the hopper with pellet fuel. At this time the auger tube is empty. It
needs to be filled before the heater can be operated properly.
2. Press the “ON/OFF” button; The “ON/OFF” light and the “AUGER”
light should begin to blink. The motors should also begin to turn.
3. Press and hold the “AUGER” button; the “AUGER” light should light
and stay lit until the button is released.
4. Continue to hold the “AUGER” button until fuel begins to drop into the
burn pot (located inside the burn chamber, see “Stove Cross Section”
diagram for exact location). This may take several minutes. If the heater
turns OFF before fuel begins to drop into the burn pot, repeat steps 2, 3
and 4.
5. Release the “AUGER” button once pellet fuel begins to drop.
If your
heater IS NOT equipped with an electric start; allow the heater to stop
(this may take up to 20 minutes) and proceed to “Starting (lighting) your
Heater” section. If your heater IS equipped with an electric start;