Page 26
system for any blockages after any prolonged shut down period. If thereis a significant amount of soot build up, it should be removed to prevent
the risk of a chimney fire. By making sure the exhaust venting system
and the heater itself are being maintained properly and are cleaned on a
regular basis, you reduce the likelihood of a chimney fire occurring.
Please contact your local building or fire officials in your area for
information on how to handle a chimney fire. Have a plan of action
ready in case of a chimney fire occurs.
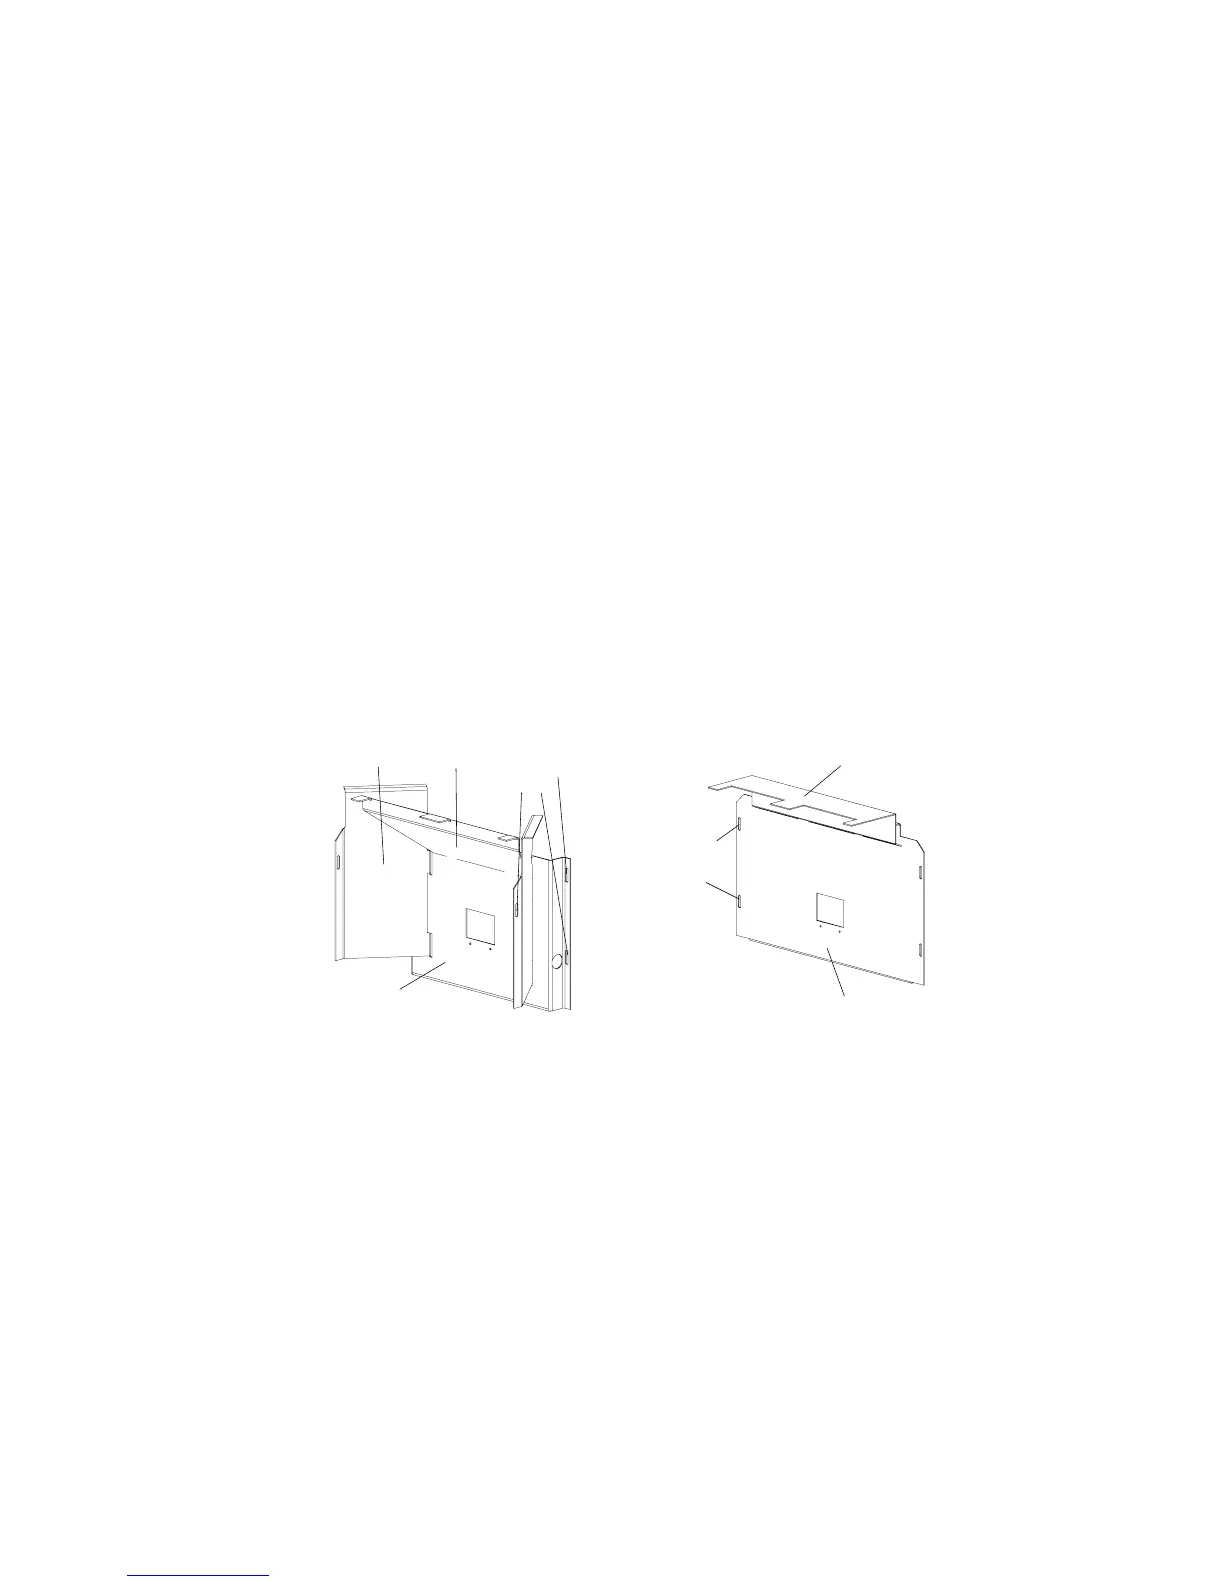
2. Clean behind the back heat shield as well as all exhaust passages. Ashes
can build up behind the back heat shield and inside the exhaust passages.
To remove the back heat shield you must remove 4 bolts located at each
corner of the heat shield. On some models the side heat shields must first
be removed by removing the 2 bolts holding them in place. Using a
brush, remove all of the ashes that have built up on the back wall of the
combustion chamber, on the inside of the heat shield as well as in the
exhaust passage. Inspect the auger chute gasket at this time. Make sure
the gasket is still in good condition and that it is in the original position
when the back heat shield is bolted back into position. Make sure to
clean behind the back heat shield after every 3 tons of fuel burned. See
Figure 20 and Figure 21 for removal of the heat shields.
Figure 20. Model 100 and
KSH 120 Heat Shields.
TOP HEAT
SHIELD
SIDE HEAT
SHIELD
BACK HEAT
SHIELD
MOUNTIN
HOLES
TOP HEAT SHIELD
BACK HEAT SHIELD
MOUNTING
HOLES
Figure 21. BayWin Heat
Shields.
3. Clean the exhaust fan and housing. Ash accumulation on the fan blades
will reduce the life of your exhaust fan. Frequent cleaning will help
extend the life of this component. Open the left side panel to access the
exhaust fan. Using a Common (flat head) screw driver, remove the 6
sheet metal screws holding the fan motor to the housing (See Figure 22).
Using a brush, clean all ash from the exhaust fan blades and housing.