12 Servicing
12.4 Replacing the mechanical seal (inner bearing)
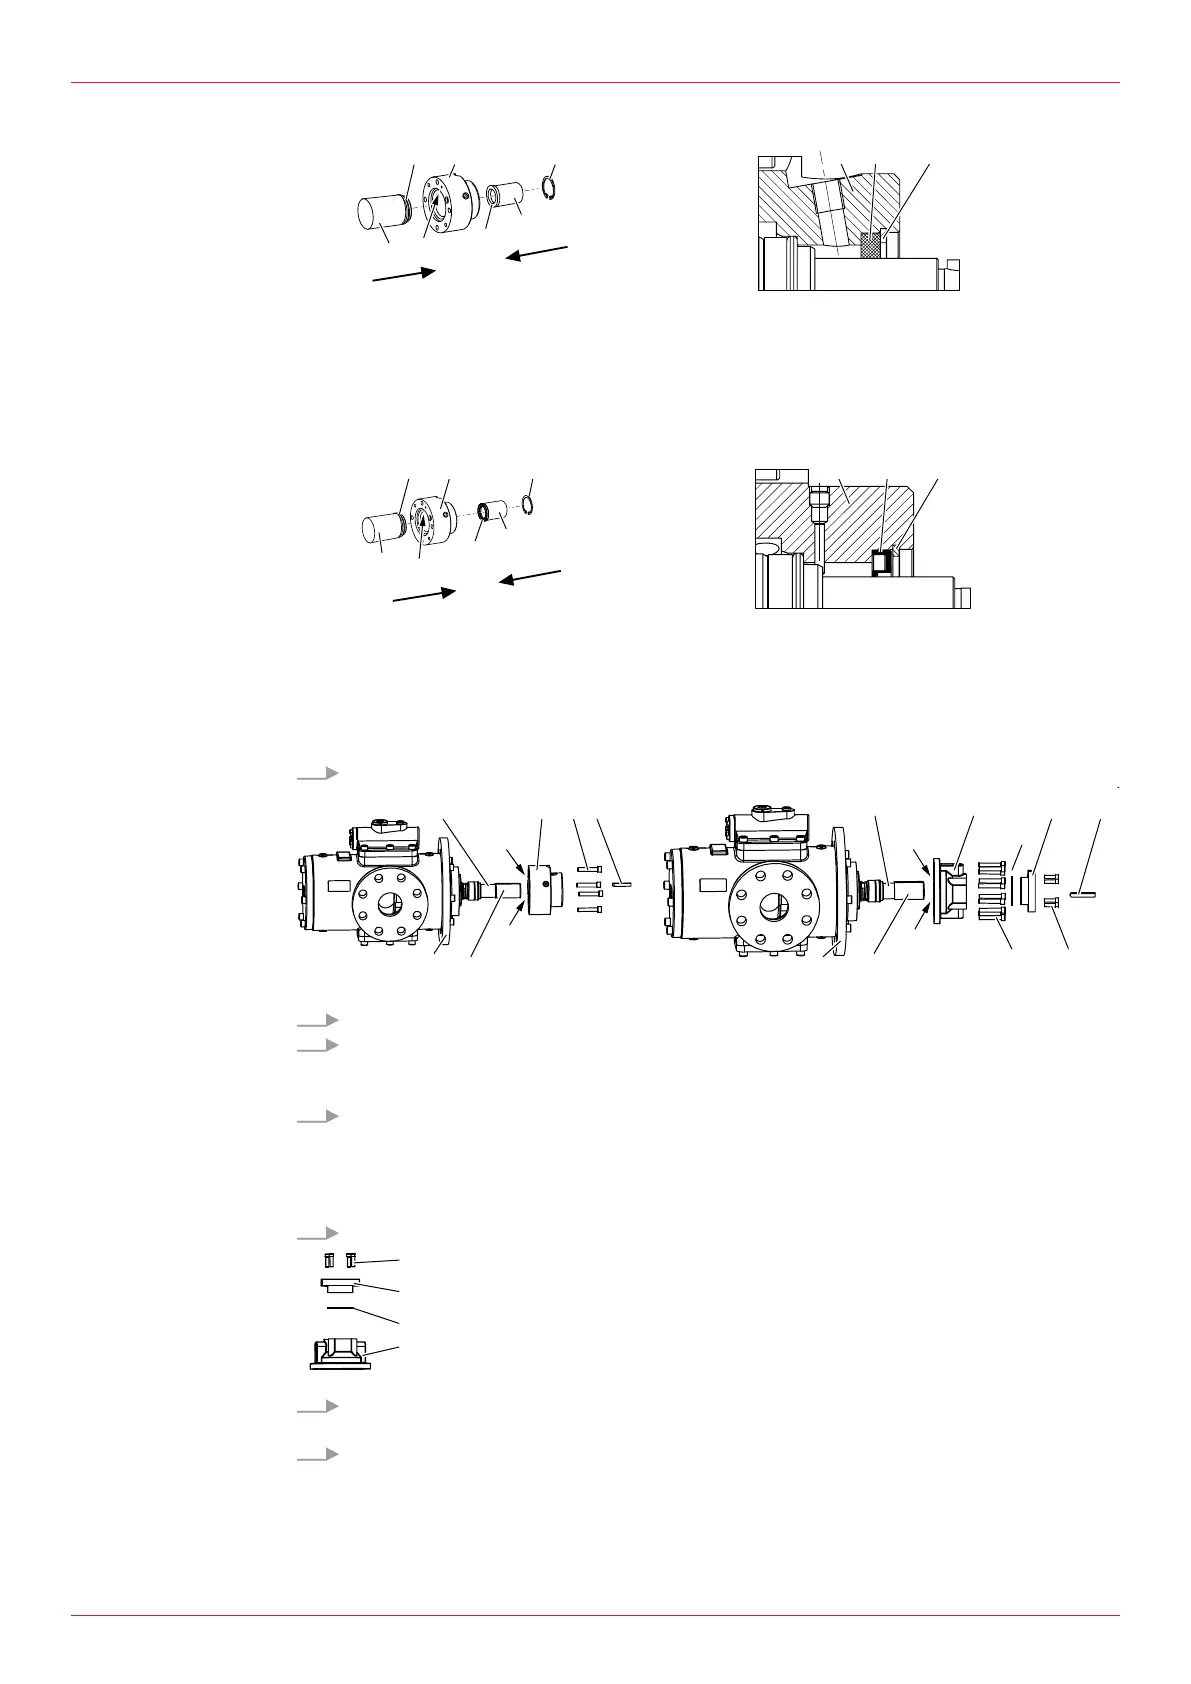
Mechanical seal with throttle ring
Size15–660, 880:
Use the mounting arbour radial shaft seal ringE to press the throttle ring14 into the seal hous-
ing3 and insert the circlip13.
Use the mounting arbour stationary seal ringA to press the stationary seal ring12 with mounted
O-ring into the seal housing.
-or-
Mechanical seal with quench
Size15–660, 880:
Use the mounting arbour radial shaft seal ringE to press the radial shaft seal ring15 into the seal
housing3 and insert the circlip13.
Use the mounting arbour stationary seal ringA to press the stationary seal ring12 with mounted
O-ring into the seal housing.
5. Clean the sliding surfaces of the mechanical seal carefully and grease with silicone grease.
6. Position the flat gasket7 at the seal housing.
7. Attention: Ensure that the spring ring2/straight pin8 is not damaged during the mounting of the
seal housing. Take the holes in the pump flange into account.
Carefully slide the seal housing with flat gasket until the pump flange stops at the main screw.
8. Size15–660, 880: Tighten the socket screws4 between the seal housing and the pump with
torque.
-or-
Size851, 951–3550: Tighten the socket screws11 between the seal housing and pump with
torque.
9. Remove the mounting sleeve main screwB.
10. Size851, 951– 3550: Slide the O-ring9 onto the seal flange10 and tighten the socket screws4
between the seal flange and seal housing3 with torque.
11. Mount the feather key5.
Operating instructions
OIC 18en-GB Edition 2020-01
35


 To Next Page