12 Servicing
12.7 Replacing the mechanical seal and ball bearing (outer bearing)
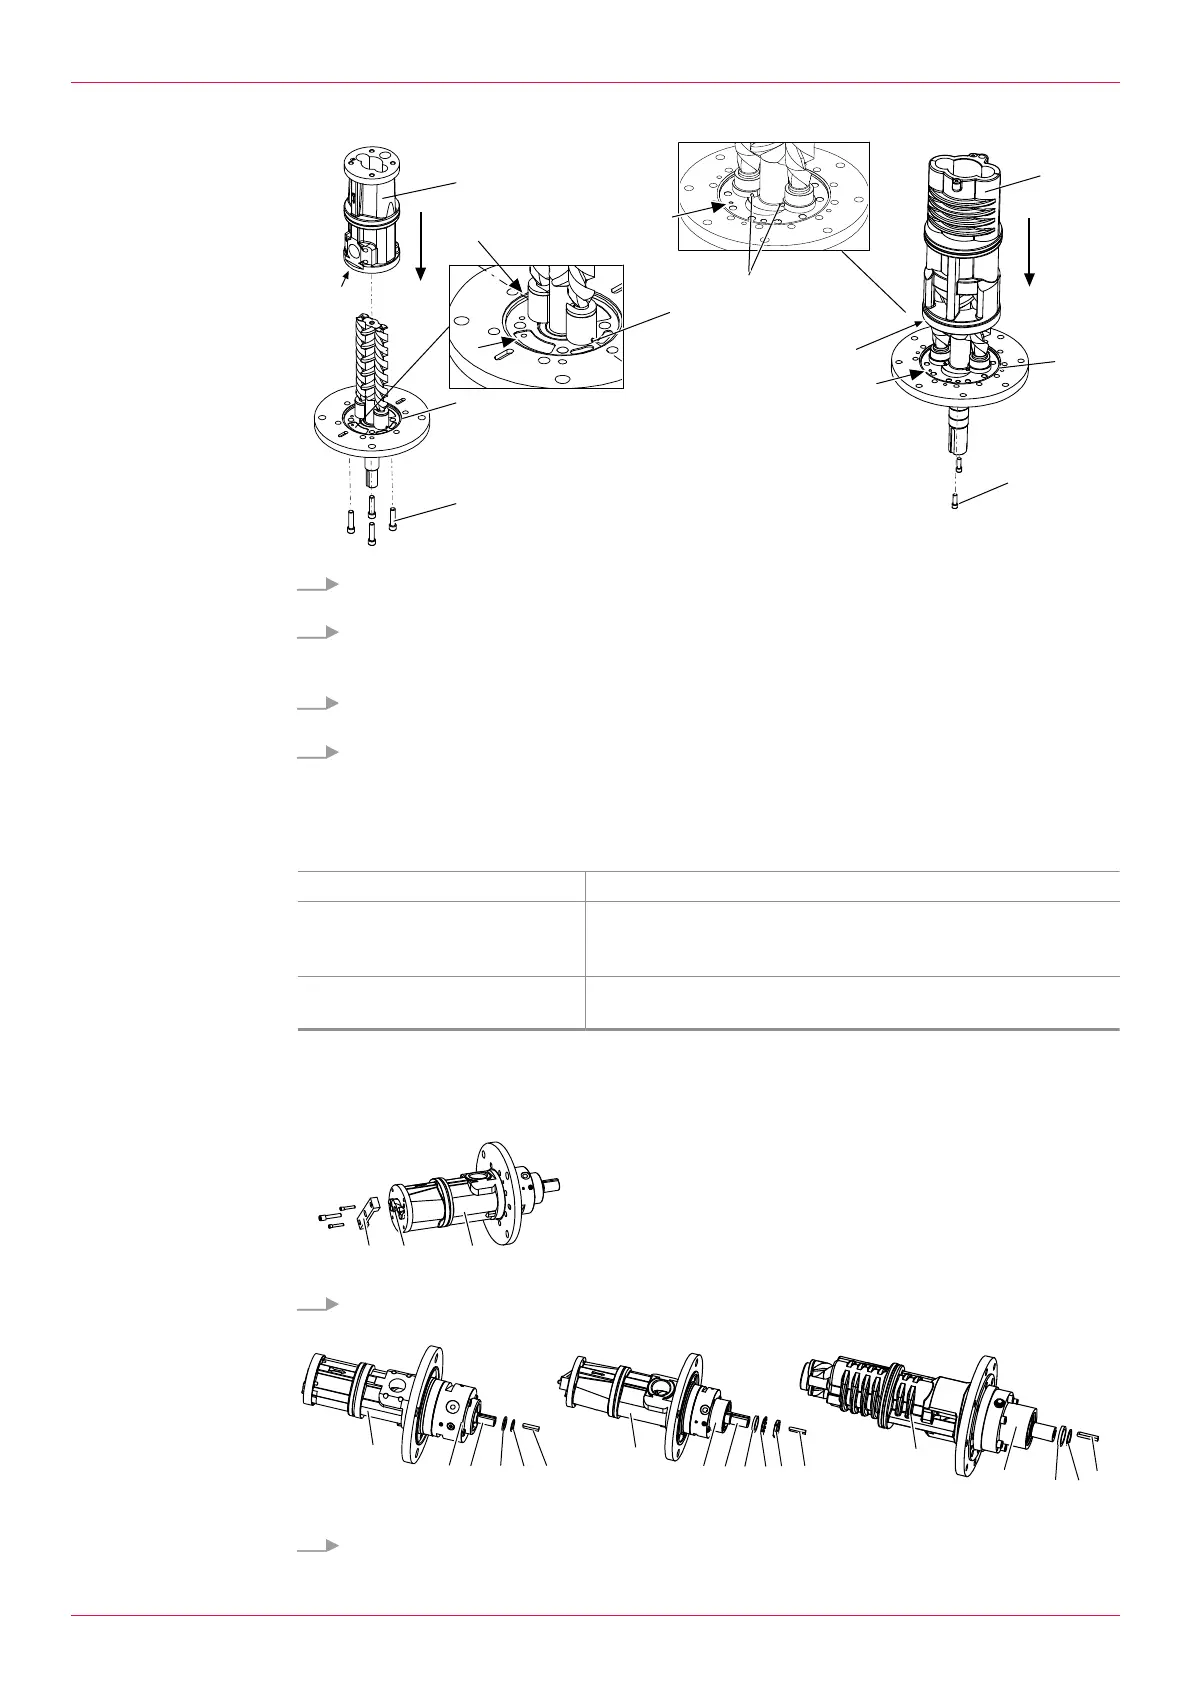
9. Place the idle screws left and right of the main screw so that the fitting surfaces of the bearing
bushes contact the shaft of the main screw. Observe the alignment of the positioning pins16.
10. Attention: Ensure that the adapter sleeve18/straight pin19 is not damaged when mounting the
cartridge housing. Take the hole17 into account.
Slide the cartridge housing1 over the pre-mounted idle screws and main screw.
11. Size15–660, 880 (figure left): Tighten the socket screws6 with torque.
Size2250–3550 (figure right): Tighten the socket screws7 with torque.
12. Mount and lightly grease the O-ring4 in the flange cover.
12.7 Replacing the mechanical seal and ball bearing (outer bearing)
12.7.1 Removing the mechanical seal and ball bearing
Personnel qualification: o Fitter
Personal protective equipment: o Work clothing
o Protective gloves
o Safety boots
Aids: o Tool set, mechanical seal Ä Spare parts,Page56
o Extractor
Requirement:
ü Pump unit disconnected from the electrical power supply, deenergized and secured against being
switched back on
ü Coupling removed
1. Secure the position of the main screw1 in the pump housing2. To do so, mount the main screw
stop for the outer bearingF to the pump housing.
2. Remove the feather key7 from the main screw1.
Operating instructions
OIC 18en-GB Edition 2020-01
41


 To Next Page