15 Accessories
15.2 Overflow valve
It therefore has to be ensured through a safety valve at the system that the maximum operating pres-
sure always lies under the opening pressure of the overflow valve.
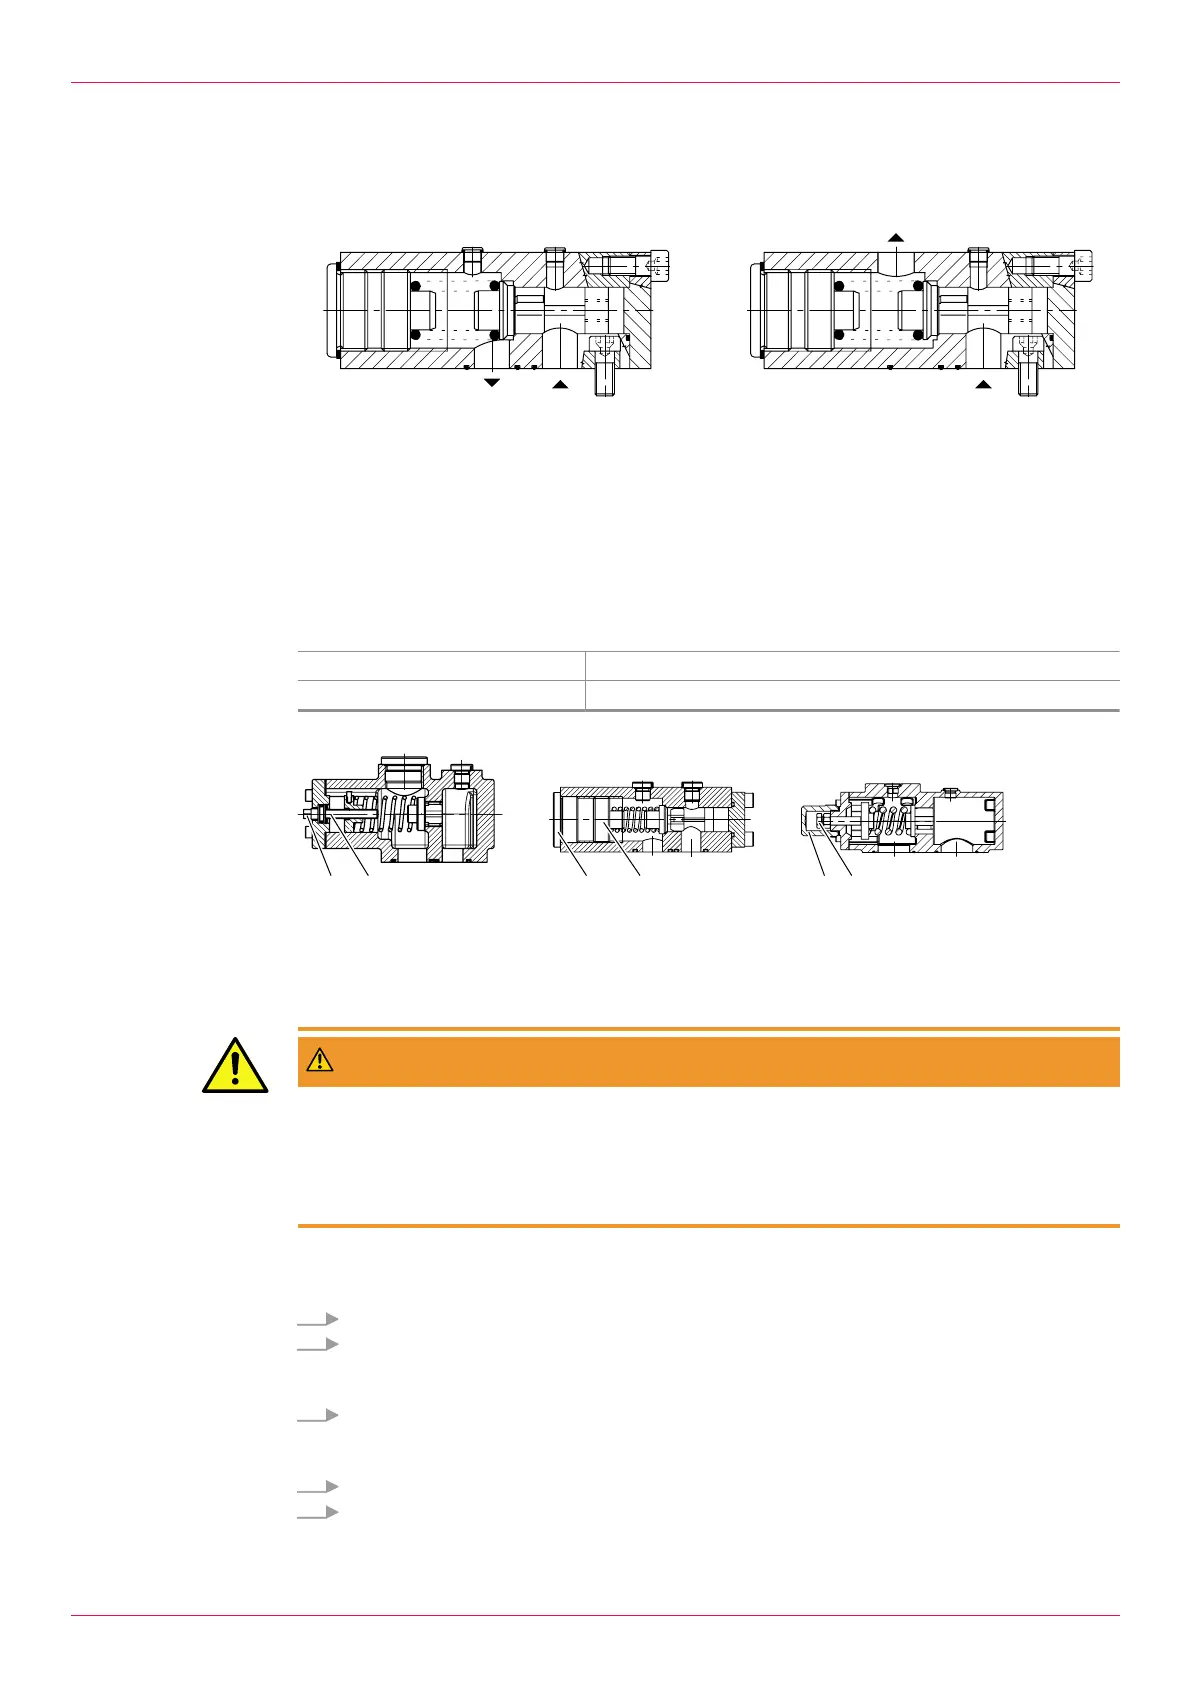
The overflow valve is offered as a circulation valve (figure left) or as a non-return valve (figure right).
Notice o A function test of the overflow valve at least every 5 years is essential for the safe operation Ä Dur-
ing operation,Page26.
o Scope and if necessary shorter test intervals must be specified by the operator-owner in accord-
ance with the requirements and national provisions (for example Austrian Ordinance of Safety and
Health (BetrSichV)).
o The first function test must take place directly after the commissioning.
o After longer downtimes (> 4 weeks) the function of the overflow valve must be tested again.
15.2.1 Adjusting the overflow valve
Personnel qualification: o Fitter
Aids: o Hexagon key
Notice The opening pressure of the overflow valve is set to 110% of the differential pressure in the factory.
Fig.16: Overflow valve
1 Screw plug/cap
2 Adjusting screw
WARNING
Risk of injury through emitted pumped liquid.
Pumped liquids can be hot, poisonous, combustible and caustic.
► Wear personal protective clothing during all the work. Ensure face protection.
► Collect any discharging pumped liquid safely and dispose of it in an environmentally compatible
manner in accordance with the applicable local regulations.
Requirement:
ü Pressure-side pressure gauge installed
1. Switch on the pump and remove the screw plug/cap1 of the overflow valve.
2. Increase the supply pressure step-by-step to check the opening pressure of the overflow valve.
Keep an eye on the pressure gauge and make sure that the operating limits are observed.
ð The opening pressure is reached, when the displayed pressure falls.
3. Turn the adjusting screw2 to set the opening pressure:
Turning clockwise: Increase the opening pressure
Turning counter-clockwise: Reduce the opening pressure
4. Repeat Steps 2 and 3 until the desired opening pressure is reached.
5. Tighten the screw plug/cap1 again.
Operating instructions
OIC 18en-GB Edition 2020-01
55


 To Next Page