Connecting KC-Virtual Brain1
Always switch off the power to each device before connecting it to your KC-Virtual Brain1.
After connecting your KC-Virtual Brain1, connect its power and then switch on the power to
each device.
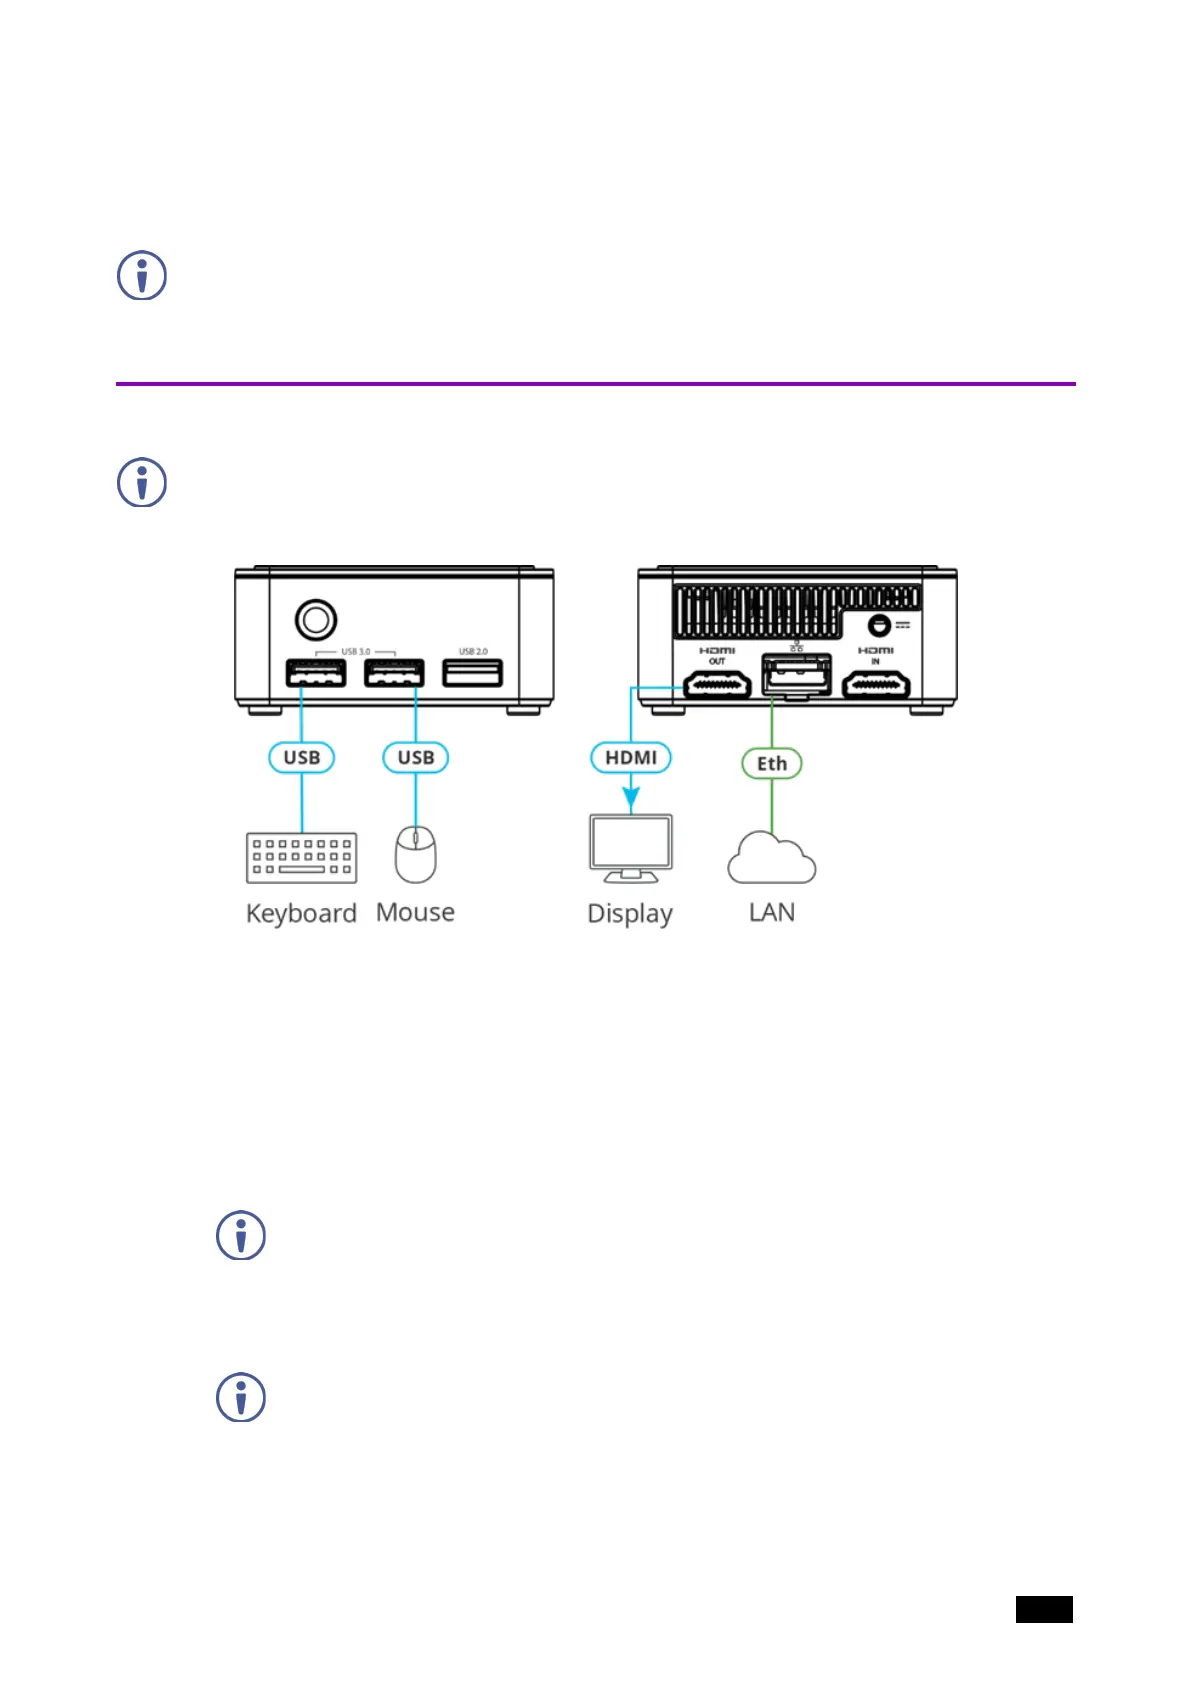
Connecting Device
For illustration purposes, the diagram shows connections for KC-Virtual Brain1, except for
the HDMI IN connector.
To connect the KC-Virtual Brain1 as illustrated above (numbers in brackets refer to the
diagram in Defining KC-Virtual Brain1 on page 5):
1. Connect a Local Area Network (LAN) cable to the LAN RJ-45 Connector (2) for
connection to your network.
2. KC-Virtual Brain1 can be controlled from a browser connected to the same network.
Optional: To control the Brain from the local display, connect an HDMI display to the
HDMI OUT Connector (5) and a keyboard and mouse to the USB Connectors (5) and
(6).
When a display is connected to the KC-Virtual Brain1, the device’s IP address is
displayed at the bottom of the screen.
3. Connect the 12V DC power adapter to the Power Connector(4) and plug it into the mains
electricity.
Do not turn the device on before connecting the LAN port to the network.
KC-Virtual Brain1 is connected.
Kramer Electronics Ltd.
KC-Virtual Brain1 - Connecting KC-Virtual Brain1 7