PT-871/2-KIT, PT-871/2xr-KIT, WP-871xr, WP-872xr, PT-871xr, PT-872xr – Connecting Device
Always switch off the power to each external device before connecting it to your PT-871/2-
KIT, PT-871/2xr-KIT, WP-871xr, WP-872xr, PT-871xr, PT-872xr. After connecting your PT-
871/2-KIT, PT-871/2xr-KIT, WP-871xr, WP-872xr, PT-871xr, PT-872xr, connect its power
and then switch on the power to each device.
We highly recommend using only Kramer UNIKAT cables with these products. If using 3
rd
party shielded CAT-6A cables, both ends of the shield must be soldered to the connectors for
the products to function properly. Do not use any jumpers, unshielded wall plates or mid-span
cable connections. These extenders are not compatible with HDBaseT technologies. Prior to
signal extension, ensure that the extension line cable is lying straight and not coiled.
Connecting PT-871/2-KIT, PT-871/2xr-KIT, PT-871xr,
PT-872xr
For illustrative purposes, the figure below shows PT-871/2xr-KIT, but the same connections
apply to PT-871/2-KIT.
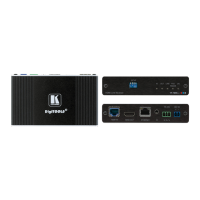
Figure 9: Connecting to PT-871/2xr-KIT
To connect PT-871/2-KIT, PT-871/2xr-KIT, PT-871xr, and PT-872xr as illustrated in
Figure 9:
1. Connect the HDMI video source to the HDMI IN Connector on the transmitter.
2. Connect the DGKat2 OUT RJ-45 Connector on the transmitter to the DGKat2 IN
RJ-45 Connector on the receiver using a DGKat 2.0 cable.
3. Connect the HDMI video acceptor to the HDMI OUT Connector on the receiver.
4. Connect the power adapter to either the transmitter or receiver.
Each device provides power to its counterpart via DGKat 2.0. Each device can
provide or accept power over cable (PoC) via DGKat 2.0.
We recommend that you use only the power cord that is supplied with this device.
 Loading...