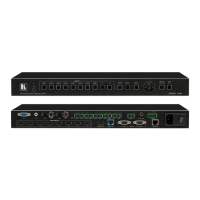
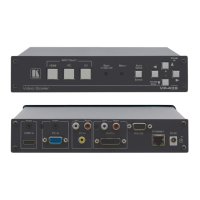
VP-551X – Defining VP-551X 4K Presentation Matrix Switcher Scaler
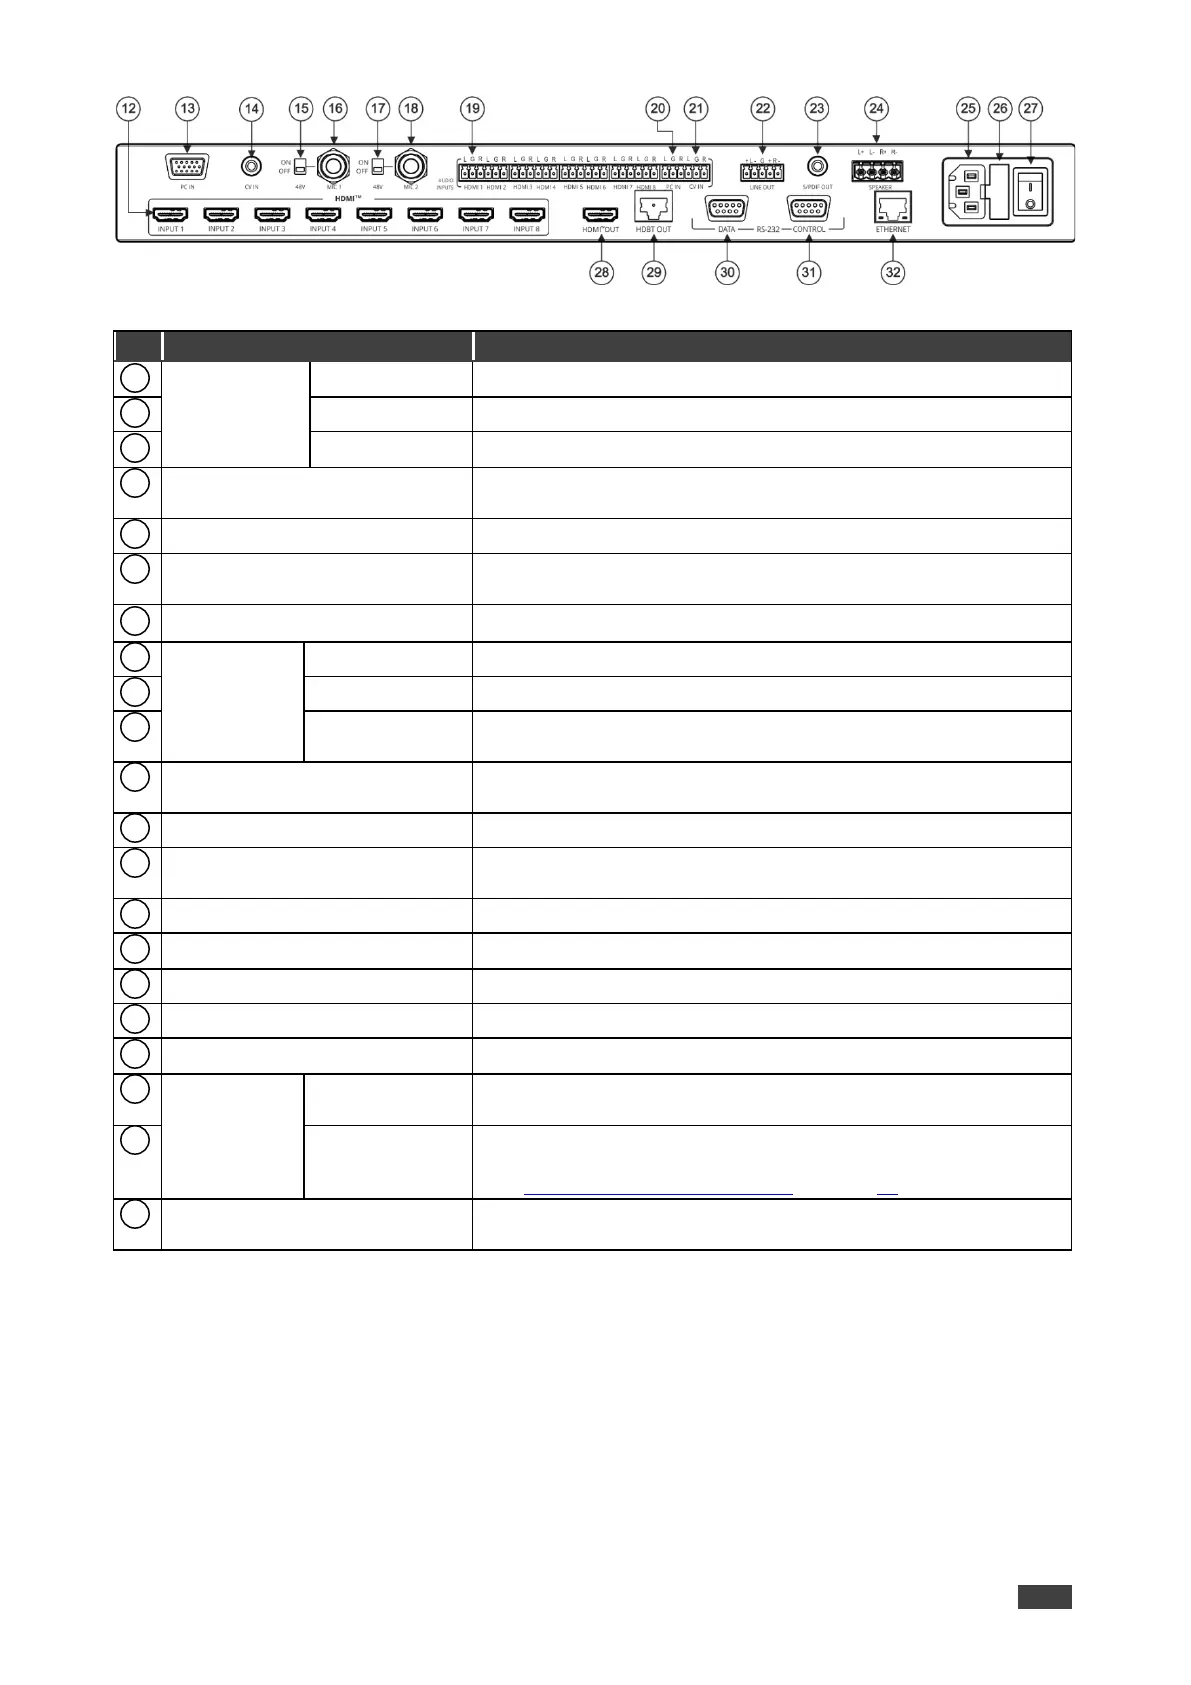
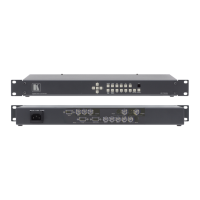
Figure 2: VP-551X 4K Presentation Matrix Switcher Scaler Rear Panel
Connect to an HDMI source (from INPUT 1 to INPUT 8).
Connect to a computer graphics source.
Connect to a composite video source.
Move up (ON) to select phantom power for a condenser type
microphone; down (OFF) to select a dynamic type microphone.
Connect to the microphone source 1.
Move up (ON) to select phantom power for a condenser type
microphone; down (OFF) to select a dynamic type microphone.
Connect to the microphone source 2.
AUDIO INPUT
Unbalanced
Stereo
Terminal
Blocks
Connect to an analog audio HDMI source (from 1 to 8).
Connect to an analog audio computer graphics source.
Connect to an analog audio composite video source.
LINE OUT Balanced Stereo 5-pin
Terminal Block Connector
Connect to a balanced stereo analog audio acceptor.
Connect to a digital audio acceptor.
SPEAKER 4-pin Terminal Block
Connector
Connect to a pair of loudspeakers.
Connect the mains power cord.
Fuse for protecting the device.
Switch for turning the unit ON or OFF.
Connect to the HDMI acceptor.
Connect to an HDBaseT receiver.
RS-232 9-pin
D-sub
Connector
Connect to a PC or controller to tunnel RS-232 via HDBT OUT or
connect to the output display to control it.
Connect to a PC or remote controller to control VP-551X or
connect to a device which you want to control via the VP-551X
(see Controlling an External Device on page 38).
Connects to the PC or other Serial Controller through computer
networking.