3
INSTALLATION
14
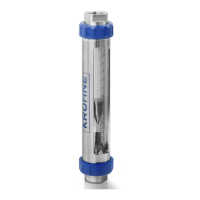
VA40 - VA45
www.krohne.com 08/2015 - 4000424402 - MA VA40-45 R04 en
3.3 Installation condtitions
3.4 Transport locks
Plastic rods are fitted as transport locks to protect the float during transportation. These need to
be removed before start-up:
• F
FF
F - Flange version DN15/DN25
Remove yellow plastic cap from upper flange and remove fixing rod from the glass.
• F
FF
F - Flange version DN40/DN50
Cut through the cable tie and remove cap. Remove fixing rod from the glass.
• V
VV
V - Screw version
Unscrew union nut and remove yellow plastic cap from the screw connection.Remove fixing
rod. When assembling the meter, tighten the union nuts with strap wrench. Make sure the O-
ring is positioned correctly!
• S
SS
S - Tube socket
Unscrew union nut and remove yellow plastic cap from the screw connection.Remove fixing
rod. When assembling the meter, tighten the union nuts with strap wrench. Make sure the O-
ring is positioned correctly!
• A
AA
A - Aseptic
the same as tube socket
CAUTION!
When installing the device in the piping, the following points must be observed:
•
The variable area flowmeter must be installed vertically (measuring principle). Flow direction
from bottom to top. For installation recommendations please refer also to VDI/VDE 3513
Sheet 3.
•
Before connecting, blow or flush out the pipes leading to the device.
•
Pipes for gas flow need to be dried before the device is installed.
•
Use connectors suitable for the particular device version.
•
Align the pipes centrically with the connection bores on the measuring device so they are free
of stresses.
•
If necessary, support the pipeline to reduce vibrations being transmitted to the measuring
device.
•
Do not lay signal cables directly next to cables for the power supply.