Do you have a question about the KTM 125 EXC 2015 and is the answer not in the manual?
Explains the meaning of specific symbols used within the manual.
Explains the typographical formats used in the document.
Details the initial unpacking and preparation steps for the motorcycle.
Instructions for safely lifting the motorcycle using a dedicated lift stand.
Instructions for safely lowering the motorcycle from the lift stand.
Procedure for removing the motorcycle seat.
Procedure for installing the motorcycle seat correctly.
Step-by-step guide on how to remove the fuel tank.
Step-by-step guide on how to install the fuel tank.
Instructions for installing the front or rear shock absorber assembly.
Detailed steps for correctly installing the front wheel.
Procedures and warnings for recharging the motorcycle battery.
Steps for correctly installing the battery into the motorcycle.
Steps for mounting the front fender onto the motorcycle.
Instructions for reattaching the headlight mask and headlight assembly.
Procedure to verify the correct aim and position of the headlight beam.
Guidance on how to adjust the headlight's beam distance.
How to open the fuel filler cap safely.
How to close the fuel filler cap securely.
Instructions and safety precautions for refueling the motorcycle.
How to change the unit of distance measurement on the display.
How to configure various display modes for the speedometer.
Steps to set the motorcycle's internal clock.
Specifies the required 2-stroke engine oil and its classification.
Details the recommended type of unleaded fuel for the motorcycle.
Specifies the fuel-oil mixture ratio and compatible oils.
Recommends a specific type of grease for lubrication.
Explains the JASO FD classification for 2-stroke engine oil.
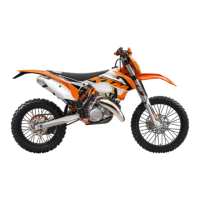
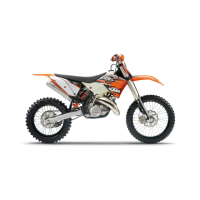
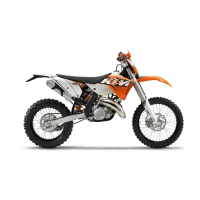
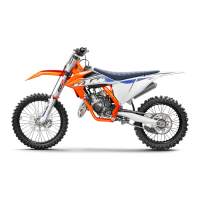
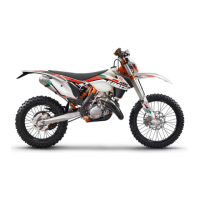
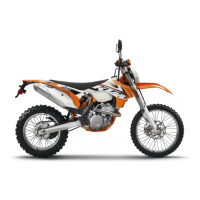
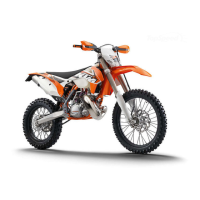
This document provides comprehensive setup instructions for various KTM EXC and XC-W models from 2015, including 125 EXC, 200 EXC, 200 XC-W, 250 EXC, 250 XC-W, 300 EXC, and 300 XC-W, with specific variations for EU, AU, US, BR, and Six Days editions. It is intended for trained mechanics to perform pre-delivery inspection and setup before the vehicle is handed over to the customer.
The manual begins with an introduction emphasizing the importance of reading the instructions thoroughly and printing the current PDI form from KTM DEALER.NET. It states that the instructions correspond to the latest state of the series and that KTM reserves the right to make technical changes. It also clarifies that general workshop methods and safety rules are not detailed, assuming the work is performed by a qualified mechanic. All specifications are non-binding, and KTM disclaims liability for delivery options, deviations from illustrations, misprints, and other errors. The document is copyrighted by KTM-Sportmotorcycle AG.
The "Means of Representation" section explains the symbols and typographical formats used throughout the manual. Symbols include a checkmark for expected reactions, an 'X' for unexpected reactions, an arrow for page references, an 'i' for additional information or tips, a double arrow for test results, 'V' for voltage measurement, 'A' for current measurement, and the omega symbol for resistance measurement. Formats distinguish between proprietary names, protected names, and trademarks.
The "Setup" section details the unpacking and initial setup of the vehicle. It instructs on removing packaging, checking the scope of supply against the packing list, and having a lift stand available. An assistant is recommended to prevent the motorcycle from falling over during these steps, and protective film should remain on the vehicle until setup is complete. The process involves carefully loosening and removing the tension belt from the footrest mount, taking the vehicle off the palette, positioning it on a lift stand, and checking for transport damage. For Package 12 models, it also includes installing the shock absorber.
Further setup steps involve routing the clutch line, positioning the fork legs, and tightening the triple clamp screws. Specific torque values are provided for different models (EXC, XC-W, and Six Days). Information is given on the milled grooves on the fork legs and the positioning of bleeder screws. For Six Days models, details on rebound and compression damping adjusters are included. The manual then guides the user through removing and repositioning handlebar clamps and supports, ensuring correct cable and wiring routing, and tightening handlebar clamp screws. It also covers positioning the speedometer and connector board.
The manual provides detailed instructions for installing controls on both sides of the handlebar, with figures illustrating cable routing. For all EXC models, it describes removing and installing the fuel tank, connecting the turn signal wiring harness, positioning the turn signal indicator lamp, securing the turn signal relay, and mounting the turn signals. It specifies connecting the right turn signal to the green-marked connector and the left turn signal to the red-marked connector. For EXC EU/AU and 300 EXC BR models, it includes mounting the turn signal switch. For all XC-W models, instructions cover connecting the pull switch, installing the front fender, mounting the fuel tank breather, installing the front wheel, and refitting the headlight mask.
Additional setup steps include mounting the handlebar cushion and installing the footrests with springs, pins, washers, and cotter pins. For all EXC models, it covers mounting the license plate holder with the lamp, turn signals, and reflector, and connecting the electrical components to the appropriately colored connectors.
The "Work" section covers various tasks, starting with raising and removing the motorcycle from the lift stand, emphasizing safety precautions against falling over. It describes how to remove and mount the seat, including securing it to the fuel tank. The process of removing and installing the fuel tank is detailed, with warnings about fuel flammability and toxicity. It instructs on turning off the fuel tap, disconnecting the fuel hose, removing screws, and detaching spoilers. For specific models, it includes handling the horn and its bracket. Installing the fuel tank involves checking throttle cable routing, positioning the tank and spoilers, and connecting the fuel tank vent hose and fuel hose.
Installing the shock absorber is described for 125/200 models and 250/300 models, with instructions on pushing aside the splash protector and tightening the screws. Torque values and the use of Loctite are specified. A note warns against lubricating the Teflon-coated heim joint to avoid reducing its service life.
Installing the front wheel involves checking wheel bearings, cleaning and greasing shaft seal rings and bearing surfaces, inserting spacers, lifting the wheel into the fork, inserting the wheel spindle, and tightening screws. It also includes operating the hand brake lever to position the brake linings and pushing down on the fork to align the fork legs.
Recharging the battery section (for 200/250/300 models) provides warnings about battery acid and gases, emphasizing safety precautions like wearing protective clothing and goggles, avoiding contact, and charging in well-ventilated areas. It also includes environmental hazard warnings regarding proper disposal of batteries and hazardous substances. The main work involves filling and recharging the battery, connecting a battery charger, and ensuring the battery is not overcharged.
Installing the battery (for 200/250/300 models) describes inserting the battery into the compartment, attaching the rubber band, positioning and tightening positive and negative cables, and ensuring contact disks are correctly mounted.
Installing the front fender involves positioning the fender and tightening screws. Refitting the headlight mask with the headlight includes connecting the electric plug connector, fixing the mask with a rubber band, and positioning the brake line and wiring harness. Checking and adjusting the headlight setting involves positioning the vehicle, marking the wall, and ensuring the light-dark boundary is correct.
The manual also covers opening and closing the fuel filler cap, refueling, setting kilometers or miles on the speedometer, and setting the clock. For speedometer settings, it explains how to navigate the setup menu, activate/deactivate functions, and store settings. For clock settings, it details how to adjust hours and segments.
The "Technical Data - Tightening Torques for Chassis" section provides a comprehensive list of screws and nuts with their respective torque values and, where applicable, specifies the use of Loctite. This includes components like spoke nipples, chassis screws, battery terminals, shock absorber adjusting rings, various triple clamp screws, handlebar clamps, footrest lever stops, sprocket screws, and wheel spindles.
The "Substances" section lists recommended engine oil (2-stroke), super unleaded fuel, and the mixture ratio for fuel with 2-stroke engine oil. It specifies standards like JASO FD and DIN EN 228, and provides guidelines on fuel quality and ethanol content. It warns against using methanol-containing fuels.
The "Auxiliary Substances" section recommends Motorex® Bike Grease 2000 for long-life grease.
Finally, the "Standards" section describes JASO FD as a classification for 2-stroke engine oil developed for extreme racing demands, highlighting its synthetic esters and additives for superb combustion.
| Engine Type | Single-cylinder, 2-stroke |
|---|---|
| Displacement | 124.8 cm³ |
| Bore x Stroke | 54 x 54.5 mm |
| Transmission | 6-speed |
| Starter | Kickstarter |
| Front Brake | Disc brake |
| Rear Brake | Disc brake |
| Seat Height | 960 mm |
| Fuel System | Carburetor |
| Front Suspension | WP USD 48 mm |
| Rear Suspension | WP PDS |