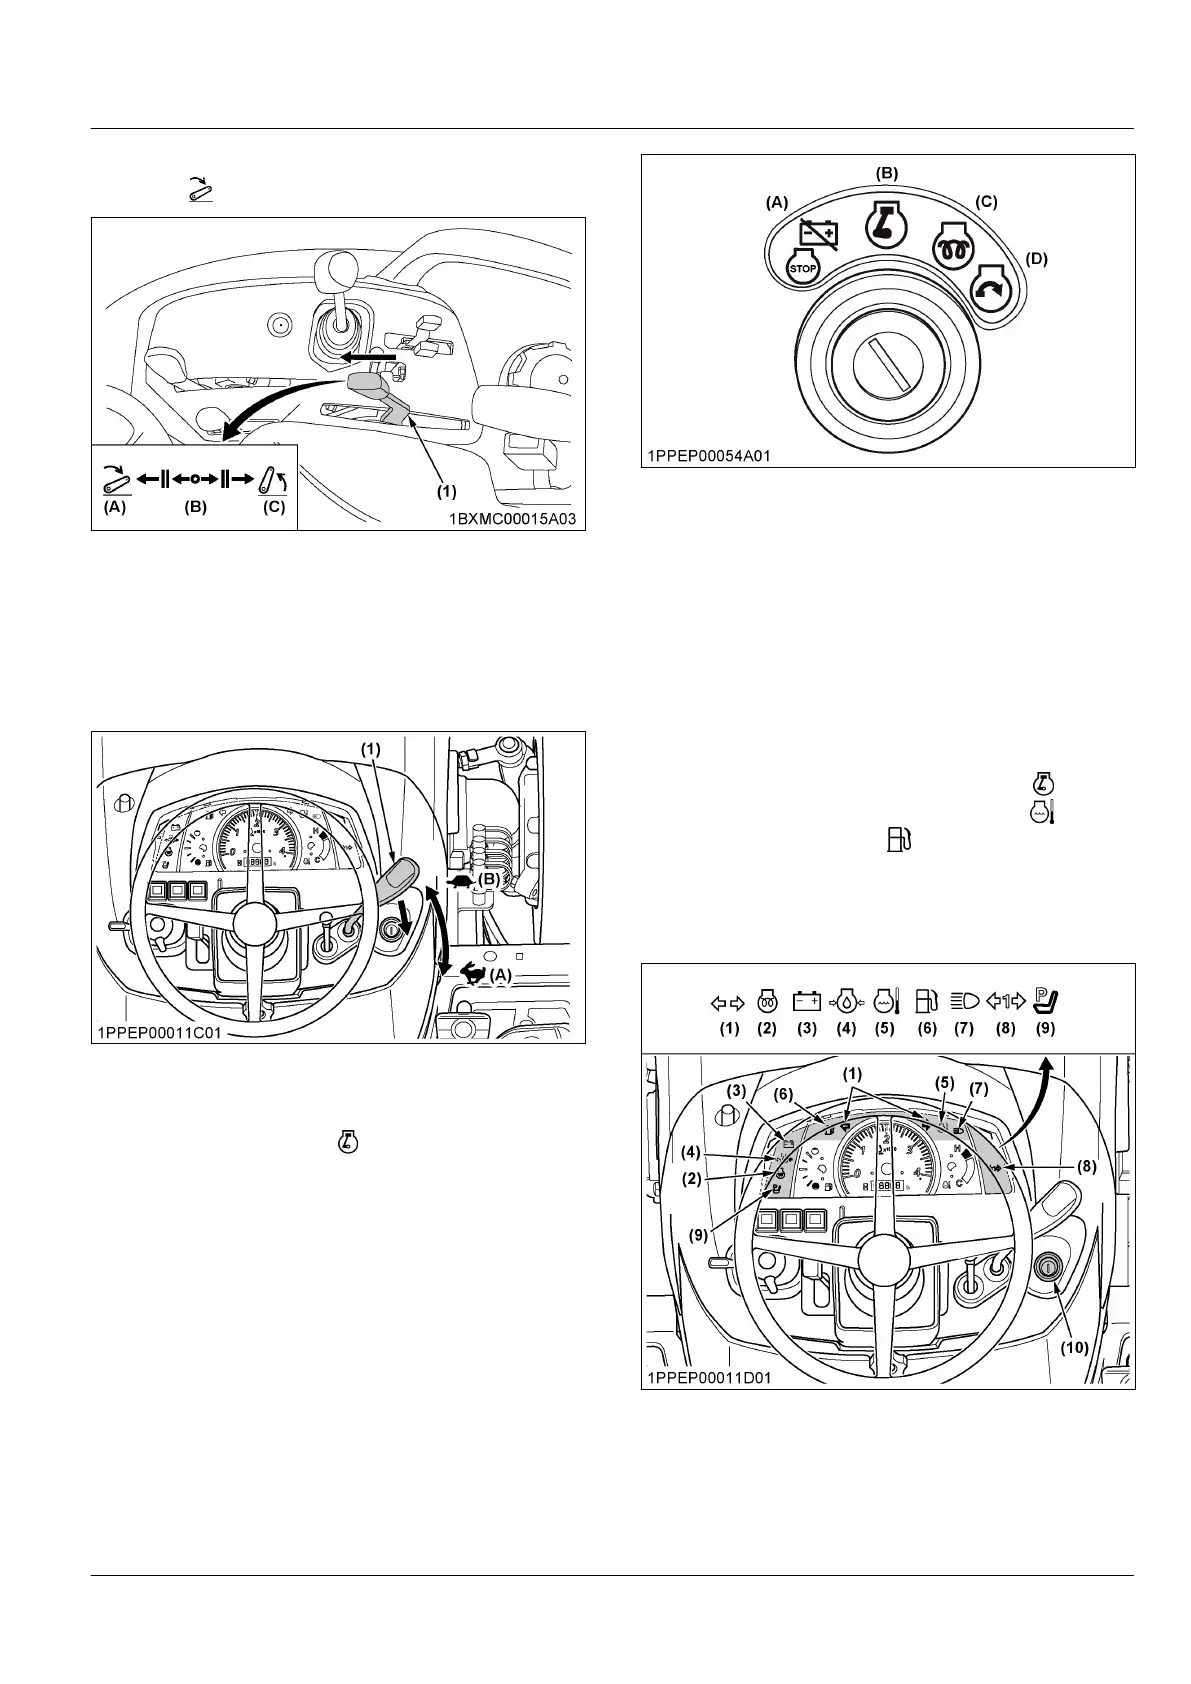
7. Move the hydraulic-control-lever forward (lowered
(down) position) to lower the implement.
(1) Hydraulic control lever
(A) Lowered
(B) Neutral position
(C) Raised
Check that the implement is down at the lowest
position after moving the hydraulic-control-lever
forward.
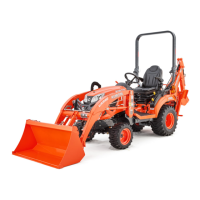
8. Set the hand-accelerator-lever to about 1/2 way.
(1) Hand accelerator lever
(A) Increase
(B) Decrease
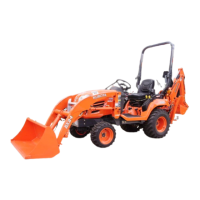
9. Insert the starter key into the key switch and turn
the starter key to the on position.
(A) Off
(B) On
(C) Preheat
(D) Start
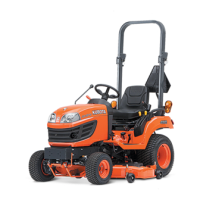
10. Check the warning-indicator-lamps in the Easy
Checker
™
.
IMPORTANT :
• Daily checks with the Easy Checker
™
only
are not sufficient. Never fail to conduct daily
checks carefully according to Checking the
gauges, the meters, and the Easy Checker
™
on page 89.
When the starter key is turned to the on
position,
the coolant-temperature-indicator-lamp and the
low-fuel-indicator-lamp only should come on
and the needles of the fuel gauge, the coolant-
temperature-gauge, and the tachometer move up
and return.
(See Easy Checker
™
on page 53)
(1) Direction indicator/hazard
light
(2) Preheat
(3) Electrical charge
(4) Engine oil pressure
(5) Coolant temperature indica-
tor
(6) Low fuel indicator
(7) High beam
(8) Trailer
(9) Parking buzzer lamp
(10) Key switch
STARTING THE ENGINE OPERATING THE ENGINE