2NM/2NX/2NY/2NZ/2P0/2P6
2-3-14
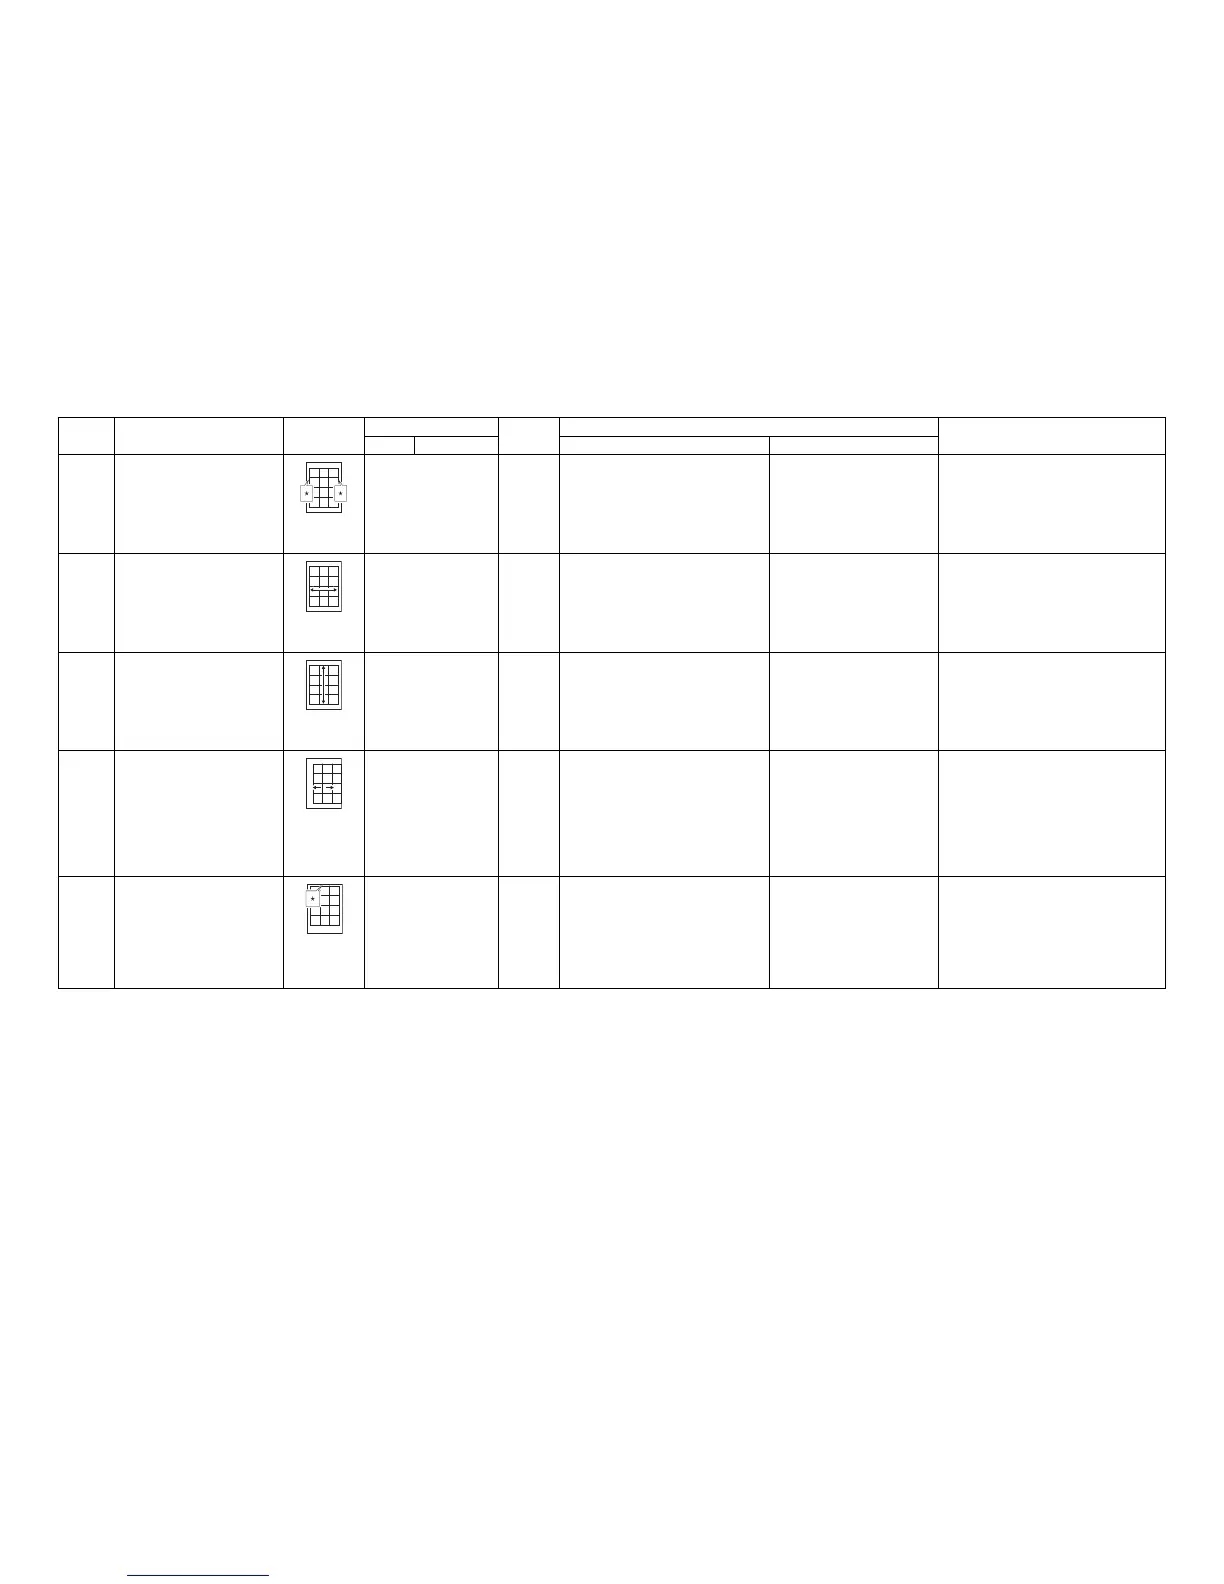
7 Adjusting the left and right margins
(printing adjustment)
LSU illumination start/end timing
U402 A Margin
C Margin
P.1-3-51 1. Press the start key.
2. Press the system menu key.
3. Press the start key.
(output a test pattern)
4. Press the system menu key.
5. Select [A Margin] or [C Margin] to be
adjusted.
1. Change the setting value using
the cursor +/- or numeric keys.
2. Press the start key. The value
is set.
Completion: Press the stop key.
A margin will become large if a preset value is
raised.
(Original:test pattern)
8 Adjusting magnification of the
scanner in the main scanning direc-
tion
(scanning adjustment)
Data processing
U065
U070
Main Scan
Convey Speed
P.1-3-27
P.1-3-32
1. Press the start key.
2. Press the system menu key.
3. Set aoriginal and then press the start
key. (output a test copy)
4. Press the system menu key.
5. Select [Main Scan] to be adjusted.
1. Change the setting value using
the cursor +/- or numeric keys.
2. Press the start key. The value
is set.
Completion: Press the stop key.
U065: When using on the contact glass
If a preset value is raised, a picture will spread.
U070: When using document processor
A picture will become long if a preset value is
raised.
(Original:test pattern)
9 Adjusting magnification of the
scanner in the auxiliary scanning
direction
(scanning adjustment)
Original scanning speed
U065 Sub Scan P.1-3-27 1. Press the start key.
2. Press the system menu key.
3. Set aoriginal and then press the start
key. (output a test copy)
4. Press the system menu key.
5. Select [Sub Scan] to be adjusted.
1. Change the setting value using
the cursor +/- or numeric keys.
2. Press the start key. The value
is set.
Completion: Press the stop key.
U065: When using on the contact glass
If a preset value is raised, a picture will spread.
(Original:test pattern)
10 Adjusting the center line
(scanning adjustment)
Adjusting the original scan data
(image adjustment)
U067
U072
Front
Front
Back
P.1-3-30
P.1-3-35
1. Press the start key.
2. Press the system menu key.
3. Set aoriginal and then press the start
key. (output a test copy)
4. Press the system menu key.
5. Select the item to be adjusted.
U067: [Front]
U072: [Front] or [Back]
1. Change the setting value using
the cursor +/- or numeric keys.
2. Press the start key. The value
is set.
Completion: Press the stop key.
U067: When using on the contact glass
If a preset value is raised, a picture will move to
the left.
U072: When using document processor
Back adjustment selects [Back] at the time of
duplex mode.
If a preset value is raised, a picture will move to
the right.
(Original:test pattern)
11 Adjusting the leading edge registra-
tion
(scanning adjustment)
Original scan start timing
U066
U071
Front
Front Head
Back Head
P.1-3-29
P.1-3-33
1. Press the start key.
2. Press the system menu key.
3. Set aoriginal and then press the start
key. (output a test copy)
4. Press the system menu key.
5. Select the item to be adjusted.
U066: [Front]
U071: [Front Head] or [Back Head]
1. Change the setting value using
the cursor +/- or numeric keys.
2. Press the start key. The value
is set.
Completion: Press the stop key.
U066: When using on the contact glass
If a preset value is raised, a picture will move
forward.
U071: When using document processor
Back adjustment selects [Back Head] at the time
of duplex mode.If a preset value is raised, a pic-
ture will move forward.
(Original:test pattern)
Adjust-
ing order
Item Image
Maintenance mode
Page
Setting procedure
Remarks
Item No. Mode
Method Setting
 Loading...