1
12
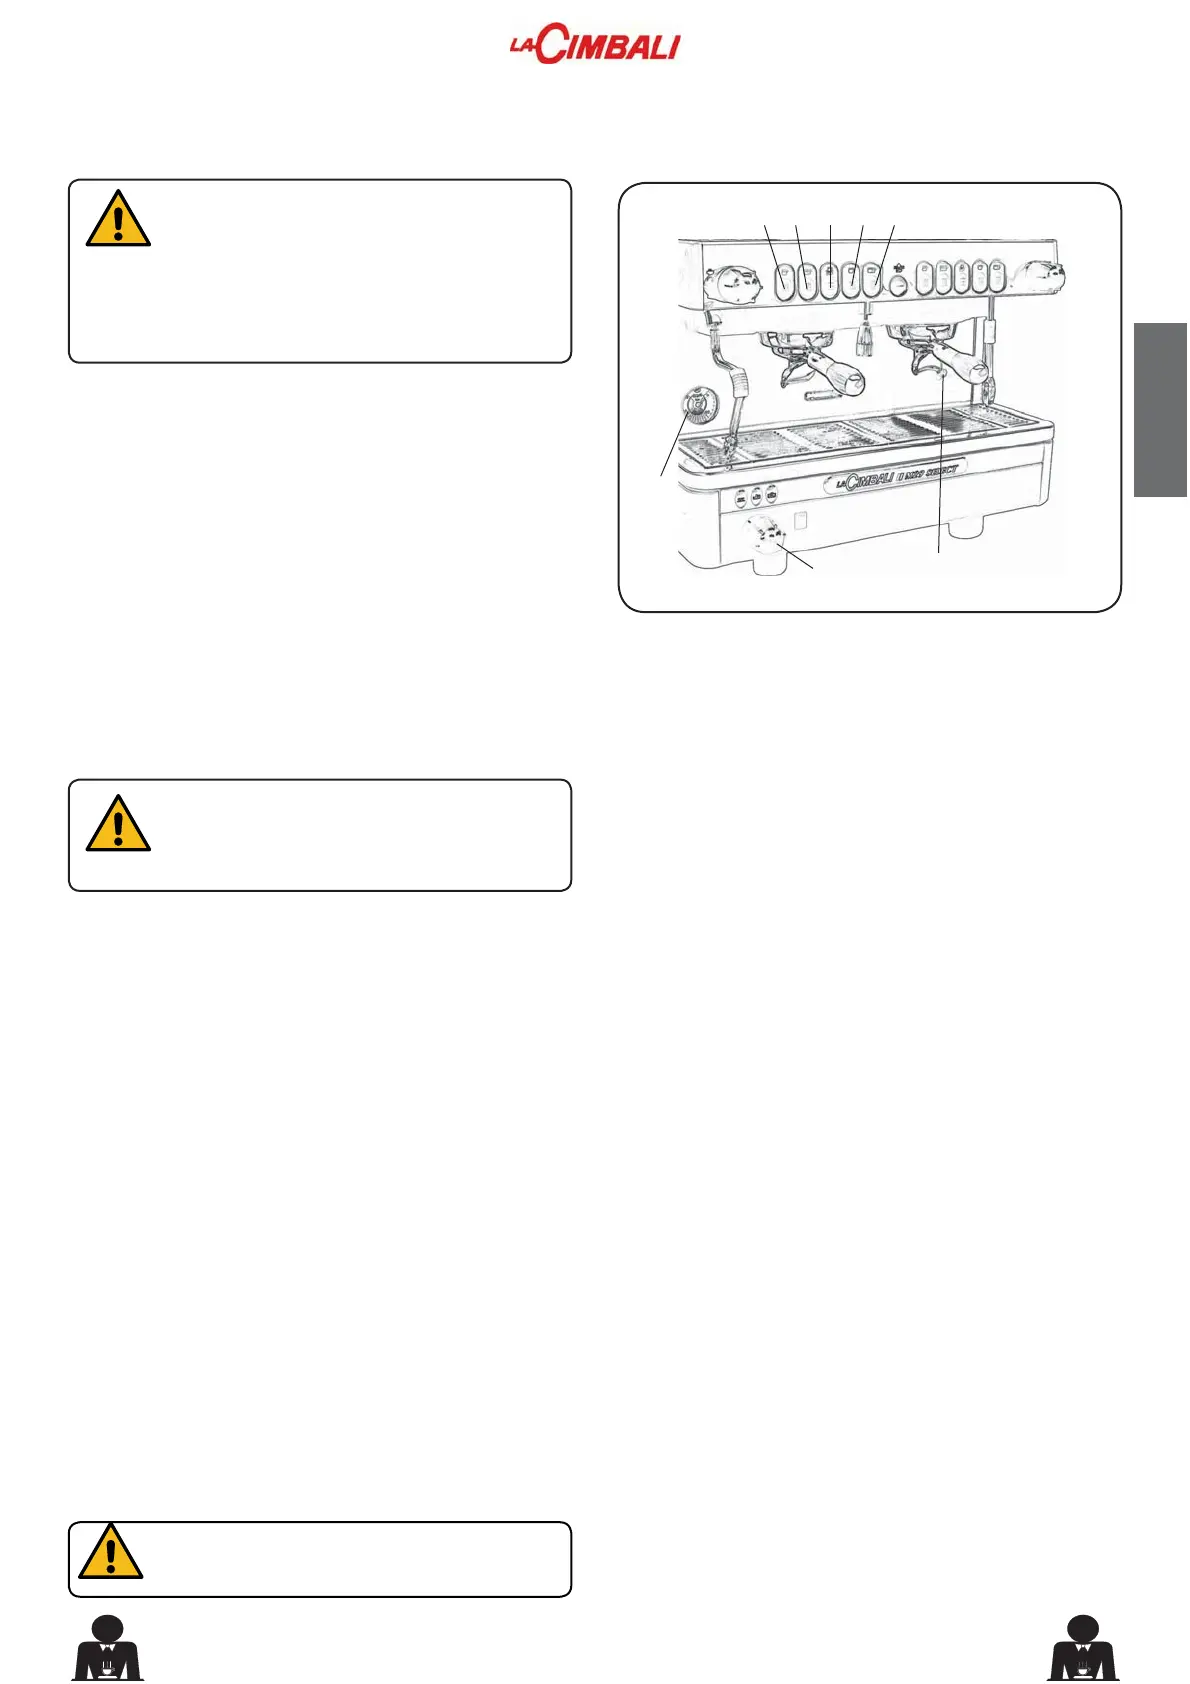
16 17 18 1920
14
English
9 EN
USE
10. Daily Switch-On
11. Cup-Warmer (where is present)
CAUTION: do not put any cloth on the cup-
warmer.
12. Heating phase
During heating, if one of the coffee dispensing switches
(16, 17, 18, 19 or 20) is pressed, the machine dispenses
a coffee at the temperature reached at the time.
Heating is completed when the boiler gauge indicator (14)
remains stable in the green area.
The machine is now ready to dispense coffee, steam and
hot water.
Place only coffee cups, cups and glasses to be used in
conjunction with the coffee machine on the cup-warming
plate.
Ensure that the coffee cups are completely drained before
placing them on the cup-warming plate.
No other objects shall be placed on the cup-warming plate.
Press the button (21) and check to see that the light turns on.
7RPDNHVXUHWKDWWKHGLVSHQVHUXQLWDQGWKH¿OWHUKROGHU
(10) are at similar temperatures, press the START-STOP
push-button (20) and let the machine dispense coffee for
a few seconds. Then press the START-STOP push-button
(20) to stop dispensing.
“Before using the machine make sure that:
the main electricity supply ON/OFF switch
is ON;
the water supply and water softener taps
are open.”
Turn the main switch (1) to position 1. The “machine ON”
indicator light (12) lights up.
If the water level in the boiler is below the minimum level,
WKHERLOHULV¿OOHGXSWRWKHRSWLPDOOHYHO
7XUQWKHPDLQ212))VZLWFK1) to position 2.
“Heating” now begins.
$WWKHHQGRIWKHGD\WXUQWKHPDFKLQH2))E\WXUQLQJWKH
PDLQ212))VZLWFK1WRSRVLWLRQ
13. Delivery of the coffee
5HPRYHWKH¿OWHUKROGHUHPSW\RXWDQ\FRIIHHJURXWVDQG
¿OOLWXSZLWKRUVHUYLQJVRIJURXQGFRIIHHGHSHQGLQJ
RQWKH¿OWHUKROGHUXVHG
3UHVVWKHJURXQGFRIIHHGRZQXQLIRUPO\LQWKH¿OWHUXVLQJ
the grinder/doser presser.
5HPRYHDQ\UHVLGXHVRIJURXQGFRIIHHIURPWKH¿OWHUULP
)LWDQGWLJKWHQWKH¿OWHUKROGHU10) on the coffee dispenser
unit, positioning the cup (or cups) under the nozzle (or
QR]]OHVRIWKH¿OWHUKROGHU10).
Press the coffee dispensing push button (16, 17, 18 or 19)
for the required serving; the machine will stop automatically.
Press the START-STOP push button (20) for continuous
dispensing.
Dispensing, whether for dosed servings or in the continuous
dispensing mode, can be interrupted at any time by
pressing the START-STOP push button (20).
'RQRWUHPRYH WKHFRIIHH ¿OWHU EHIRUHWKH
coffee dispensing has completed.