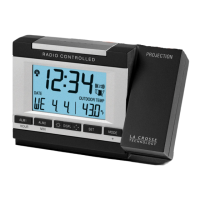
3. From –5h to –8h, a US map with the highlighted time zone will also be
displayed to the right of the time display.
-4h Atlantic Time
-5h Eastern Time (default setting)
-6h Central Time
-7h Mountain Time
-8h Pacific Time
-9h Alaskan Time
-10h Hawaiian Time
-11h, -12h Next two time zones West of HAW
0h Greenwich Mean Time
-1h, -2h, -3h Three time zones West of GMT
4. Press the “SET” button to confirm the time zone setting, and to advance to
DST (Daylight saving time) setting.
D. DST (DAYLIGHT SAVING TIME) SETTING
Note:
The DST default is “On”, meaning that the WWVB will automatically
change the time according to Daylight Saving Time in the spring and fall. For
areas that do not recognize DST changes (Arizona and parts of Indiana) turn
the DST “OFF”.
1. Hold down the “SET” button for 1 second (the selected time zone will
flash); press the “SET” button once more until “On” flashes in the lower left
and “DST” flashes in the upper right.
2. Press the “+” button to turn the DST off, as will be indicated by the display
of “OFF” in the time LCD.
3. Press the “SET” button to confirm the DST setting, and to advance to select
the length of the snooze.
E. ADJUSTABLE SNOOZE TIME
Note:
The snooze length can be adjusted from 1 minute to 59 minutes. This
duration refers to the length of time the alarm will be disabled when the
“SNOOZE” bar is pressed. If set to “0”, activating the snooze will turn off the
alarm for 24 hours.
1. Hold down the “SET” button for 1 second (the selected time zone will
flash), press the “SET” button 2 more times, until “Sno” appears in the
lower left and duration (“:10” default) flashes in the time LCD.
2. Press the “+” button to advance the snooze time from 0 (off ) to 59 minutes.
3. Press the “SET” button to confirm the snooze setting, and to advance to
manually set the time.
7