INSTRUCTIONS FOR THE INSTALLER 8
2.
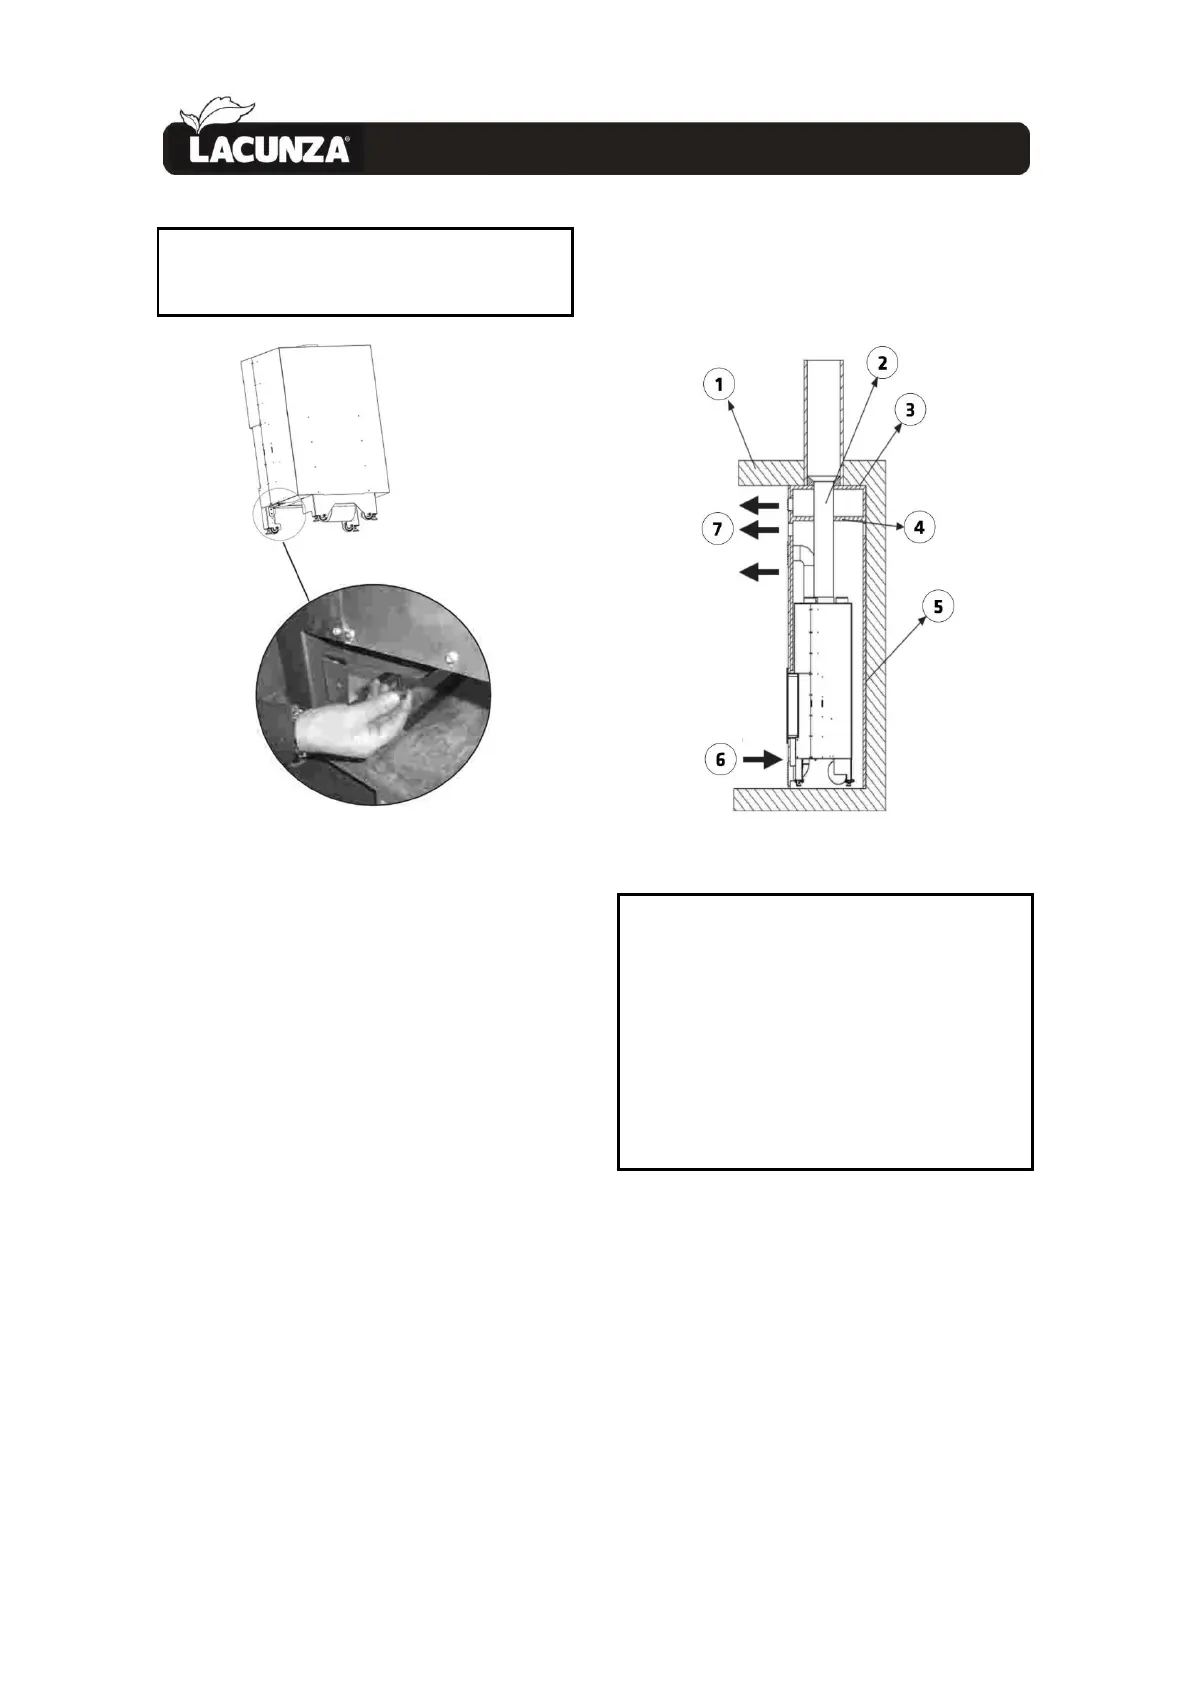
IMPORTANT: Remove the nut and bolt on
each side of the appliance before lowering
the guillotine door
Figure No.5 - Access to remove the bolts
securing the counterweights
2.3.4. Height adjustment and levelling the
appliance
The appliance must be perfectly level,
horizontally and vertically, both at the
front and on the sides (use a spirit level).
The appliance has adjustable legs with
which to adjust its height.
IMPORTANT! When it is level and
before encasing the appliance, check that
the guillotine door works properly; the
door rises and lowers smoothly and
without any friction or noise other than
that of correct operation of the guillotine
system.
2.3.5. Casing
Make sure that the material around the
appliance is not flammable or likely to
deteriorate as a result of heat (wallpaper,
carpet, plastic-based casing, Silestone,
etc.).
The image below gives an example of
how the appliance can be encased
properly:
Figure No.6 - Interior diagram of the casing
Key to casing diagram:
1 Ceiling
2 Flue
3 Incombustible material (Inner hood
insulation)
4 Insulating deflector made of
incombustible material
5 Wall
6 Fresh-air inlet (1,000 cm
2
)
7 Hot-air outlet (1,000 cm
2
)