8.
1.
2.
3.
4.
5.
6.
7.
9.
4mm
10.
49
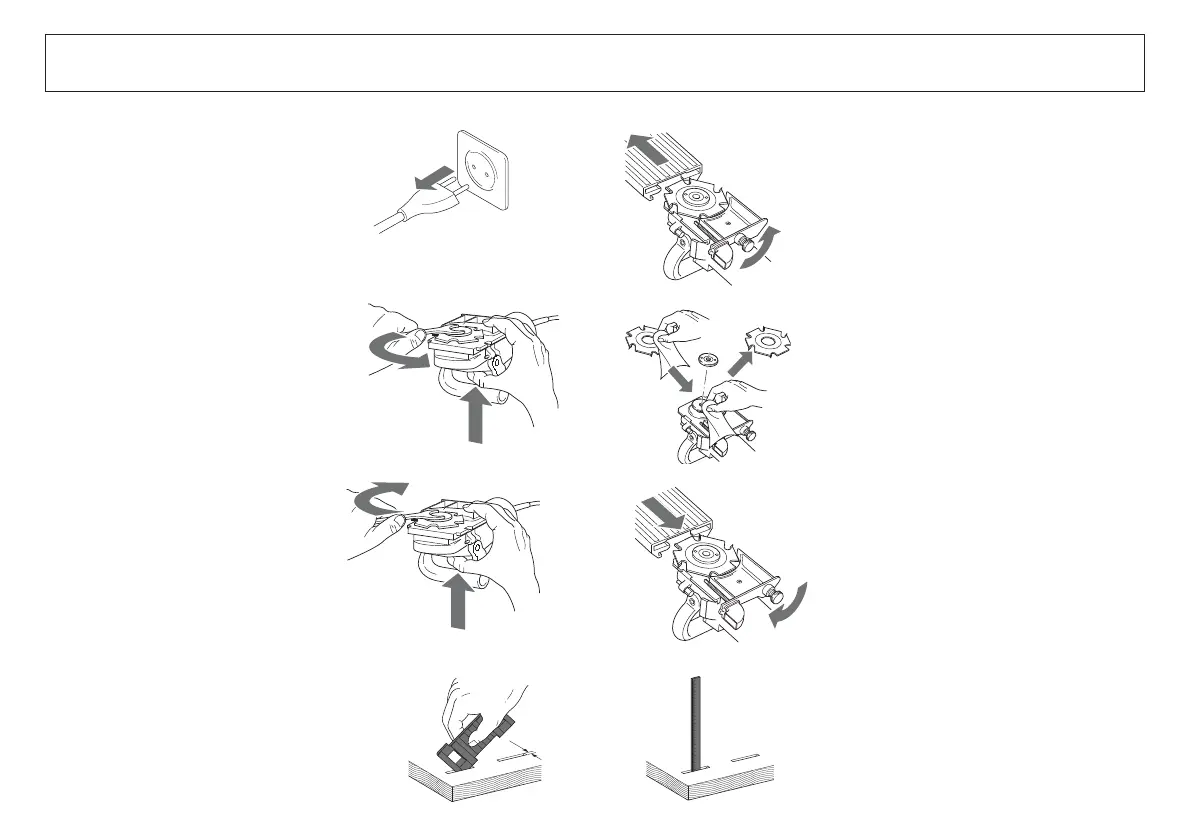
Use only perfectly sharp tools!
Use only cutters rated for manual feed!
1. Unplug the power cable.
2. Release lock.
3. Draw off baseplate.
/RFNVSLQGOHZKLOHUHOHDVLQJÁDQJHQXW
at same time with the face spanner.
5. Fit new cutter, check direction of
rotation. Ensure that supporting
surfaces are clean.
7LJKWHQÁDQJHQXWZLWKIDFHVSDQQHU
7. Fit baseplate and
8. tighten lock.
9. Check groove width (with 4 mm
thickness plate).
10. Check cutting depth and readjust if
necessary. See following page.
¡Use solo herramientas afiladas perfecta-
mente!
¡Use solo fresas para el avance manual!
1. Saque el enchufe de la red.
2. Suelte el bloqueo.
3. Saque la placa de base.
'HWHQJDHOKXVLOORDÁRMHVLPXOWiQHD-
mente la tuerca de brida usando la llave
de espigas frontales.
5. Monte la nueva fresa. Tenga en cuenta
el sentido de giro. Asegúrese de que las
VXSHUÀFLHVGHDSR\RHVWpQOLPSLDV
6. Apriete la tuerca de brida usando la
llave de espigas frontales.
7. Ponga la placa de base y
ÀMHHOFLHUUH
9. Controle el ancho de la ranura
(con la placa auxiliar de 4 mm).
10. Controle la profundidad de fresado,
reajústela en caso necesario. Véase la
página siguiente.
Changing the cutter Cambiar fresas