Manual radarTOUCH Version 3.4
T. Schwirten LANG AG
14.10.10
Page 24
5.2 Changing the IP address of the measurement device
Note: This small application changes the IP address of the measurement device, not the IP
of your local computer!
To change the IP address you have to connect the device to the power supply and connect it
with the Ethernet cable to your PC.
Make sure that your PC network settings are correct regarding the current IP settings from
the measurement device. You have to be sure that you can connect to the device.
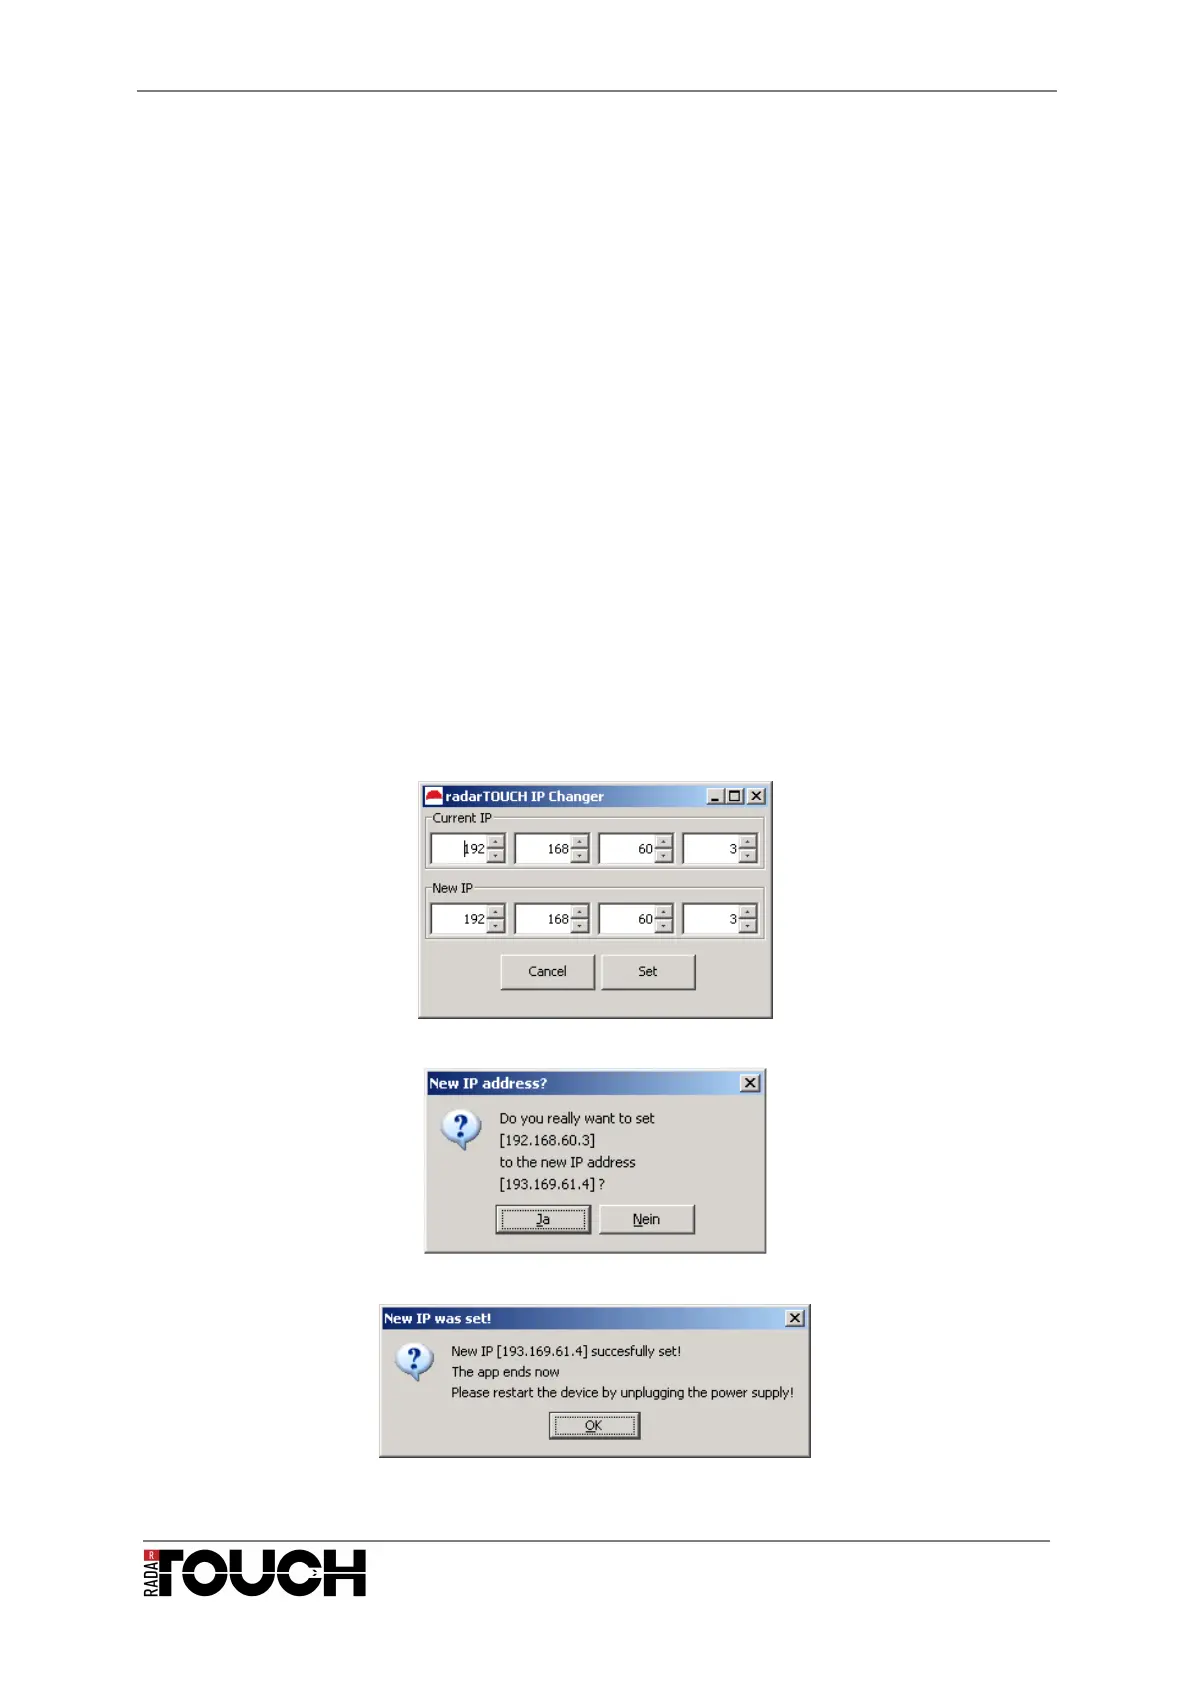
Start the IP changer software for the radarTOUCH; you will see the small GUI which is
displayed in Figure 26.
Please enter the current IP address of the measurement device in the upper four fields. You
only have to enter the value, no dots or anything like that. If you type a number in the field,
always confirm by pressing enter on your keyboard.
Then enter the new IP address in the same way and press the “Set” button, a window asking
you if you really want to set the new IP will appear (Figure 27). This is your chance to check
if the settings are correct.
If the new IP was successfully set after you have confirmed the dialog, you will see a new
window that looks like the one in Figure 28. If this was not successful, an error message will
appear.
The measurement device will reboot, only the red light will be on. After a few seconds also
the orange led will turn on. Now please always restart the device after a few seconds by
unplugging it from the power supply.
If you change the IP address of the device, you also have to change the IP in the
radarTOUCH software. For this, please refer to chapter 4.3.2 Configuration file.
Figure 26 radarTOUCH IP Changer GUI
Figure 27 Confirm dialog
Figure 28 Dialog after setting the new IP