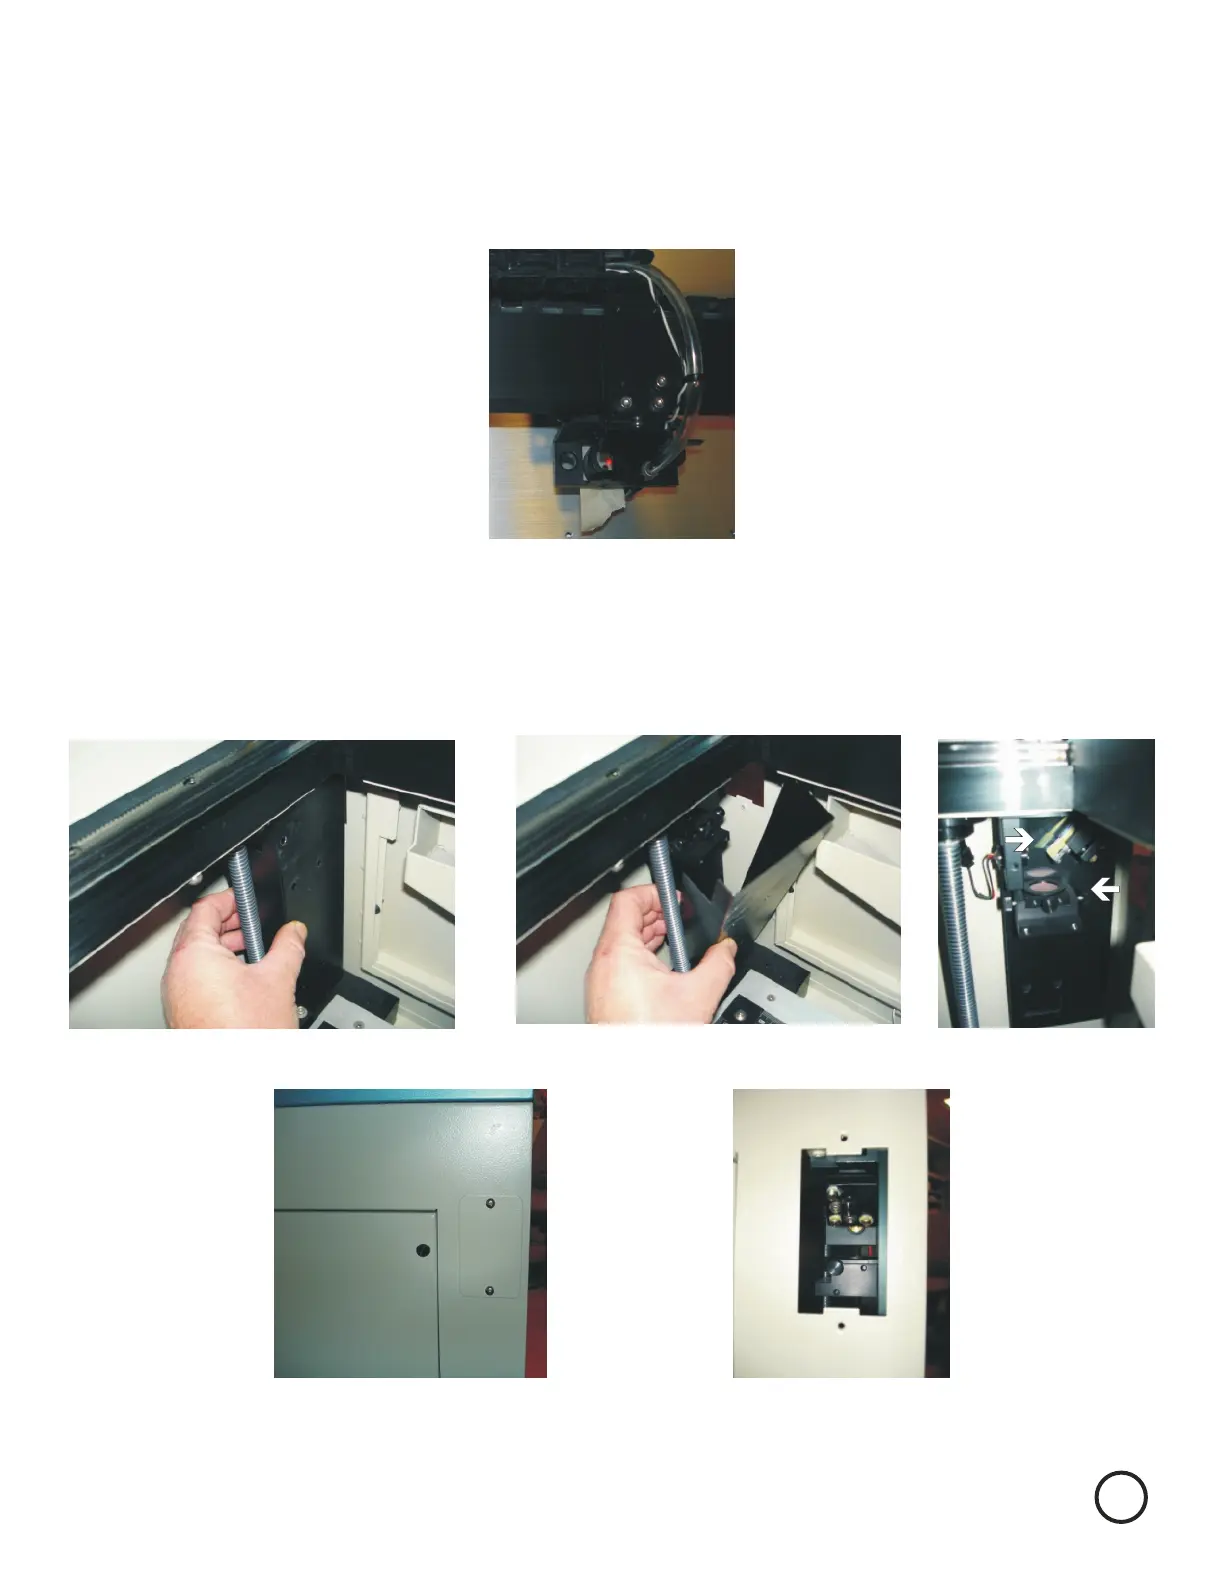
To align the Red Beam adjust the prism mount for mirror 0 so that the red dot hits the burn mark
on the tape on the bottom of the lens carriage from your final test of mirror 1’s adjustment.
As the Red Beam is in a different Beam Path then the Co2 Beam locate the lens carriage
in the location you wish the pointer to be most accurate.
Remember to always wear safety glasses while doing any open beam tests.Remember to always wear safety glasses while doing any open beam tests.
Lower table all the way down. Remove the 3 thumb screws and tip box cover to the right and remove.
(Picture 1 and 2) Clean collimating lens (3) as long as it is exposed. When reinstalling collimating lens
make sure it stays flat as you tighten front and rear thumb screws.
1 2
3
Collimating
Lens
Red Beam
Mirror
Left Rear Access
Panel
Red Beam Prism
Mount
Adjust the Red Beam Prism Mount so that the Red Beam hits the Burn Mark after adjusting
Mirror 1.
Red Beam Adjustment
10
Please note 100+ watt lasers have the Collimating Lens directly on end of Tube