To do beam alignment you will need to understand a few basics.
1. First closest position to the mirror (P1 or P3) burn mark will not move. (see diagram 1 below)
2. We move P2 to line up on top of P1’s burn, and P4 to line up with P3.
3. The mirrors are aligned by adjusting 2 of the three screws on the prism mount.
One screw moves the beam path up and down while the other is left and right.
5. You need alignment more accurate. as small of a burn mark as possible to make
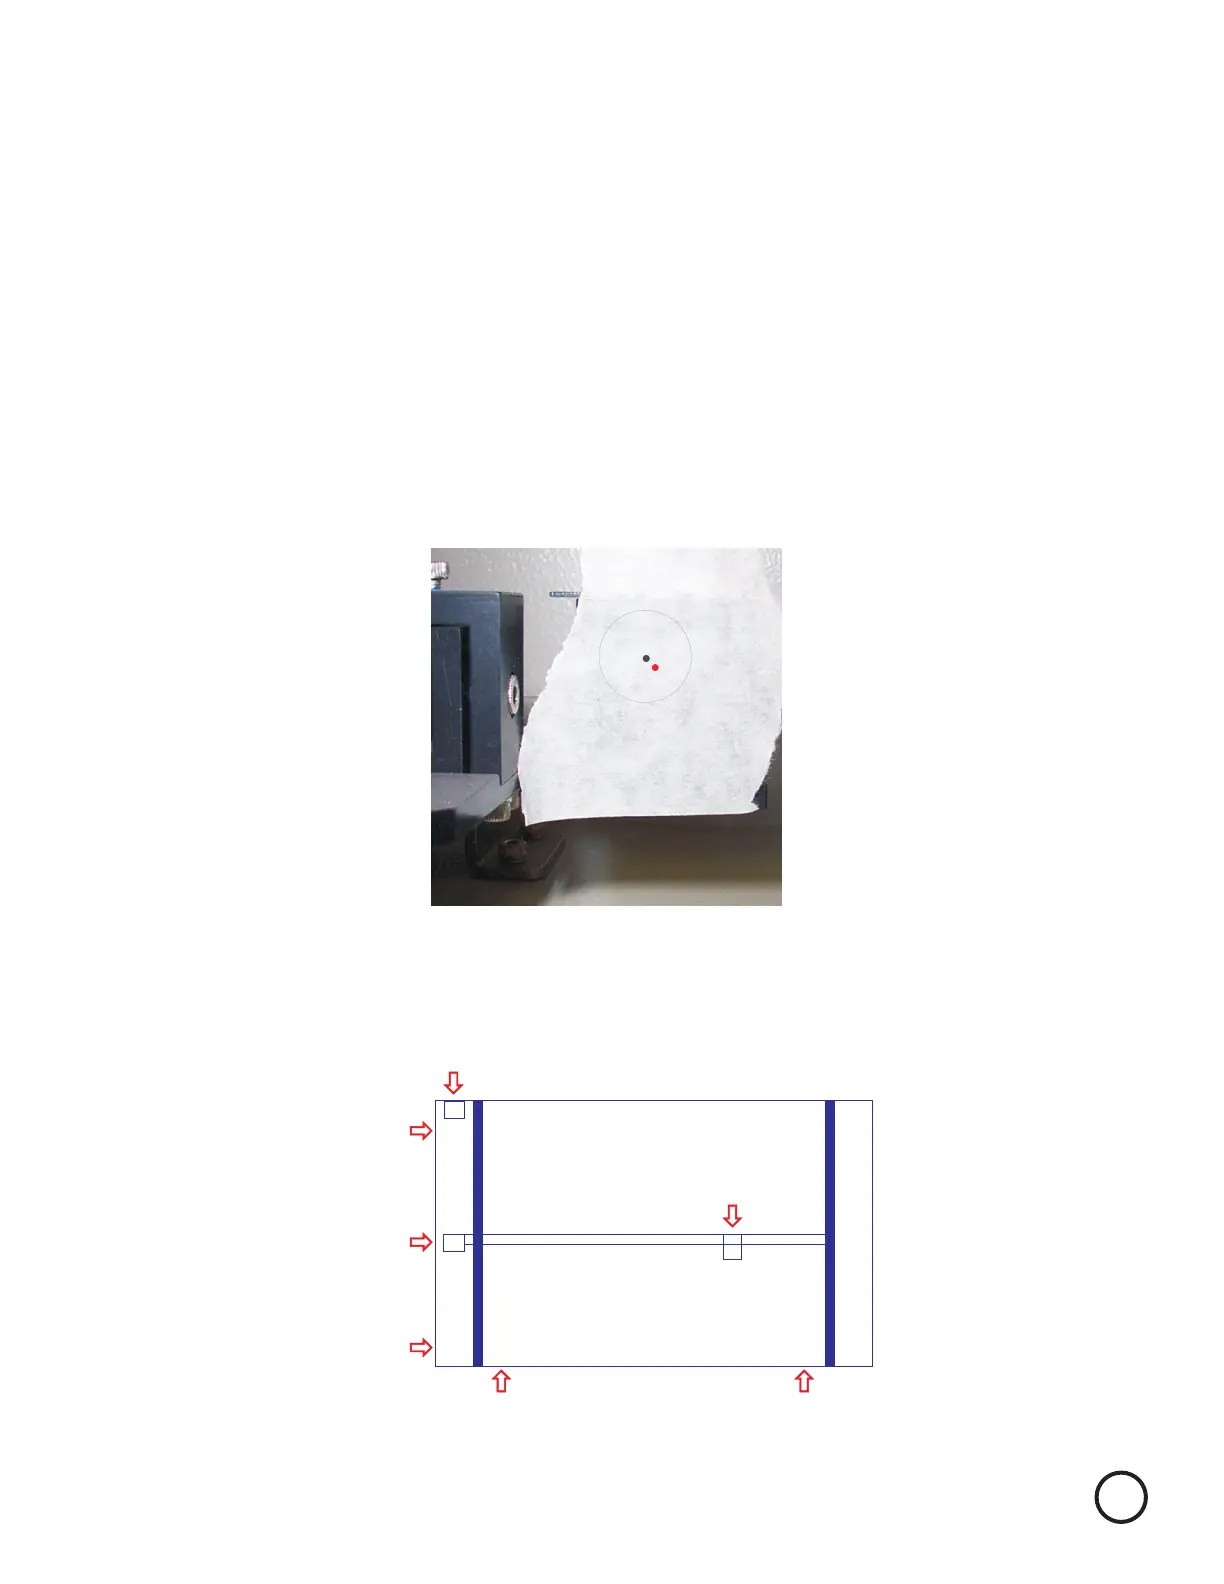
Place a piece of tape on the back of mirror 3’s sheet metal cover covering up the round hole.
Do a test fire as described in text on page 3. Orange
If your results are not similar to the above you will need to adjust mirror 2 so that only 1 burn mark
and the red dot are visible on the test tape..
4. The red beam will not line up with the burn marks.
However, we adjust the screws and watch the results by following
In other words if the P2 is .06” high and .03” left from P1’s burn, we will
to move the red beam .06” down and .03” right.
adjust the screws
You may find it easier to put a pen mark as far from the red beam as P2 is from P1
Adjust the prism mount to move the red beam so that it is on the target spot you drew.
the red beam’s motion.
Mirror 2
Mirror 3
P1
P2
P3
P4
Mirror 4
Back of Explorer
Remember to always wear safety glasses while doing any open beam tests.
5
(Diagram 1)
 Loading...