This document will show you how to check and align your Explorer. The first thing to do is toLaserPro
check the alignment. Briefly the logic is to have a perfectly straight beam path from Mirror 2
(Back top left) to mirror 3 (Left end of X axis). From mirror 3 to mirror 4 (the one in the lens carriage).
Mirror 0 is for the red beam. Mirror 1 only controls where the beam hits the lens. If mirror 1 is adjusted
incorrectly you may have beveled edges when vector cutting in x or y.
If beam adjustment on Mirror 2 is necessary it may require that the you unfasten the lid, and shift it to
the right. Please note when doing this the lid will be unstable. Take care not to bump or kock it in
such a way to cause it to fall off the Explorer. When Moving the X-Axis arm form P1 to P2 raise the left
end of the lid and move the X-Axis to the next position. See Page 4 for photos.
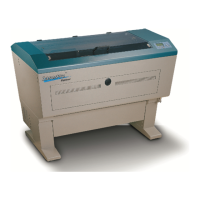
The first step is to check your machines alignment. We will check it in 4 places P1, P2, P3, and P4.
(Diagram 1)
Mirror 2
Mirror 3
P1
P2
P3
P4
Mirror 4
Back of Explorer
To start place a piece of tan masking tape, transfer tape, or small white label to back of mirror 3’s
housing. (Cover the hole the laser beam enters to get to mirror 3)
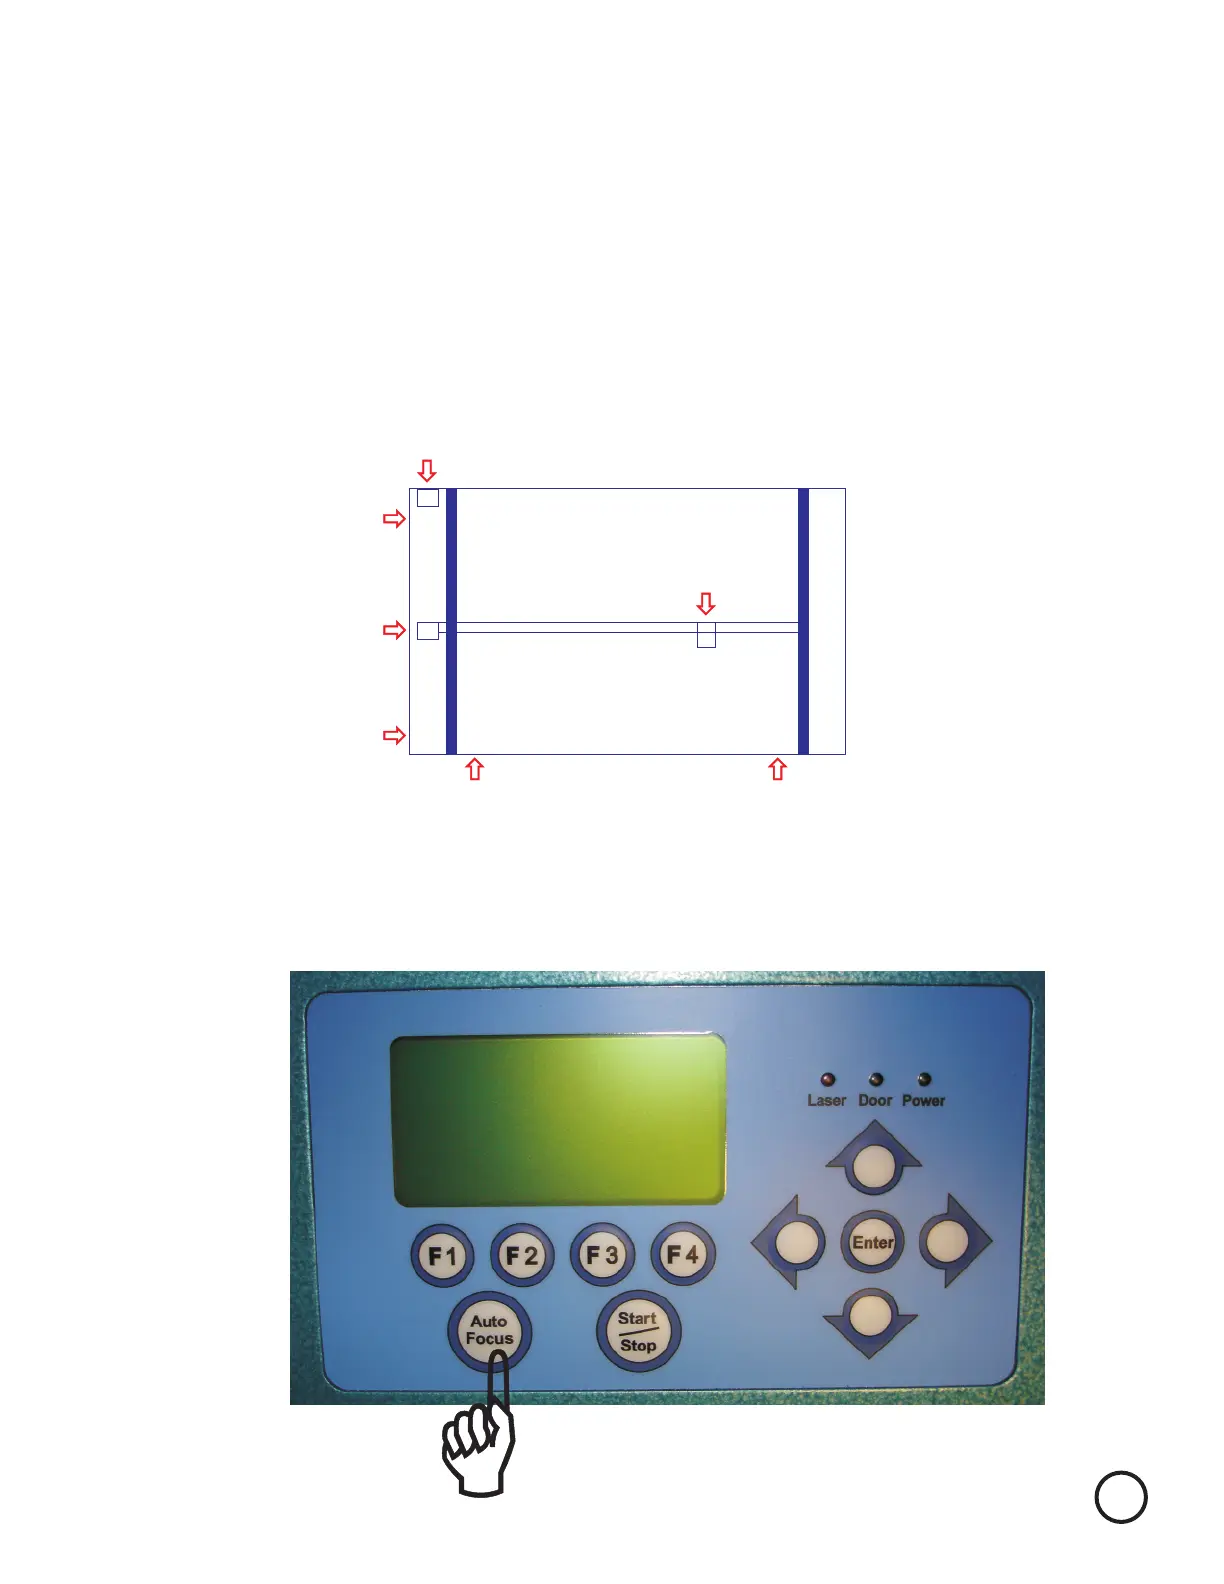
Turn on the machine while holding down the Auto Focus key on the Control Panel.
Remember to always wear safety glasses while doing any open beam tests.
1