70
LAUNCH X-431 PAD V
User's Manual
Sweep: The sweep mode determines how the Scopebox behaves in
the absence of a trigger event. The Scopebox provides three trigger
modes: Auto, Normal, and Single.
• Auto: It allows the Scopebox to acquire waveforms even when it
does not detect a trigger condition. If no trigger condition occurs
while the Scopebox is waiting for a specic period, it will force itself
to trigger.
When forcing invalid triggers, the Scopebox can not synchronize
the waveform, and then waveform seems to roll across the display.
If valid triggers occur, the display becomes stable on the screen.
• Normal: This mode allows the Scopebox to acquire a waveform
only when it is triggered. If no trigger occurs, the Scopebox keeps
waiting, and the previous waveform, if any, will remain on the
display.
• Single: In this mode, it only acquires the waveform that generates
for the rst time the trigger conditions are met, and then stops after
nishing capture.
Source: Select which channel as trigger signal.
Condition: To select pulse condition.
Pulse Width: Set required pulse width.
High Freq Rejection: Reject high frequency signals when selected.
7.3.4.2 Auto
The Scopebox has an Auto feature that sets up the Scopebox
automatically to display the input signal in a best t.
Tap , the Scopebox may change the current settings to display the
signal. It automatically adjusts the vertical and horizontal scaling, as
well as the trigger coupling, position, slope, level and mode settings.
7.3.4.3 View Settings
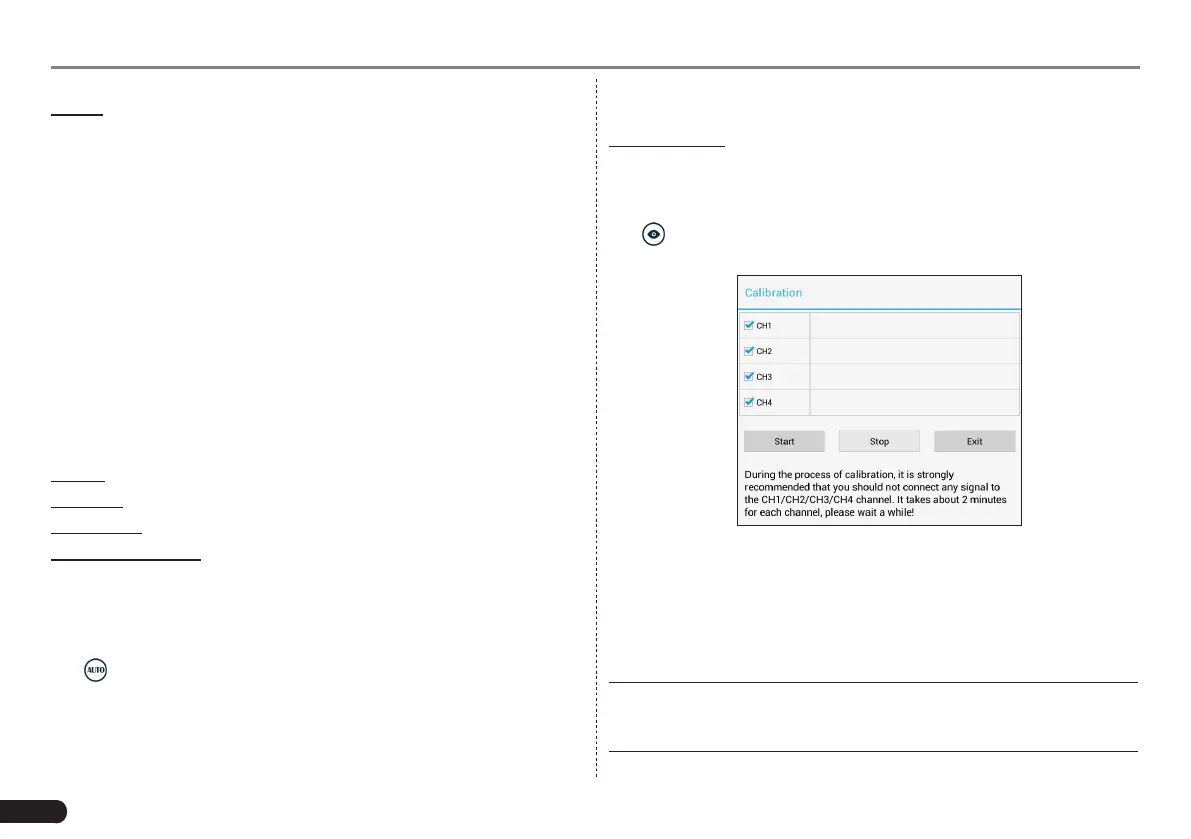
<1> Calibration
This option adjusts the Scopebox’s internal circuitry to get the best
accuracy. Use this function to calibrate the Scopebox’s vertical and
horizontal systems.
Tap and then tap [Calibration], a dialog box similar to Fig. 7-30 will
appear.
Fig. 7-30
Check the box before the channel to select it. To deselect it, just
uncheck it. After choosing the desired channel(s), tap [Start] to
start calibration and [Start] button will be temporarily invalid during
calibrating. Tap [Stop] to stop calibrating. Once it becomes active, it
indicates calibration has completed.
*Note: In process of calibration, make sure CH1/CH2/CH3/CH4 has no
signal input. Moreover, calibraon may take several minutes and please be
paent to wait.