
A
alyssabrewerSep 12, 2025
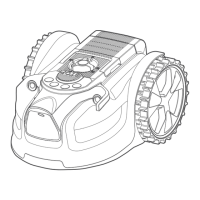
What to do if LawnMaster robotic lawnmower is upside down?
- MMegan LoweSep 13, 2025
If your LawnMaster robotic lawnmower is upside down, turn it the right way up and determine why it turned over, then rectify the cause.
What to do if LawnMaster robotic lawnmower is upside down?
If your LawnMaster robotic lawnmower is upside down, turn it the right way up and determine why it turned over, then rectify the cause.
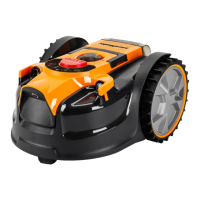
What to do if my LawnMaster VBRM16 Lawn Mower is stuck during mowing?
If your LawnMaster Lawn Mower gets stuck while mowing, there are several possible reasons and solutions: * Check the wheels and blade disc for grass or debris and remove any obstructions. * If the blade disc is in a pool of water, move the mower and prevent water from collecting in the area. * If the mower is caught on something, free it and remove the obstacle. * If it's stuck behind obstacles, remove them. * Level any uneven dips or hollows in the lawn with topsoil and grass seed. * If the lift sensor is activated, free the mower.
What to do if LawnMaster VBRM16 is cutting grass unevenly?
If your LawnMaster Lawn Mower is cutting grass unevenly, consider the following: * If the working area is too big, adjust the border protections to decrease it. Recharge the battery to mow the area twice or purchase an additional battery. * Check if blades are dull and replace all the blades and screws. * If the height of cut is too low, or the grass is too high, increase the height of cut. * Check underneath the mower for grass wrapped around the blade disc and clear as necessary.
Why charge control LEDs do not light up after inserting the mains plug into the socket of LawnMaster VBRM16 Lawn Mower?
If the charge control LEDs don't light up after plugging in your LawnMaster Lawn Mower, check the following: * Mains plug not fully inserted: Ensure the mains plug is fully inserted into the socket outlet. * Defective socket outlet, mains cable, or battery charger. * Blown plug fuse: Check and replace the fuse in the plug.
What does it mean if LawnMaster error indicator is red continuous?
A continuous red error indicator on your LawnMaster mower typically indicates a sensor error, overcurrent in the motor, a motor fault, or an operation system error. Remove and re-insert the isolator key and restart the mower. Check for and remove any obstacles around the rear wheels and the blade disc. Increase the cutting height and ensure the grass isn't too tall, mowing it to below 60 mm if necessary. If the problem persists, further assistance is needed.
Why is the LawnMaster VBRM16 Lawn Mower area of cut not large enough?
If the area your LawnMaster Lawn Mower cuts isn't large enough, consider these factors: * Height of cut too low: Increase the height of cut. * Grass is wet: Wait until the grass is dry. * Grass is dense: Increase the height of cut and cut more frequently. * Battery not fully charged: Charge the battery. * Lawn area too large: Recharge the battery and mow again or purchase an additional battery.
What to do if charge control LEDs do not light up on LawnMaster Lawn Mower?
If the charge control LEDs do not light up after inserting the mains plug into the socket for your LawnMaster Lawn Mower, ensure the mains plug of the battery charger is fully inserted into the socket outlet. If the issue persists, check the socket outlet, mains cable, or battery charger for defects. If necessary, contact the After Sales Helpline.
Why LawnMaster robotic lawn mower runs outside working area?
The LawnMaster robotic lawnmower might run outside the designated working area due to several reasons. It could be that the barriers defining the area are incorrectly set, requiring you to check and improve them. Alternatively, the ultrasonic sensors might be turned off, so ensure they are activated. Finally, if the working area has slopes steeper than 35%, you should delimit those areas.
What does it mean if LawnMaster VBRM16 Lawn Mower ultrasonic indicator is yellow flashing?
A yellow flashing ultrasonic indicator on your LawnMaster Lawn Mower means: * Communication issue with the camera: It may be too dark for the camera to work. Only operate the mower during daylight hours. You can also try removing and re-inserting the isolator key and restarting the mower.
What does it mean if LawnMaster VBRM16 error indicator is yellow continuous?
A continuous yellow error indicator on your LawnMaster Lawn Mower suggests: * The lift sensor has been activated for 10 seconds: Remove and re-insert the isolator key, check for obstacles taller than 10 cm in the working area, and restart the mower. * The obstruction sensor has tripped 10 times in one minute: Remove and re-insert the isolator key, remove any obstacles, and check if the grass is too tall. If needed, mow the grass to below 60 mm with a conventional lawn mower, then restart the mower.
Prepares the lawn surface and defines the mowing area for optimal robotic mower performance.
Outlines methods for clearly defining lawn edges using visual or physical boundaries for proper mower operation.
Provides instructions for safely installing and removing the battery pack from the robotic mower.
Details the functions of the control panel buttons, indicators, and their meanings during operation.
Step-by-step guide on how to power the robotic mower on and off safely.
Instructions for safely starting, stopping, and resuming the robotic mower's operation.
Explains the different mowing modes available, including Auto Cutting and Spot Cutting.
Guide on how to adjust the cutting height for optimal lawn care.
Covers battery charging procedures, usage, and LED indicator meanings.
Instructions for operating the battery charger and understanding its indicator lights.
Routine cleaning and checks to keep the mower in safe working condition.
Detailed steps for safely replacing the mower's cutting blades.
Instructions for cleaning the underside of the robotic mower.
Guidelines for properly storing the mower when not in use.
How to maintain the battery and charger for optimal performance and longevity.
Instructions on how to update the robotic mower's software via USB.
Details the measured sound power and pressure levels of the robotic mower.
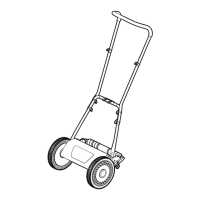
Instructions for preparing and unpacking the grass trimmer for assembly.
Steps for securely connecting the upper, middle, and lower handle shafts.
Guide on how to attach and adjust the auxiliary handle for comfortable use.
Instructions for correctly positioning and securing the safety guard.
Steps for safely installing and removing the battery pack.
Details battery charging, LED indicators, and battery care.
Instructions for using the charger and understanding its status lights.
Steps to safely switch the grass trimmer on and off.
How to advance the trimming line and manage cutting performance.
Method for manually adjusting the trimming line length.
Information about the safety guard and its importance during operation.
Details on adjusting the auxiliary handle for optimal working position.
How to adjust the trimmer head to different positions for various tasks.
Instructions for using the trimmer for edging tasks.
How to use the plant protector to safeguard plants from the cutting line.
Proper techniques and precautions for trimming grass effectively.
Routine cleaning and care for the grass trimmer.
Guidelines for storing the grass trimmer and its accessories safely.
How to maintain the battery and charger.
Instructions for replacing the trimmer line spool.
Instructions for replacing the trimming line on the spool.
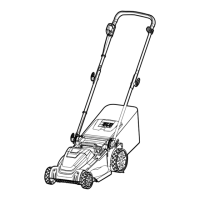
| Cutting Width | 16 inches |
|---|---|
| Battery Voltage | 40V |
| Deck Material | Plastic |
| Height Adjustment | 6 positions |
| Type | Cordless |