EasyManua.ls Logo

LEGRAND Wattstopper LMCP-GE24 User Manual

LEGRAND Wattstopper LMCP-GE24
4 pages
To Next Page IconTo Next Page
Page #1 background imageLoading...
Page #1 background image
Wattstopper
®
DLM - DLM GE SWS or TLC Relay to LMCP Retrofit Kits
Installation Instructions • Instructions d’Installation • Instrucciones de Instalación
No: 24813 – 11/16 rev. 1
Catalog Numbers • Les Numéros de Catalogue • Números de Catálogo: LMCP-GE24/LMCP-GE48
Country of Origin: Made in China • Pays d’origine: Fabriqué en Chine • País de origen: Hecho en China
LMCP-GE24 RETROFIT KIT INSTALLATION
Step 1: Remove all interior components
leaving relays and power supply only.
Fig. 1: Example GE24
panel assembly
Fig. 2: After removing
interior items
Step 3: Install LMRD adapter plate.
Fig. 4: Install LMRD adapter plate
Step 4: Install LMRD and LMPI cards.
CAUTION: Do not overtighten screws.
Fig. 5: LMRD and LMPI mounting details
Step 5:
Connect LMRD card to LMPI.
Connect relays to LMRD card.
Connect power to LMPI.
(See Relay Connection Details for DIP Switch settings.)
Fig. 6: Connection details
Step 6: Apply upgrade label.
Fig. 7: Label location suggestion
Step 2: Remove LMRD cards
from adapter plate.
Fig. 3: Remove LMRD
Mounting plate
screw locations
(Total 4 #6-32
screws for
mounting plate)
LMRD-12-M
P
P/N # 841436
LMRD-12
P/N # 16694
Mounting plate screw location
s
(Total 12 #4-40 screws fo
r
mounting plate)
Mounting plate screw locations
(Total 4 #6-32 screws for
mounting plate)
LMPI-ASSY
P/N # 770431
Power supply connection detail
Question and Answer IconNeed help?

Do you have a question about the LEGRAND Wattstopper LMCP-GE24 and is the answer not in the manual?

LEGRAND Wattstopper LMCP-GE24 Specifications

General IconGeneral
Voltage Rating120/277V AC
Current Rating20 A
Current20 A
Number of Poles2
Contact MaterialSilver Alloy
Control Voltage24V DC

Summary

LMCP-GE24 Retrofit Kit Installation

Component Removal and Preparation

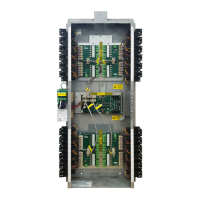
Remove interior components and LMRD cards from the adapter plate.

Adapter Plate and Card Installation

Install the LMRD adapter plate and the LMRD and LMPI cards.

Connection and Labeling Procedures

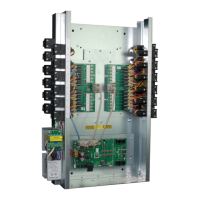
Connect components, apply upgrade label, and details on connections.

LMCP-GE48 Retrofit Kit Installation

Component Removal and Adapter Plate Installation

Remove interior components and LMRD cards, then install the adapter plate.

Card Installation and Connections

Install LMRD and LMPI cards, make connections, and apply the upgrade label.

Relay Connection Details and Parts List

DIP Switch Settings for Relay Connections

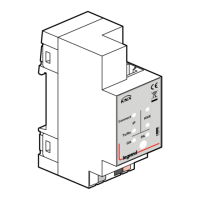
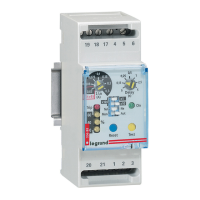
Provides DIP switch settings for 5-pin and 3-pin connectors for relay control.

Retrofit Kit Parts List

Lists part numbers and quantities for LMRD, LMPI, and associated hardware.

Related product manuals