Detailed guide/ Record mode / 137
4. Press the shutter release button all the way down
to take the photograph.
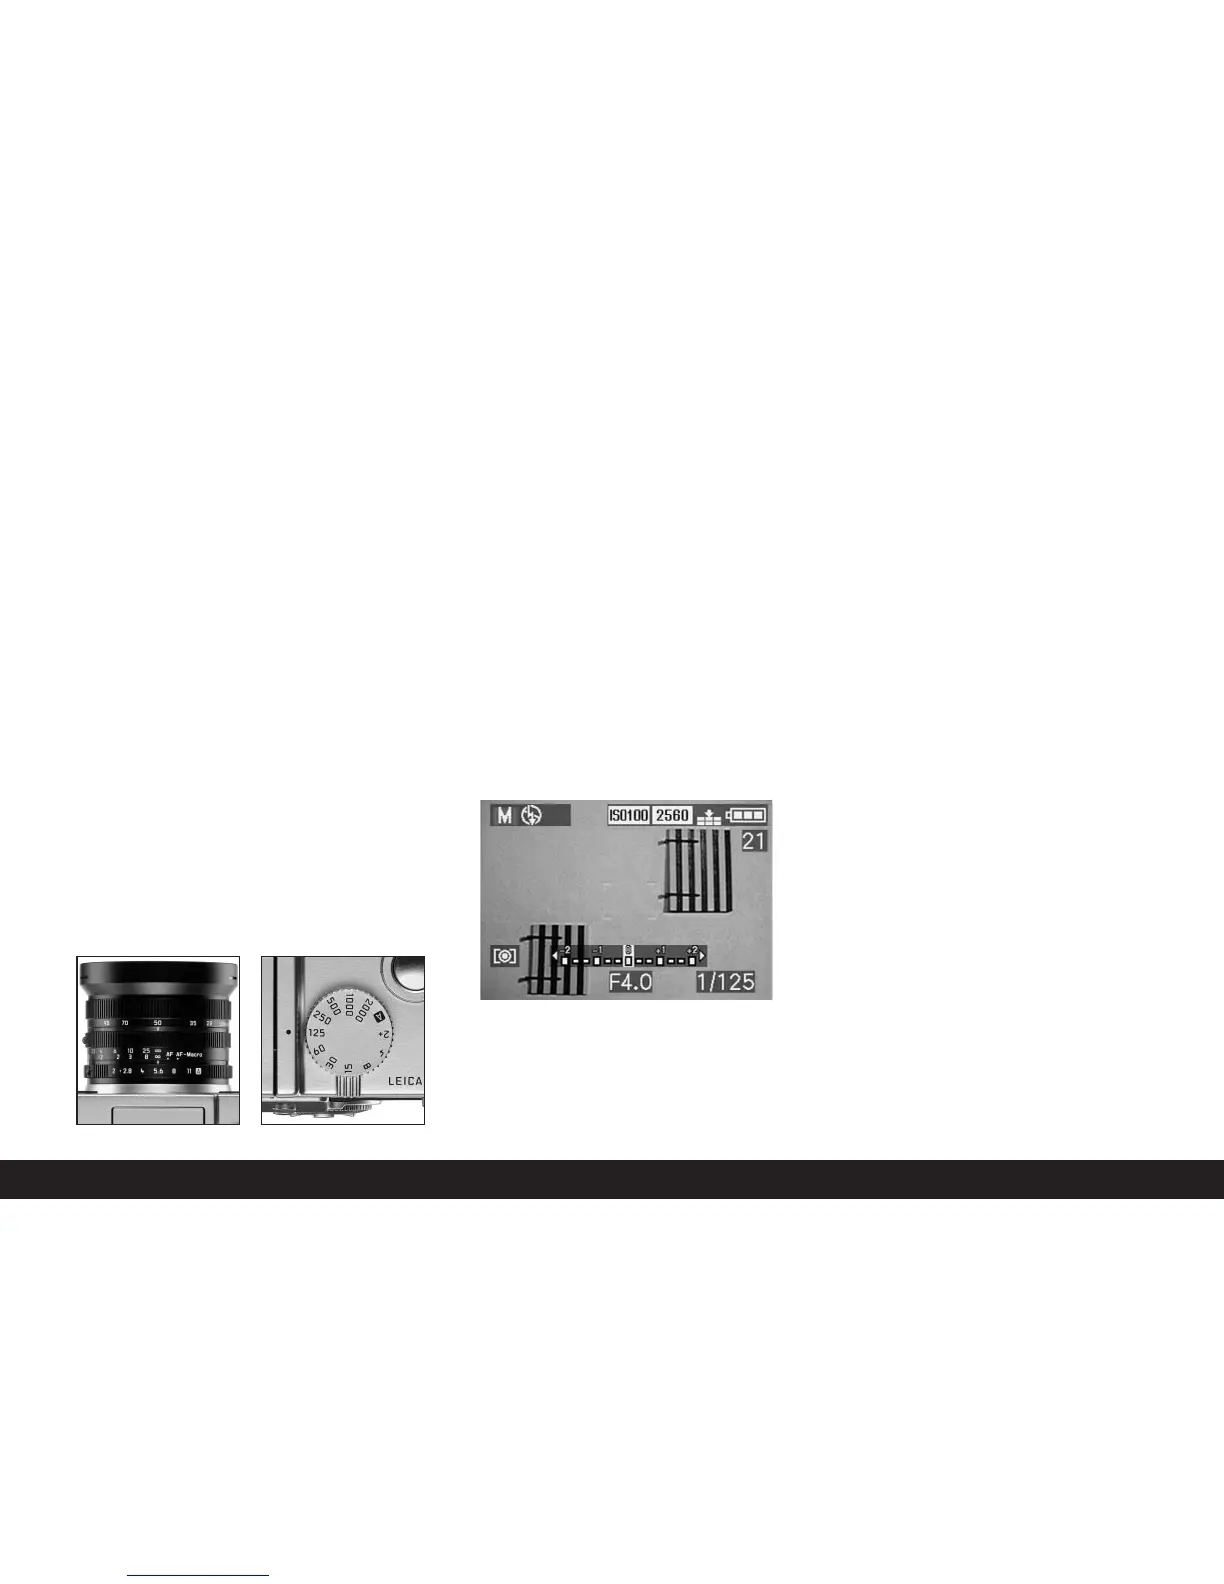
Taking photographs with manual setting of shut-
ter speed and aperture - M
If, for example, you want to achieve a particular effect,
which is only possible with a quite specific exposure,
of if you want to ensure that several pictures with dif-
ferent trimming have an absolutely identical exposure,
then you can use manual setting of the shutter speed
and aperture.
Shutter speeds in the range from 8s to
1
/
2000
s can be
set on the LEICA DIGILUX 2, and aperture values from
2–11 in
1
/
3
steps.
To set this mode, turn
1. the lens aperture ring (1.9) to the desired value,
and
2. the shutter speed dial (1.16) also to the desired
value.
• In the viewfinder/monitor screen this mode is
displayed by M (2.1.1 d). In addition, the manually
set shutter speed (2.1.18) and aperture (2.1.20)
appear – in white.
What to do next:
3. Aim at your subject with the rectangle (autofocus
metering area 2.1.30/31) and press the shutter
release button (1.13) to its pressure point.
• The light balance (2.1.25) appears additionally,
with the yellow mark on the scale indicating
precisely – in
1
/
3
EV increments – the deviation of
the set pair of values of the correct exposure
within the range of ±2EV, or if the mark is at the
triangles to the left or right, a deviation of at
least 2 EV.
4. If necessary, align the shutter speed and/or aper-
ture on the basis of the light balance and/or the
histogram (see p. 138) to the desired exposure.
5. Press the shutter release button all the way down
to take the photograph.
Selecting the exposure metering method
The LEICA DIGILUX 2 offers you a selection of 3
exposure metering methods. They allow adjustment to
the prevailing light conditions, the situation, and your
style of work, and your creative ideas.
Multi-field metering -
3
With this metering method, the camera automatically
analyses the brightness differences in the subject
and, by comparing them with programmed brightness
distribution patterns, arrives at the likely position of
the main subject and the corresponding best (com-
promise) exposure.
By consequence, this method is particularly suitable
for spontaneous, uncomplicated but reliable photo-
graphy even under difficult conditions.
Center-weighted metering -
2
This metering method allocates the highest weighting
to the center of the image field, but also records all
other areas.
In conjunction with metering memory-lock in partic-
ular (see p. 132) it allows selective adjustment of the
exposure to particular sections of the subject with
simultaneous consideration of the entire image field.

 Loading...


