Detailed guide/ Record mode / 143
Notes:
• Due to the longer route for the flash light and the
(usually low) reflections of the areas flashed, the
range is reduced, possibly to a great extent.
•Reflective areas that do not have a neutral color,
e.g. white or gray, can result in color casts in the
picture.
Taking photographs with the flash synchronized
to the end of the exposure -
5 FLASH SYNC.
Flash photographs are illuminated by two light
sources, the available light and the light from the
flash. Parts of the subject that are exclusively or
primarily illuminated by the flash are almost always
reproduced extremely sharply (with correct focusing)
due to the extremely short pulse of light. By contrast,
all other parts of the subject – those that are
sufficiently illuminated by the available light or illumi-
nate themselves – are portrayed with different de-
grees of sharpness in the same picture.
Whether these parts of the subject are reproduced
sharply or “blurred”, and the degree of blurring, is
determined by two independent factors.
1. The length of the exposure, i.e. for how long these
parts of the subject “act upon” the sensor and
2. how quickly these parts of the subject – or the
camera itself – are moving during exposure.
The longer the shutter speed/exposure time or the
faster this movement, the more clearly the two –
superimposed – parts of the picture can differ.
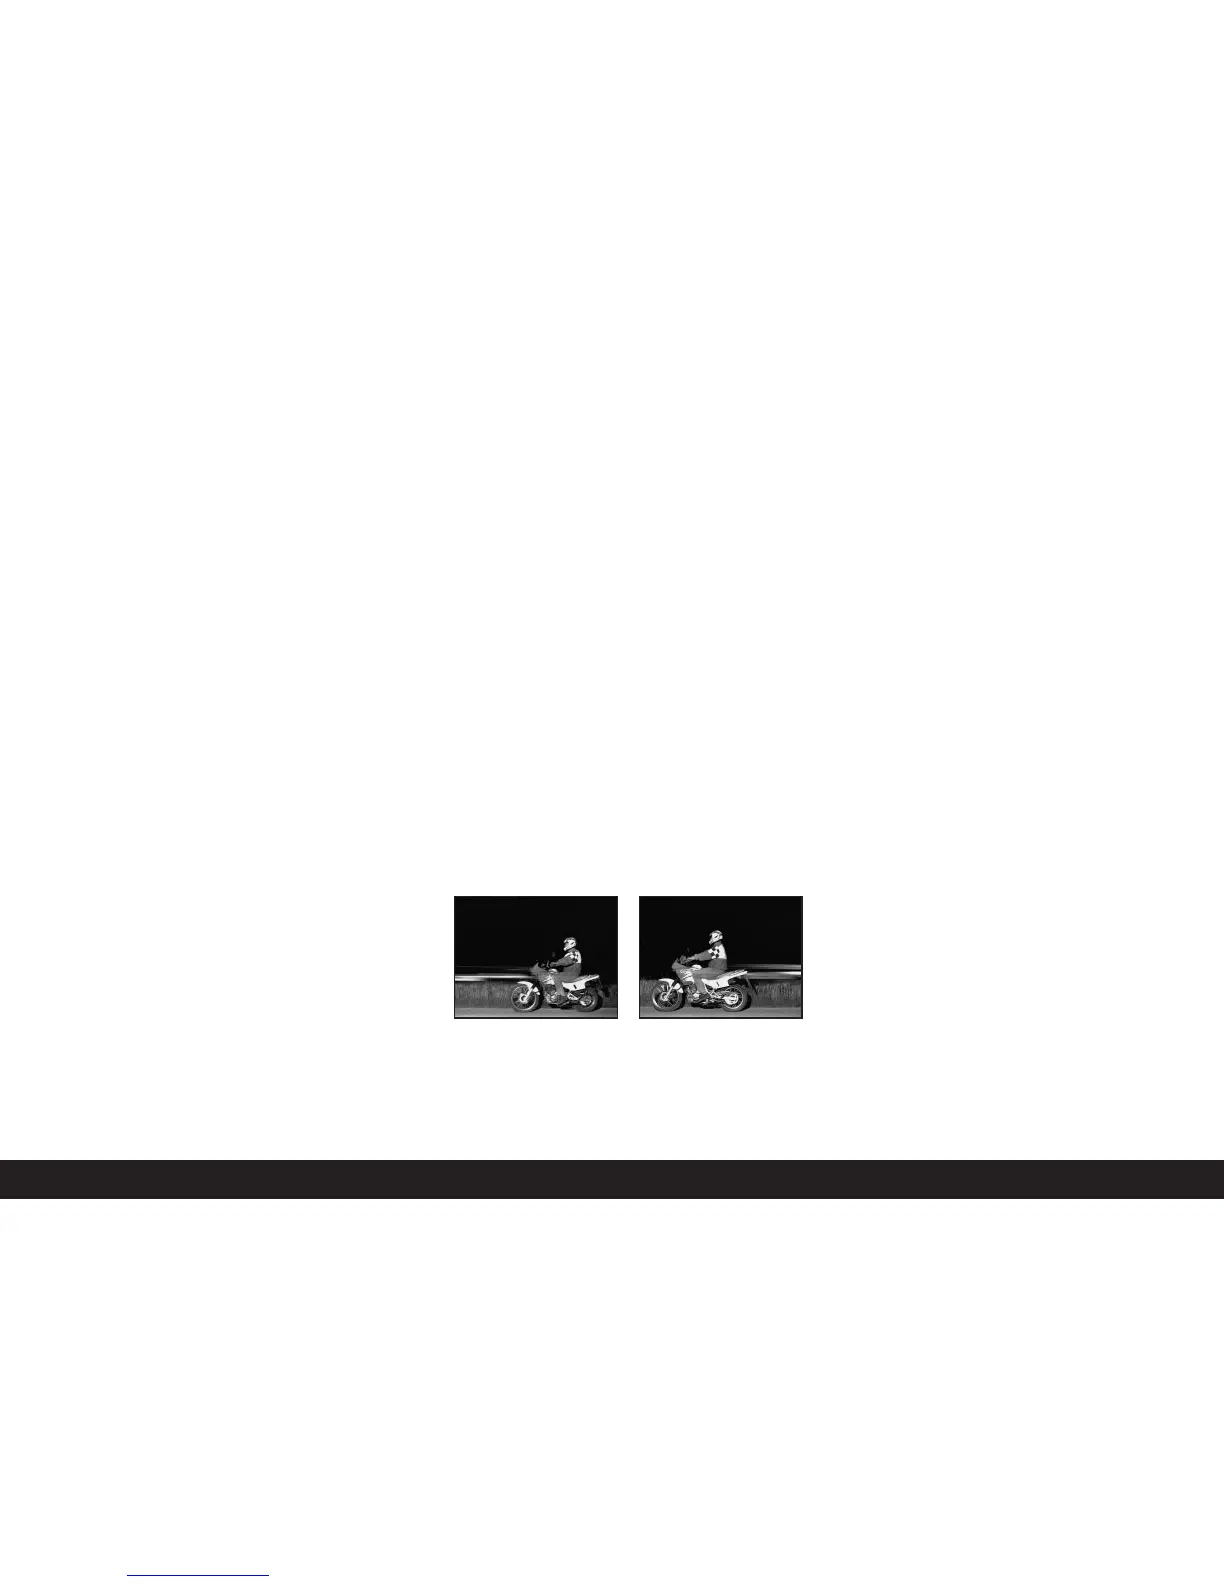
With the flash fired at the normal moment, at the
beginning of the exposure, i.e. immediately after the
shutter is completely open, this can even lead to
apparent contradictions, such as in the picture of the
motorcycle (A), which is being overtaken by its own
light traces.
The LEICA DIGILUX 2 gives you a choice between this
normal flash firing moment and synchronization to the
end of the exposure, i.e. immediately before the
shutter begins to close again. In this case, the sharp
image is located at the end of the movement. In the
photograph (B), this flash technique gives a natural
impression of movement and dynamics.
Notes:
• The combination of synchronization to the end of
the exposure
S
with the flash modes
E
,
M
and
P
(see p. 140) is not possible. If it is acti-
vated when one of these modes is activated, they
change to the corresponding modes without pre-
flash.
• When using faster shutter speeds, in terms of the
image there is hardly any difference, or only for
rapid movements, between the two flash moments.
Setting the function
In the main record menu
j
REC
3
/
4
(see pp. 112/
122) select the menu item
5
FLASH SYNC. (3.10) and
follow the further menu instructions.
• The original viewfinder/monitor screen appears
again with the corresponding display (2.1.28).
A B

 Loading...


