168 / Detailed guide/ Review mode
2. Open the associated viewfinder/monitor screen by
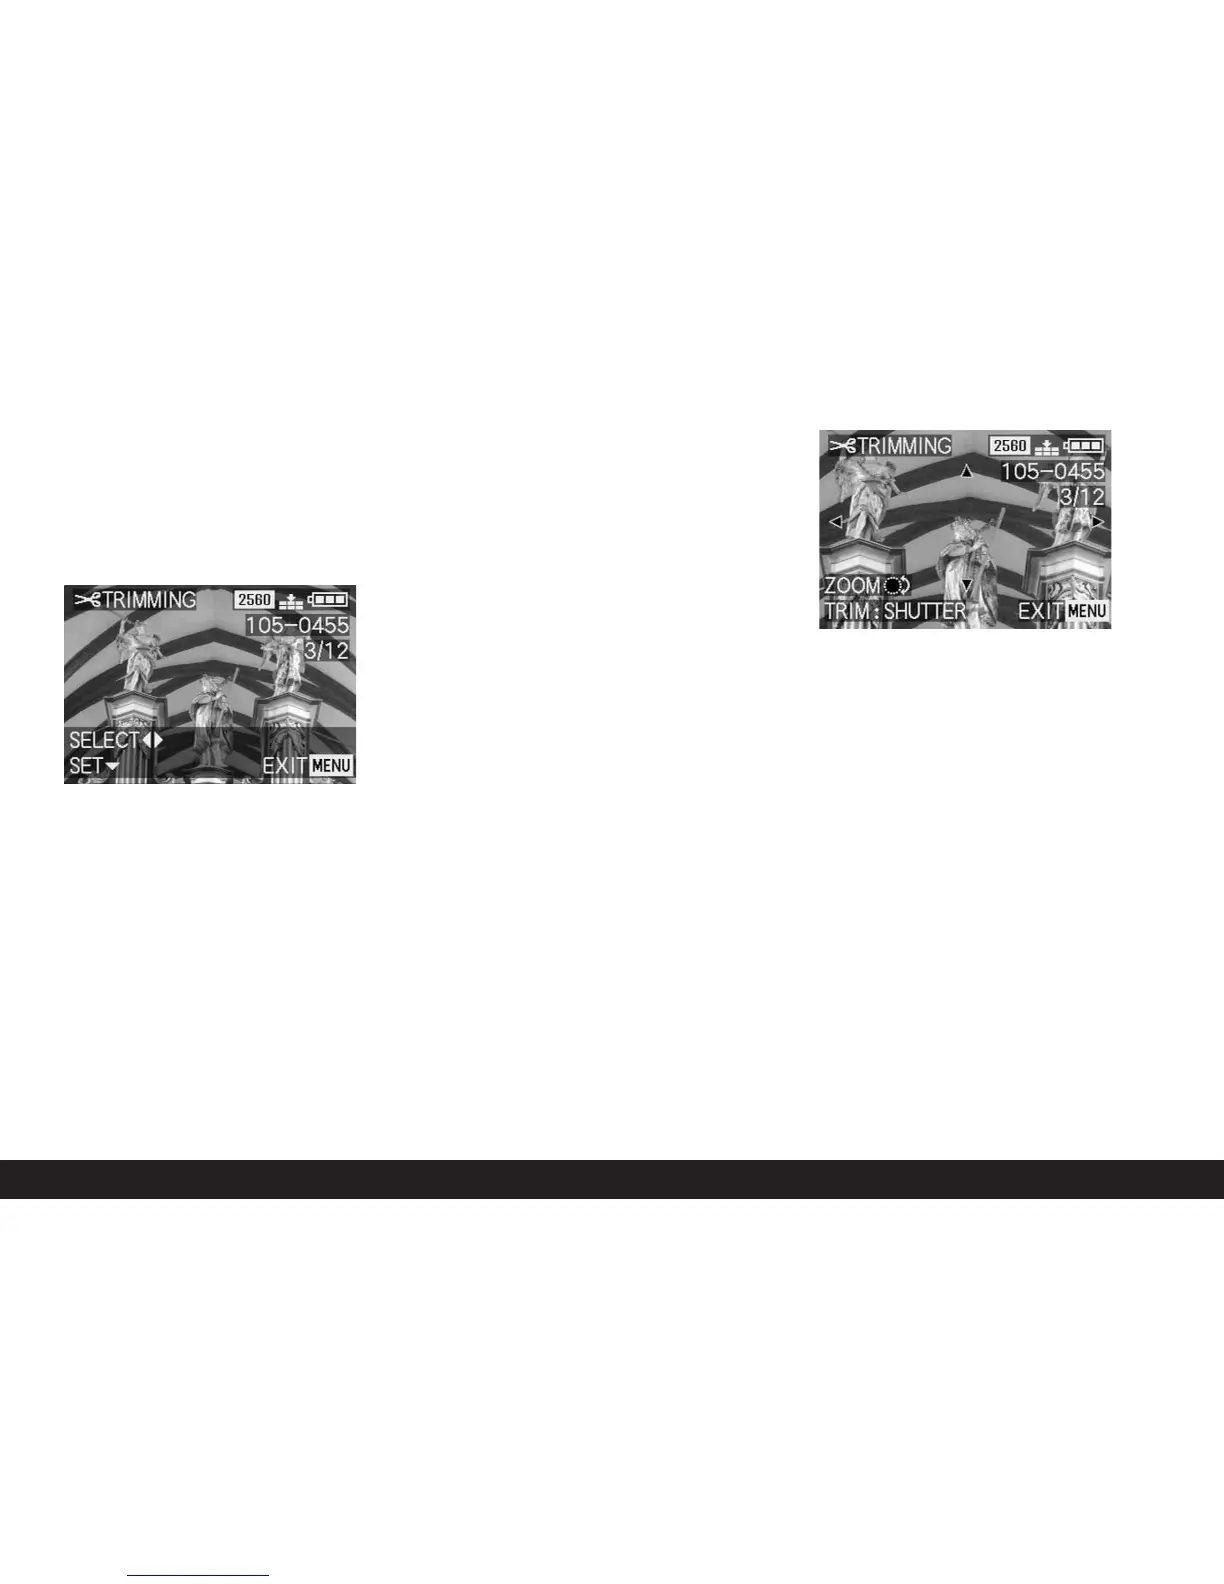
pressing right on the direction pad (1.26).
• If it is possible to change the trimming
W
TRIMMING appears in the header, while the
footer contains information about further set-
tings for the function.
However, if it is not possible to change the trim-
ming (for the reasons mentioned under “Note”
above) the following appears instead:
• In the center of the screen THIS PICTURE CAN-
NOT BE TRIMMED, and only one footer with
notes on subsequent actions.
Note: You can also select the other pictures within
this operation step so that you can change their
trimming.
The following step is only necessary if it is not
possible to change the trimming. Otherwise, you can
continue as described in point 4 onwards.
3. In these cases, choose one of the other pictures
whose trimming you want to change.
4. Open the next viewfinder/monitor screen by
pressing down on the direction pad.
• The (single) footer contains information on sub-
sequent actions.
5. Use the central adjustment dial (1.29) to select the
desired trimming. Turning to the right results in an
enlarged, i.e. smaller trimmed area, turning to the
left results in a reduced, i.e. larger trimmed area.
4 enlargement levels are available here:
• Arrows appear on the 4 edges of the picture, to
indicate how the trimmed area can be moved.
The display in the footer indicates whether fur-
ther enlargement and/or reduction levels are
possible, as well as information about sub-
sequent actions.
Notes:
• Enlarging the trimmed area is only possible after
at least one previous reduction.
• The smaller the selected trimmed area is, the
more it can be moved off-center in point 6
6. Select the desired trimming using the direction
pad.
• In the viewfinder/monitor, the image “moves” in
the direction you press on the direction pad.
Note: The edges of the original picture are the
limits of where you can move.
• If, when moving, you reach one or two of these
edges, the relevant arrows disappear.

 Loading...


