Do you have a question about the Leica OH4 and is the answer not in the manual?
Explains hazard and information symbols used in the manual, including danger, warning, caution, and usage information.
Covers copyright, liability, and safety responsibilities for service technicians handling the manual.
Lists system articles, accessories, and their specifications for the Leica OH4 system.
Details electrical, optical, and mechanical data of the Leica M525 microscope system.
Identifies and describes the function of various control buttons, indicators, and operating states.
Illustrates the power supply connections and master controller configurations.
Provides a high-level functional block diagram of the Leica M525 OH4 system.
Explains how to access and navigate the service menu structure, including general information.
Details diagnostic procedures, error history, and system setup options like firmware updates.
Covers updating the service tool, MDC, UIC, OH4 adapter, and managing configurations.
Provides a step-by-step guide for adjusting the D-balance module, including shim usage.
Details the procedure for adjusting the A/B-balance module, focusing on switch and LED indicators.
Outlines general practices for maintaining the instrument's cleanliness and condition, including parts cleaning.
Recommends periodic checks and re-greasing of mechanical parts every 18 months.
Provides a template for recording system configuration, serial numbers, and test results.
Lists accessories with their weights for balance calculations, crucial for system stability.
Lists common parts like screws, toolsets, fuses, and cables for general maintenance.
Details parts related to the stand, castors, dampers, and base assembly.
Lists PCBs, displays, flash cards, and other control unit components.
Lists parts for D-balance, swing arm, swing carrier, handgrips, and optics carrier.
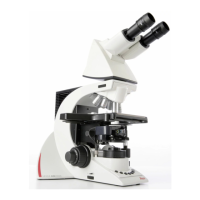
Explains how to identify the microscope model and serial number, and common symbols.
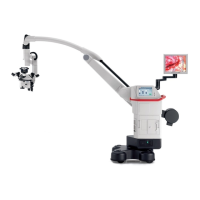
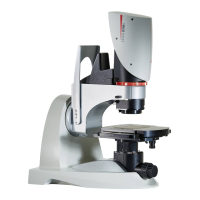
Illustrates the main components and their arrangement on the microscope system.
Details the functions of LEDs, buttons, and switches on the microscope arm for various modes.
Describes the touch panel, buttons, status line, and various input/output terminals.
Explains how to configure CAN handles and footswitches for specific functions and user presets.
Outlines pre-configured settings for different surgical applications like Cranial, Spine, and ENT.
Provides essential steps to perform before operating the microscope, including cleaning and accessory installation.
Guides the user through attaching components like tubes, beam splitters, and cameras.
Explains the automatic and manual balancing procedures for optimal stability and safety.
Covers coarse and fine positioning of the microscope using controls, including XY drive.
Details how to adjust illumination intensity, field diameter, and use the BrightCare™ function.
Explains manual and automatic adjustment of zoom and focus, including motor failure procedures.
Describes managing user profiles, saving settings, and configuring handles/footswitches.
Outlines fundamental safety rules, intended application, and responsibilities for personnel.
Lists potential dangers during operation, including electrical shock, injury, and tissue heating.
Provides manufacturer declarations and guidance on electromagnetic immunity and separation distances.
Covers cleaning, bulb and fuse replacement, and reprocessing of resterilizable parts.
Lists common faults, their causes, and recommended remedies for operational issues.
Details electrical requirements, magnification range, field of view, and microscope carrier specifications.
Lists specs for IGS, Fluorescence, Floor stand, materials, and accessory weights.
Specifies operating/storage conditions, standards fulfilled, and usage limitations.
Highlights critical safety measures to follow during instrument assembly, including hazard symbols.
Guides on unpacking the microscope system and lists necessary tools and assembly materials.
Details steps for mounting the stand, securing the swing arm stop, and attaching counterweights.
Explains how to install the microscope carrier, optics carrier, and handgrips.
Covers connecting power, data cables, and optional MDRS components to the system.
Guides the installation of fluorescence filters, connector boards, and additional light sources.
Describes procedures for balancing the microscope and checking its movement and stability.
Outlines the inspection process, safety checks, and acceptance sequence by Leica Service.
Specifies the procedure for filling out the delivery report by the responsible Leica representative.
| Brand | Leica |
|---|---|
| Model | OH4 |
| Category | Microscope |
| Language | English |