37
VARIABLY SPACED HALF-BLIND DOVETAILS
Chapter 10D4R Pro User Guide
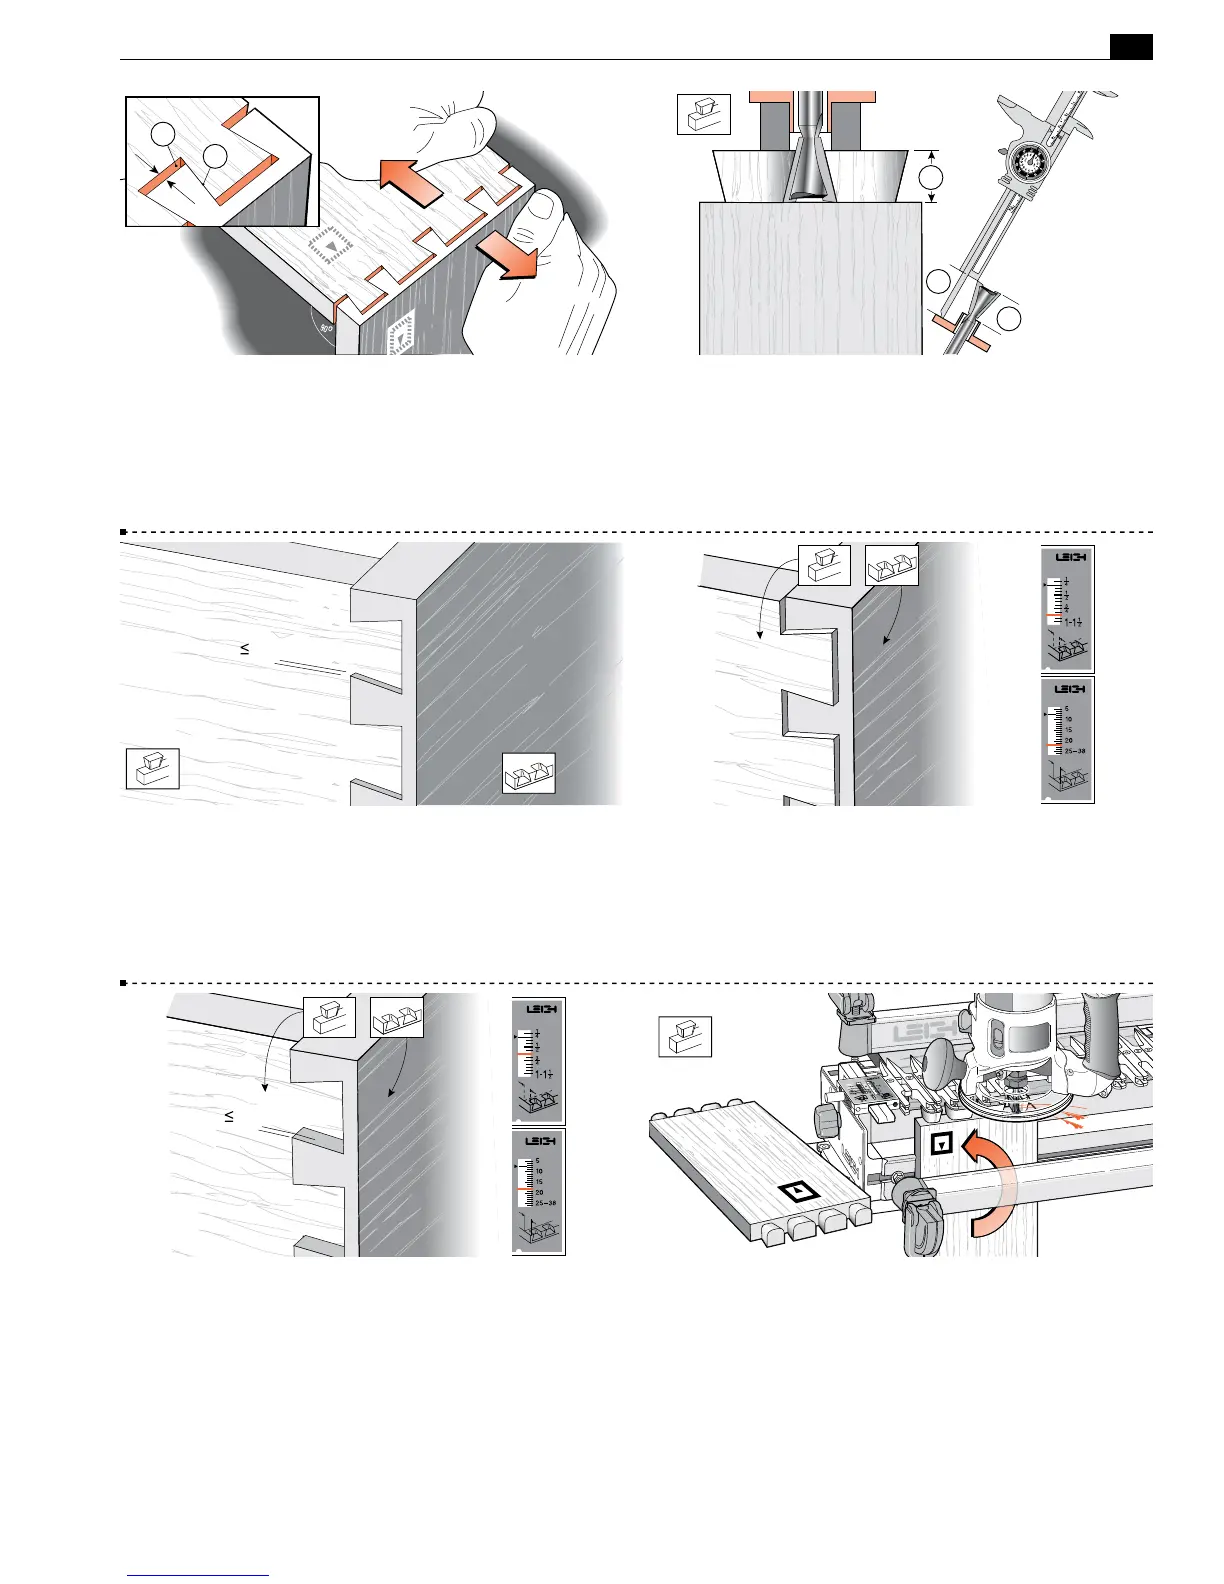
10-26 Remove the pin board and test the fit. If the joint is loose,
lower the bit to increase the depth of cut, by the amount of the
gap at the bottom of the pins
➀
(when the pins are pulled against
the socket sides
➁
). If the joint is too tight, raise the bit slightly
to decrease the depth of cut. Test again. You cannot rout the same
board twice. Use two fresh board ends for each test.
1
2
10-27 Keep the test tail board that fits well, and mark it with
the number of the bit you used to rout it. For quick set-up next
time, clamp this tail board in the jig as a depth-of-cut gauge
➀
to
show how far to lower the bit. Better yet, measure the bit projec-
tion from the end of the guidebush
➁
or guidebush flange
➂
and
record this for fast set-ups in future.
1
3
2
10-28 When you have the proper tightness of fit, check the
flushness. The tails should be under flush to the pins by no more
than
1
⁄64"[0,3mm] to allow for cleanup (exaggerated here). The
concentricity of the collet and guidebush on different routers will
affect this tolerance.
1/64"[0,3mm]
10-29 If the tails stand out from the pins, set the
h
HB PINS
scale away from the operator by the amount required.
10-30 If the tails fit in too far past the pins ends, set the
h
HB
PINS scale toward the operator by the amount required. These
adjustments for “flushness” are made only in the
h
HB PINS
mode. The tail mode scale setting remains the same.
1/64"[0,3mm]
10-31 To make a box, rout all four ends of the tail boards, keep-
ing the inside face
i
of the tail boards away from the jig.
 Loading...

