BOX JOINTS
56
Chapter 15 D4R Pro User Guide
15-7 Repeat this procedure across the jig until there is at least
one guide finger spaced past the right hand side of the work piece.
Finger pairs should have a uniform
1
⁄2"[12,7mm] space between
them
➀
, and .054"[1,37mm] gap
➁
between fingers of the same
pair. Tighten the unused guides.
1
1
2
2
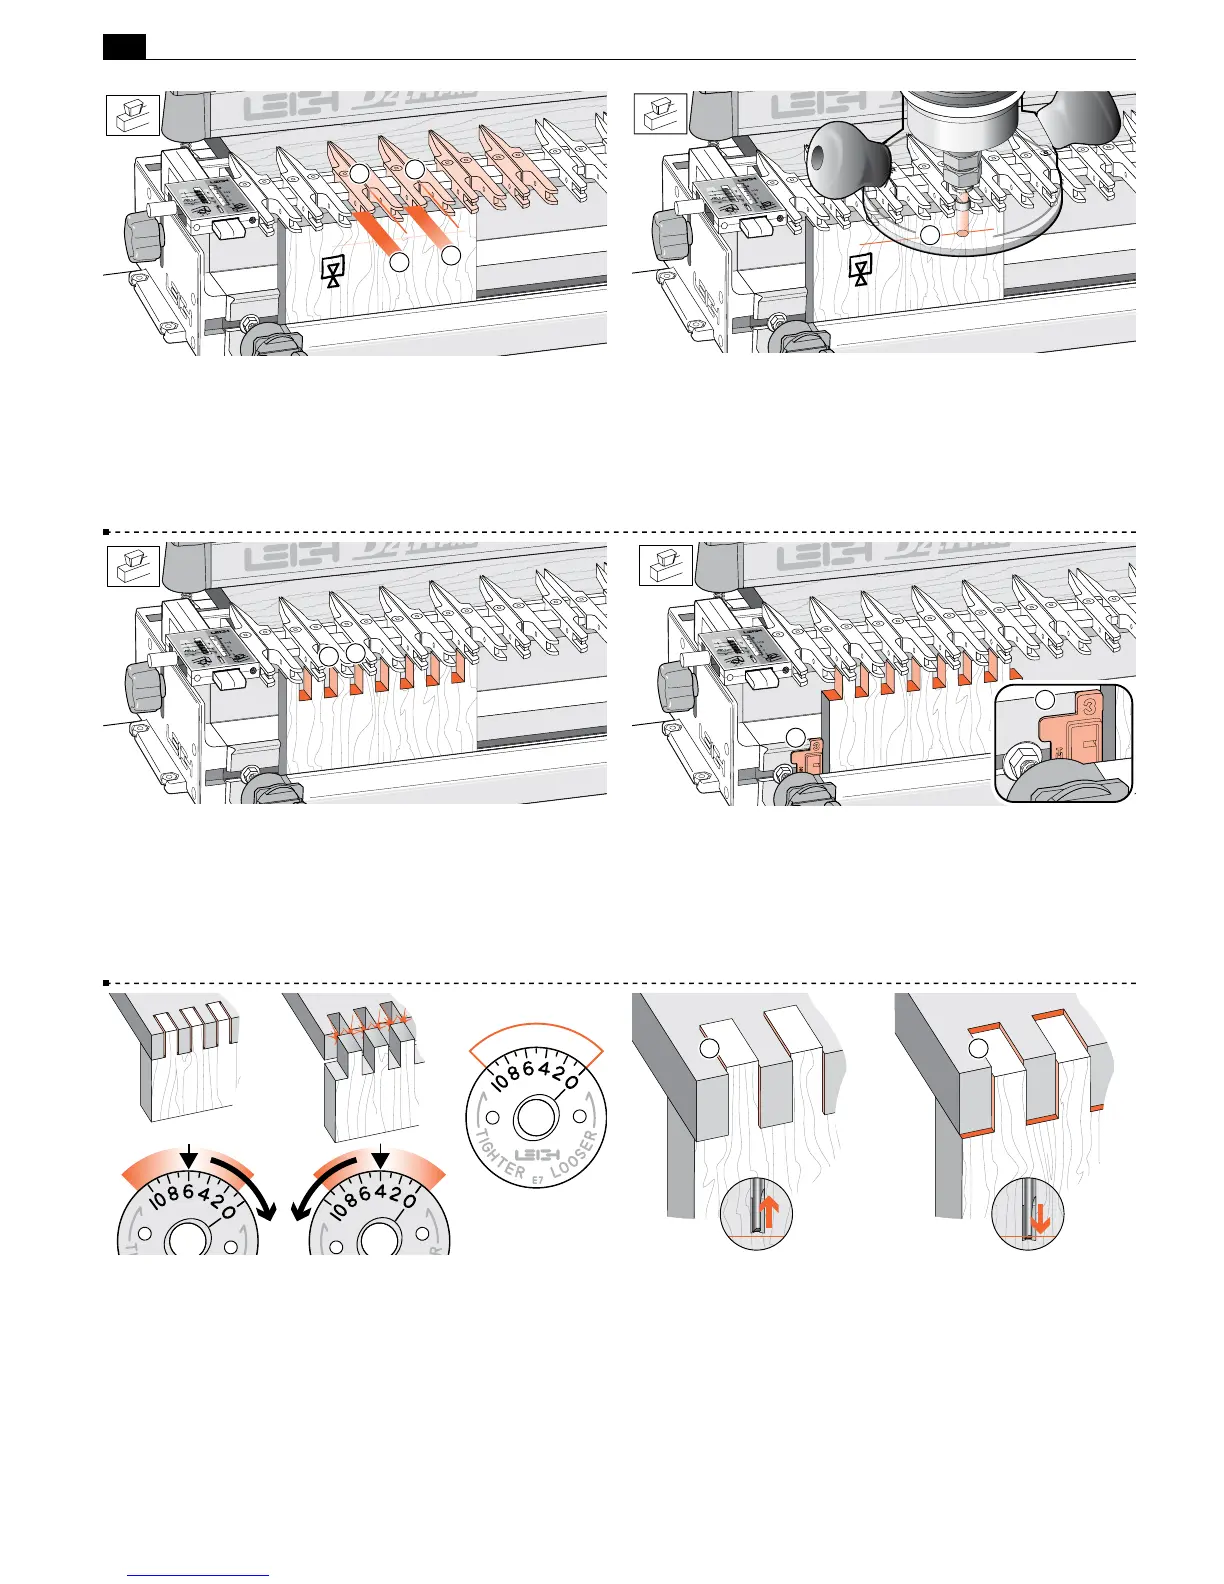
15-8 Lower the finger assembly onto the spacer board and double-
check that the bit depth is down to the center of the pencil line
➀
.
Make sure the collet does not rub on the guidebush.
1
15-9 Rout one end of the scrap board. Rout into each finger
opening
➀
and between each finger
➁
. Make sure to run the
guidebush on both sides of each opening.
1
2
15-10 Remove the board and fit the box joint Spacer against
the front side stop with the number 3 showing
➀
. Make sure
it is fully home. Clamp the second test board with its side edge
against the Spacer and its top edge touching the guide fingers.
Rout this board. Note: Square ended boards are essential to achieve
flush joint alignment.
1
1
15-11 Test the boards for fit and flushness. If the joint is loose, turn
the e7-Bush to a higher number and rout two more boards. If the
joint is too tight, turn the e7-Bush to a lower number. Trial-and-error
establishes the best e7-Bush setting. Record it on this bush drawing for
a good result the next time. Note: each increment adjusts glue line fit by
0.002"[0,05mm]. Retighten the eBush nut after each adjustment.
15-12 If the joint is over flush
➀
, raise the bit slightly. If it is
under flush
➁
, lower the bit.
1 2
 Loading...

