4646
RTJ400 User Guide
Box Joint Procedures - 3/8"
Chapter 10
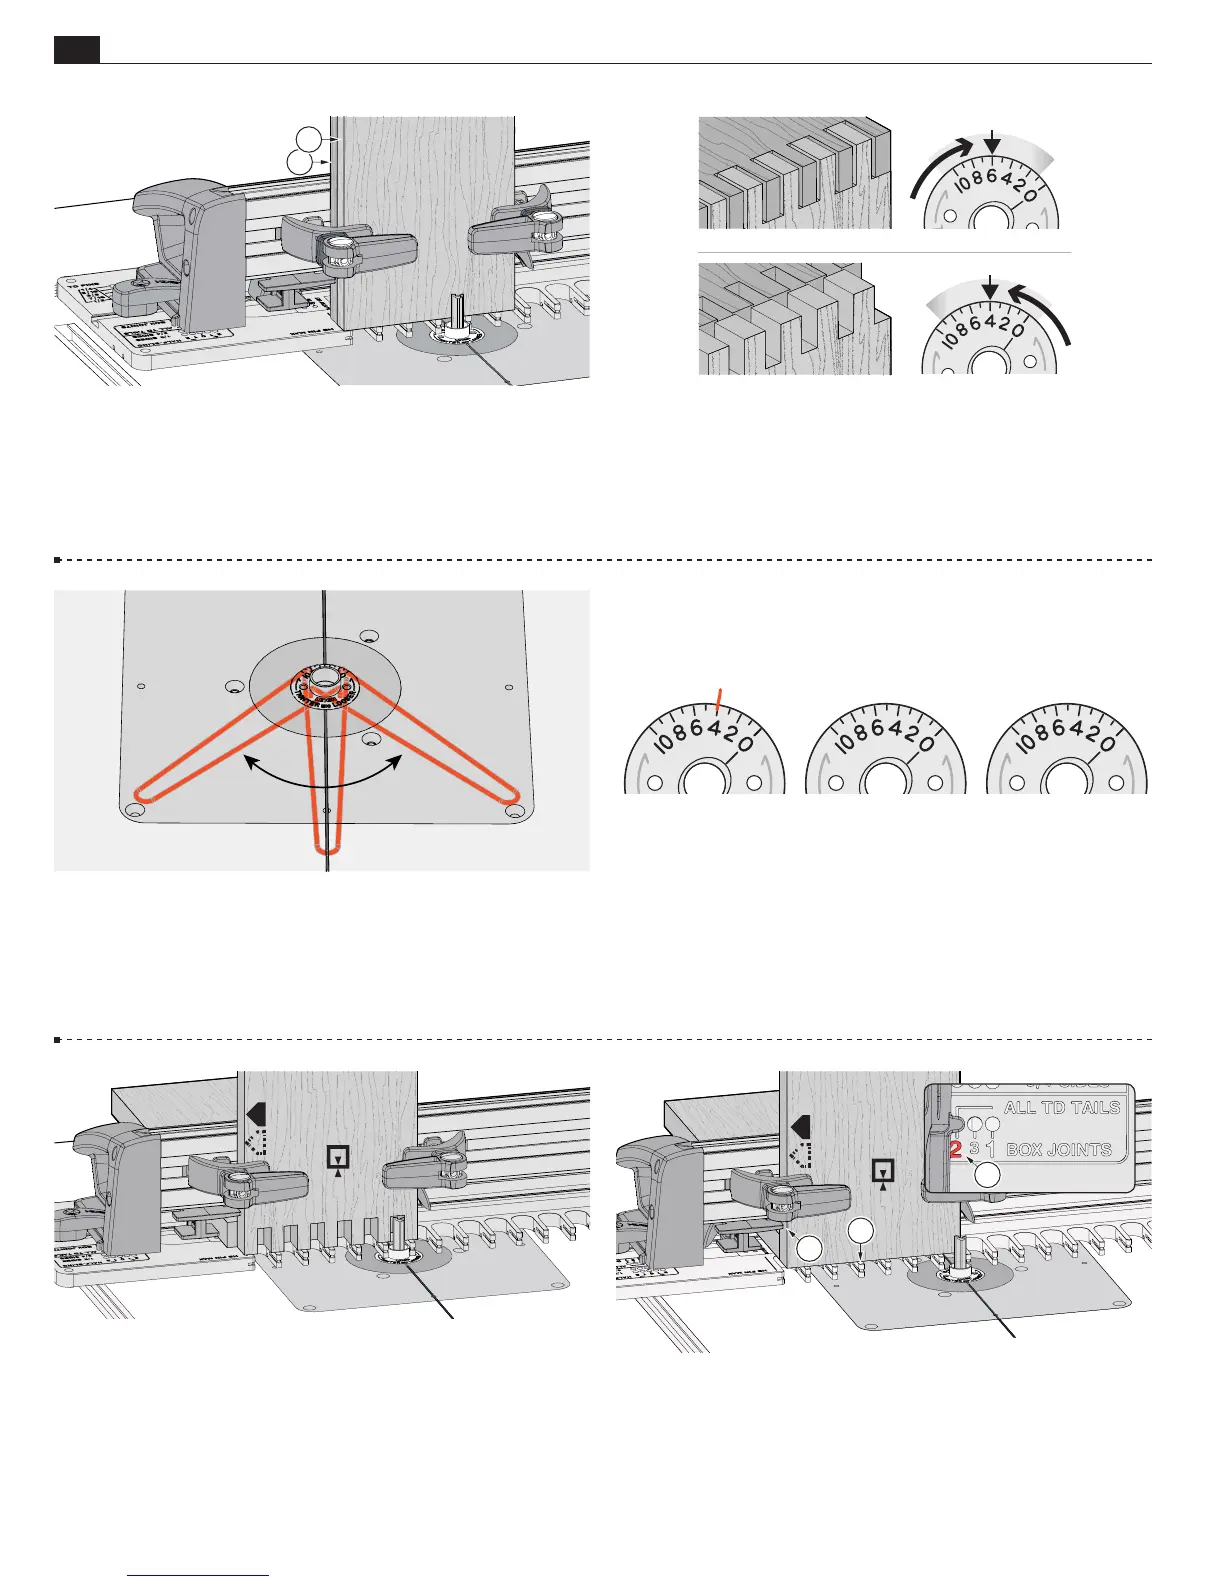
10-18 Now that your joint tightness has been determined,
re-clamp pin board 1 in position and rout into all of the openings.
The eBush must touch one side of the opening as you enter
and the other side as you exit.
Flip the board, keeping the same
edge against the sidestop, and rout the other end. Remove pin
board 1 and repeat the procedure with pin board 2. Remove pin
board 2.
B
A
Sample
Leigh 173-500C Bit
10-17
On the eBushes above, record the settings you used to
achieve perfect joint fit. The first eBush is simply an example of
how to record your setting.
10-15
Joint Fit Adjustment Keep the same side board edges
together. If the joint is too loose, turn the eBush to a higher
number, as shown in the next step. If too tight, turn the eBush to
a lower number.
C
10-19 Unlatch and move the right frame pin to the
No.2 BOX
JOINTS
hole
A
. Latch the frame. Clamp socket board 1 against
the sidestop
B
, flush on the template
C
.
TOO LOOSE TIGHTEN
TOO TIGHT LOOSEN
10-16 Each increment on the eBush changes the joint glue line
fit by 0.002" [0.05mm]. Half an increment, a mere 1000th inch!
Re-tighten the eBush nut after each guide bushing adjustment.
10-14 Quick Fit Test To save time and wood, clamp two ½"
thick scrap boards in the jig, back to back
A
.
First review
the remaining steps up to 10-20.
Rout both boards at the same
time. Test the boards for joint fit, and make joint fit adjustments
(steps 10-15 to 10-17). Don’t worry about board edge alignment,
the test is for joint fit only.
A
A