The provided document is an operating manual for the Leister WELDPLAST 600/605 hot air welder extruder. This device is designed for professional welding of thermoplastic materials, specifically PE (polyethylene) and PP (polypropylene), in various applications such as vessel construction, pipeline construction, equipment construction, landfill construction, and repairs.
Function Description
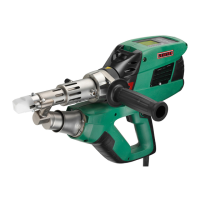
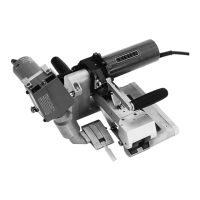
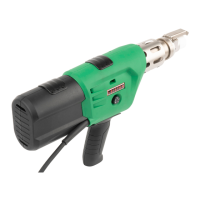
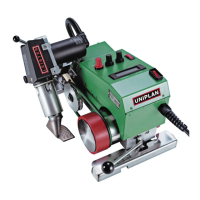
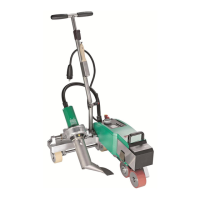
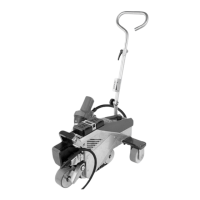
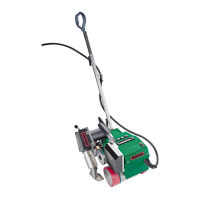
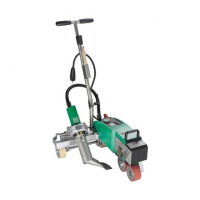
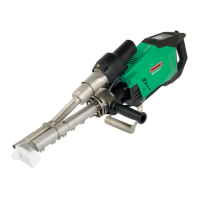
The WELDPLAST 600/605 is a hot air welder extruder that uses a combination of hot air and extruded plastic material to create strong welds. The device features a control panel (2) with function buttons (30-34) and a display (35) for monitoring and adjusting welding parameters. Key components include a hot air blower (15), jacket heating (10), a pre-heating nozzle (12), and a welding shoe (9). The plastic drive is responsible for extruding the welding rod through bilateral entry points (11).
The operation involves several steps:
- Preparation: The device is placed on a stable, fireproof surface. The welding material, welding shoe, and preheating nozzle are checked for cleanliness and proper positioning. The power cord (1) is inspected for damage.
- Starting: The device is switched on using the main switch (18). The heating is activated via the Heating On/Off button (31), and a 10-minute warm-up period is observed until the desired temperature is reached and the plastic drive is released.
- Welding: The welding rod is inserted into the welding rod entry point (11). The plastic drive is activated using the drive on/off switch (16), extruding the material. The preheating nozzle heats the surfaces to be welded, and the extruder is guided stably along the weld seam. Test welds are recommended to adjust the welding profile as needed.
- Finishing: To stop plastic output, the drive on/off switch (16) is pressed, and the welding shoe is swiveled away from the seam. Any remaining material in the welding shoe hole is removed.
- Switching Off: The air/plastic heaters are switched off with the Heating On/Off button (31), initiating a cool-down mode (approximately 6 minutes for the blower). The main switch (18) is then turned off, and the power cord (1) is disconnected. The device must be allowed to cool completely.
The device incorporates safety features such as warnings for hazardous voltage, risk of burning from hot parts or escaping material, and fire/explosion risk from improper use or flammable surroundings. It is designed to be operated by trained specialists or under supervision, with children not permitted to operate it. A fault current circuit breaker is recommended for use on construction sites.
Important Technical Specifications
The WELDPLAST 600 and WELDPLAST 605 models share many specifications:
- Voltage: 230 V~
- Power: 3680 W
- Frequency: 50/60 Hz
- Temperature (Plastic): Max. 260 °C (WELDPLAST 600), Max. 300 °C (WELDPLAST 605)
- Air Temperature: Max. 300 °C (both models)
- Air Volume: 45-100%
- Drive: 60-100%
- Noise Level (LPA): <70 dB (K = 3 dB)
- Vibration Level (ah): < 2.5 m/s² (K = 1.5 m/s²)
- Weight (without power cord): 12.2 kg (26.9 lbs) for WELDPLAST 600, 12.6 kg (27.8 lbs) for WELDPLAST 605
- Dimensions: Length (a) 809 mm (31.9 inches), Width (b) 140 mm (5.5 inches), Height (c) 273 mm (10.7 inches).
The device requires a local supply voltage matching its nominal voltage, and extension cables must have a minimum cross-section of 2.5 mm². When using autonomous power generators, they must be grounded and equipped with residual current circuit breakers, with a maximum total harmonic distortion (THD) of 5% or less. The generator's nominal power should be at least "2 x nominal power of the hot air extruder."
Usage Features
The WELDPLAST 600/605 offers a range of user-configurable settings and functions through its software:
- Adjustable Handle (7): The position of the adjustable handle can be loosened, set, and fastened for ergonomic use. The WELDPLAST 605 also features a guide handle (23) that can be adjusted by loosening and tightening a locking screw (24).
- Control Panel (2): The control panel includes buttons for work light (30), heating on/off (31), reduce/increase (32), confirm (33), and menu (34). The display (35) shows status and work information.
- Welding Parameters: Users can set plastic temperature, air temperature, and air volume. The potentiometer (18) allows real-time adjustment of plastic extrusion during welding.
- Recipes (9.3): The device supports saving and recalling welding recipes. Users can select existing recipes or create new ones, defining parameters like plastic temperature, air temperature, and airflow.
- Displaying Nominal Values (Set values) (9.4): This feature, activated by default, shows the actual and target temperatures, plastic extrusion percentage, and air volume on the work display.
- Eco Mode (9.5): When activated, Eco mode optimizes energy consumption. It initiates plastic heating first, then the air heater, with a 5-minute countdown timer before the plastic drive is enabled. An ECO timer automatically reduces air volume and target air temperature if the extruder remains inactive for a specified period. A standby timer initiates a cooling process after a period of inactivity.
- LQS Data Recording (9.6): This function allows recording of welding parameters. Users can enable monitored welding to log exceeded limits, set seam naming conventions, define recording intervals, and view the number of files and free memory.
- GPS (9.6): When activated, GPS coordinates of welds are recorded in the welding protocol. The status display (40) shows GPS reception status.
- WLAN Settings (9.7): The device can be connected to a WLAN network.
- Machine Settings (9.8): This menu allows configuration of various machine parameters, including date and time, unit system (metric or imperial), work light brightness, LCD contrast, and backlight intensity.
- Info Mode (9.9): Provides additional information during operation, such as plastic motor speed, blower heating capacity, and plastic heating capacities (A and B) with actual and target temperatures.
- Duty Info (9.10): Displays runtimes for the machine, drive, and blower.
- General Info (9.11): Shows firmware versions (HMI and PCU), production year, month, day, and serial number.
- Warnings and Error Messages (9.12): The device displays warnings (allowing continued operation) and error messages (stopping operation, e.g., for excessive temperature or defective heating elements). Error codes are provided for troubleshooting.
Maintenance Features
Regular maintenance is crucial for the device's longevity and performance:
- Lubrication Axial Groove Ball Bearing (11.1): After 500 hours of drive motor operation, a "Maintenance Servicing" message appears on the control panel (2). The axial grooved ball bearing requires re-lubrication with a maximum of 1 cm³ of grease using a grease gun while the drive is running. The service message can be reset in the machine settings.
- Cleaning the Filters (11.2): The filters (16) should be cleaned once a week with a brush.
- General Maintenance: Disconnect the device from the power supply and allow it to cool before any maintenance or repair work.
- Service and Repair (12): Repairs must be performed exclusively by authorized Leister Service Centers, which guarantee professional service with original spare parts.
- Training (13): Leister Technologies AG and its authorized Service Centers offer welding courses and introductory training classes.
The document also includes a Declaration of Conformity for EU and UK regulations and instructions for proper disposal of electrical equipment. Warranty information specifies that only original Leister spare parts and accessories should be used to maintain warranty validity, and damage from natural wear, overload, or improper handling is excluded.