Page 30
Constant Air Volume (CAV) Blowers
4− The blower RPM can be adjusted at the motor pulley.
Loosen Allen screw and turn adjustable pulley clock-
wise to increase CFM. Turn counterclockwise to de-
crease CFM. See figure 12, or 13. Do not exceed mini-
mum and maximum number of pulley turns as shown
in table 1.
TABLE 1
MINIMUM AND MAXIMUM PULLEY ADJUSTMENT
Belt Minimum Turns Open Maximum Turns Open
A Section 0 5
B Section 1* 6
*No minimum number of turns open when B belt is used on pulleys
6" O.D. or larger.
Multi−Stage Air Volume (MSAVt) Blowers
5− The VFD blower motor pulley is fixed. The supply CFM
can be adjusted by changing ECTO settings at the IMC
board or by using optional software. See table 2 (ex-
ample only for 240/288 units) See unit label for ECTO
setting for all units)
IMPORTANT − Units are factory−set in MSAV mode. If blow-
er speed does not change appropriately to demand, check
ECTO 0.01. Setting should be 3.
TABLE 2
240/288 FAN SPEED FACTORY ECTO SETTINGS
Example Only
Description ECTO
Factory
Setting
Sets supply air fan speed for cooling stage
1 demand.
0.05 35
Sets supply air fan speed for cooling stage
2 demand.
0.14 45
Sets supply air fan speed for cooling stage
3 demand.
0.15 60
Sets supply air fan speed for cooling stage
4 demand.
0.16 73
Sets supply air fan speed for heating stage
1 demand.
0.04 80
Sets supply air fan speed for blower only
demand.
0.03 73
Sets supply air fan speed for smoke alarm
demand (smoke detector is optional).
0.02 80
Sets supply air fan minimum speed for
cooling, ventilation, or smoke detection.
0.06 33
The minimum output CFM output for cooling, ventila-
tion or smoke alarm mode is factory−set at 33% of fan
speed. The minimum can be adjusted by ECTO 0.06:
Adjust Belt Tension
Maximum life and wear can be obtained from belts only if
proper pulley alignment and belt tension are main-
tained. Tension new belt after a 24−48 hour period of op-
eration. This will allow belt to stretch and seat to
grooves. Make sure blower and motor pulley are aligned
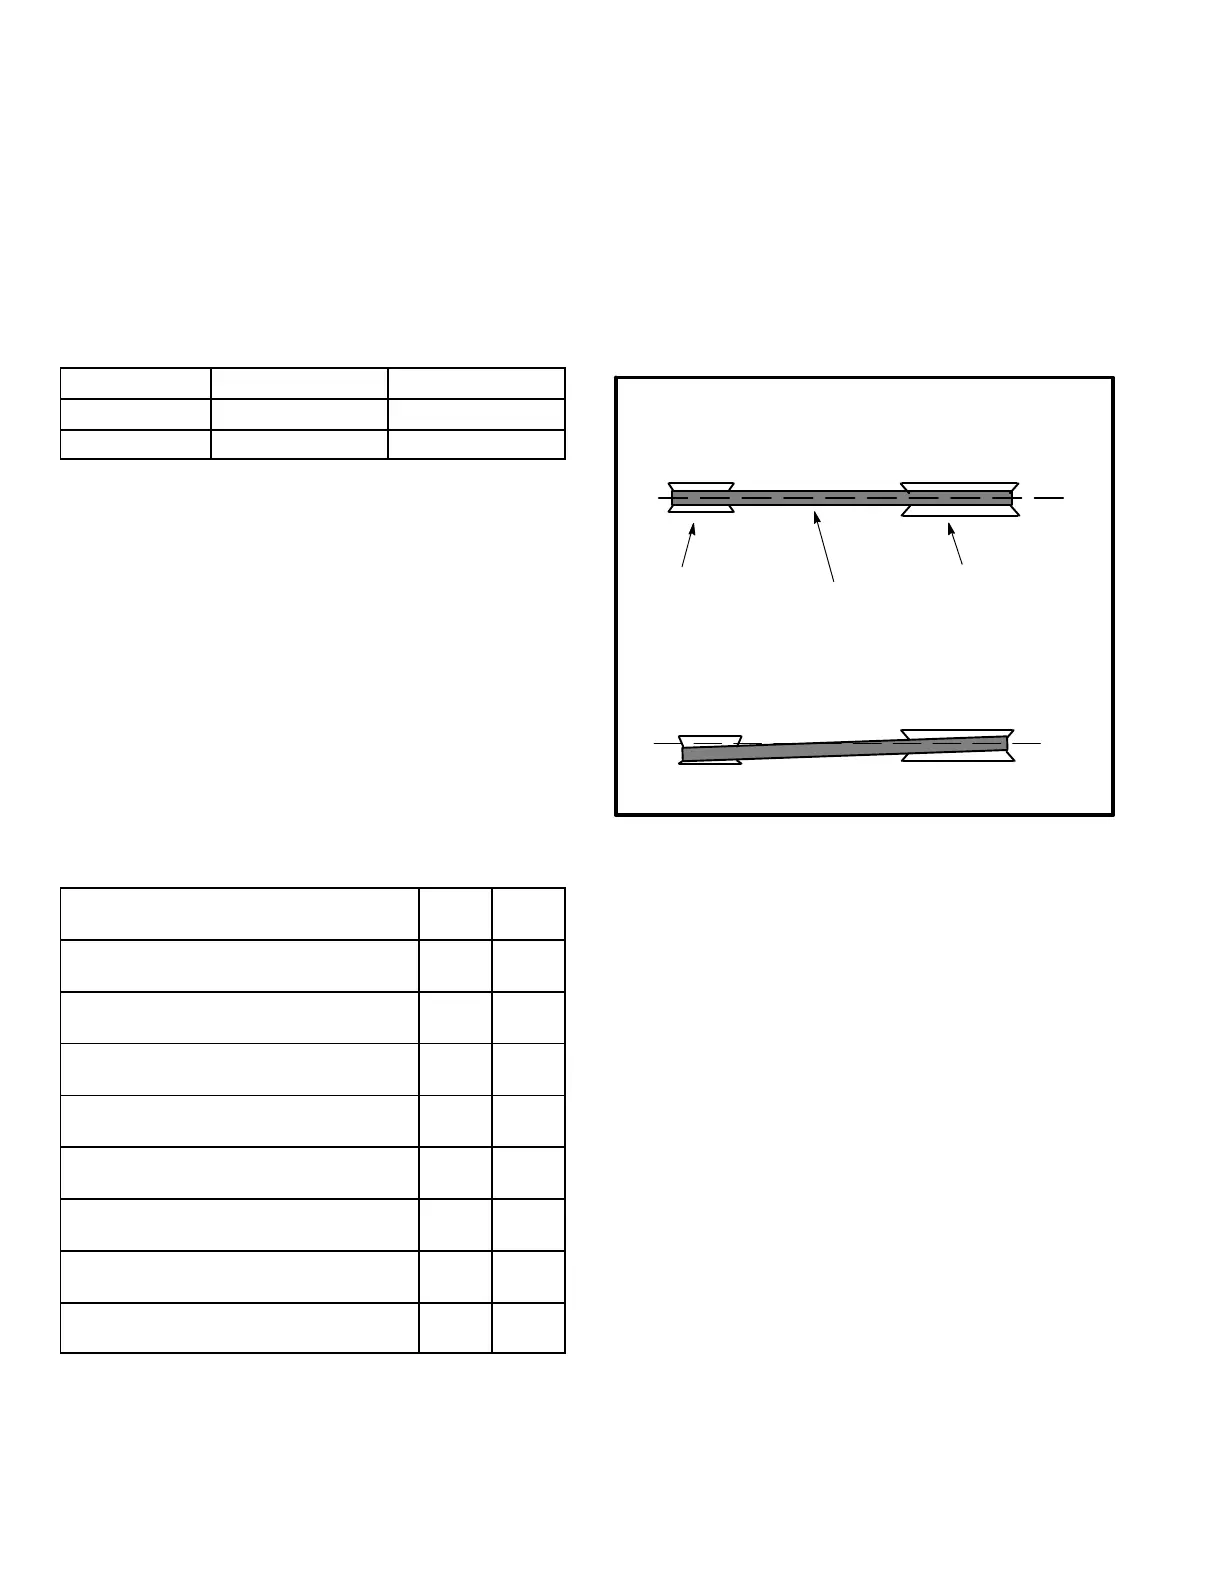
as shown in figure 14.
FIGURE 14
PULLEY ALIGNMENT
(TOP VIEW)
BELT
BLOWER
PULLEY
MOTOR
PULLEY
NOT ALIGNED
ALIGNED
1− Loosen screws securing slotted arm and rear belt ten-
sion adjusting bolt. See figure 12.
2− To increase belt tension −
Turn front belt tension adjusting bolt to the left, or coun-
terclockwise, to tighten the belt. This increases the dis-
tance between the blower motor and the blower hous-
ing.
To loosen belt tension −
Turn the front belt tension adjusting bolt to the right, or
clockwise to loosen belt tension.
3− Turn rear belt tension adjusting bolt until pulleys are
aligned. Tighten screws securing slotted arm and rear
belt tension adjusting bolt once adjustments have been
made.
Check Belt Tension
Overtensioning belts shortens belt and bearing life. Check
belt tension as follows:
 Loading...