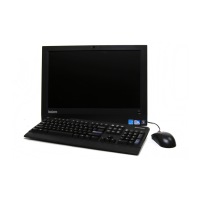
ReplacingtheLCDpanel
Attention
Donotopenyourcomputerorattemptanyrepairbeforereadingandunderstandingthe“Importantsafety
information”intheThinkCentreSafetyandWarrantyGuidethatcamewithyourcomputer.Toobtainacopy
oftheThinkCentreSafetyandWarrantyGuide,goto:
http://www.lenovo.com/support
ThissectionprovidesinstructionsonhowtoreplacetheLCDpanel.
Note:ToaccesstheLCDpanel,otherFRUshavetoberemoved.AsyouremoveeachFRU,setitaside,
alongwiththescrewsforit.
RemovingtheLCDpanel
ToremovetheLCDpanel,dothefollowing:
1.Turnoffthecomputer.
2.Disconnectallcables,powercords,andexternaloptionsfromyourcomputer.See“Rearconnectors”
onpage65.
3.Placeasoft,cleantowelorclothonthedeskorsurface.Holdthesidesofyourcomputerandgentlylay
itdownsothatthescreenisagainstthesurfaceandthecoverisfacingup.
4.Removethecomputercover.See“Removingthecomputercover”onpage70.
5.Removetheharddiskdrive.See“Replacingtheharddiskdrive”onpage74.
6.Removetheopticaldrive.See“Removingtheopticaldrive”onpage77.
7.Openthesystemboardshielding.See“Openingthesystemboardshielding”onpage71.
8.RemovetherearI/Oassembly.See“RemovingtherearI/Oassembly”onpage92.
9.Removethepowersupplyassembly.See“Removingthepowersupplyassembly”onpage102.
10.Removethemicroprocessorandheatsinkassembly.See“Removingthemicroprocessorandheat
sinkassembly”onpage85.
11.Removethemicroprocessorfanassembly.See“Removingthemicroprocessorfanassembly”on
page81.
12.Removethememorymodules.See“Removingthememorymodule”onpage79.
13.Removethesystemboard.See“Removingthesystemboard”onpage88.
14.Removeall11screwsthatsecurethemainbrackettothefrontbezel.
106ThinkCentreHardwareMaintenanceManual
 Loading...