6
INSTALLATION
INSTALLATION
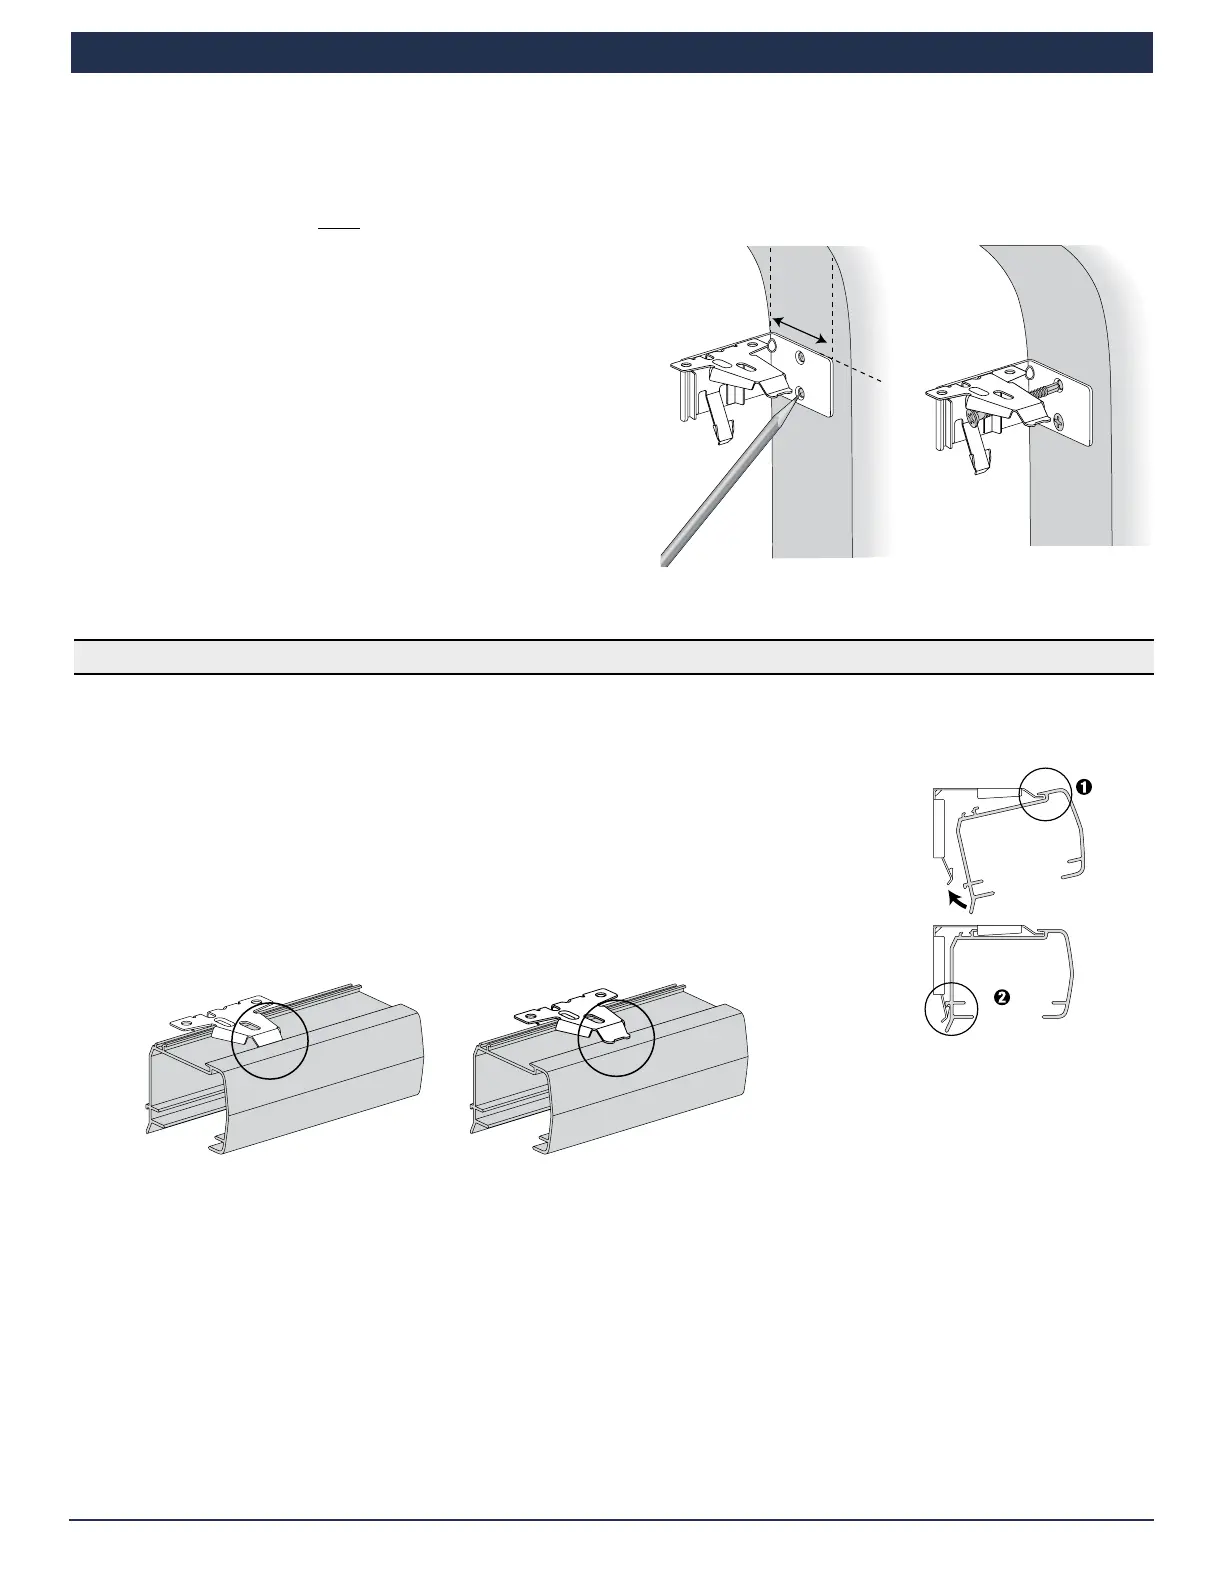
Mount the Installation Brackets — End Mount
End mount the headrail when conventional mounting techniques will not work — for example, in an arched window opening.
■
Position the end mount brackets so that the top of the attached installation brackets are at the ordered height of the shade.
CAUTION: Both brackets must be installed at the same depth and height.
■
Mark both screw holes.
➤
The mounting surface must be vertical and flat, not part of an
arched curve.
➤
Minimum mounting depth is 1
1
⁄
4
" for
3
⁄
8
" and
3
⁄
4
" cell sizes and
2" for the 1
1
⁄
4
" cell size. Minimum mounting depth for a fully
recessed end mount is 2
3
⁄
8
" for
3
⁄
8
" and
3
⁄
4
" cell sizes and 3" for
the 1
1
⁄
4
" cell size.
■
Drill the screw holes using a
3
⁄
32
" drill bit.
■
Attach the end mount installation brackets using the flat head
screws provided.
CAUTION: Drywall mounting is not recommended.
IMPORTANT: For instructions on installing an arch over a
rectangular shade, see the Installation Instructions that
came with your arch shade.
Proceed to "Install the Shade" on page 6.
Install the Shade
■
Fit the front channel on top of the headrail onto the front lip of the installation brackets.
■
Push the headrail up and back until it snaps into place.
■
Check to ensure the headrail is securely in the brackets.
➤
Check that the bottom of the headrail is snapped into the base of each bracket.
➤
Check that the front lip of each bracket is in the front channel of the headrail.
■
If any brackets are not installed correctly, release the shade and reinstall. See "Remove the Shade,
If Necessary" on page 13.
1
1
∕
4
"
Minimum
Ordered
Shade
Height
The back of the headrail
snaps into the bracket.
The front of the bracket
fits under the groove.
Headrail
Bracket
Snap
in Place
Good Bad